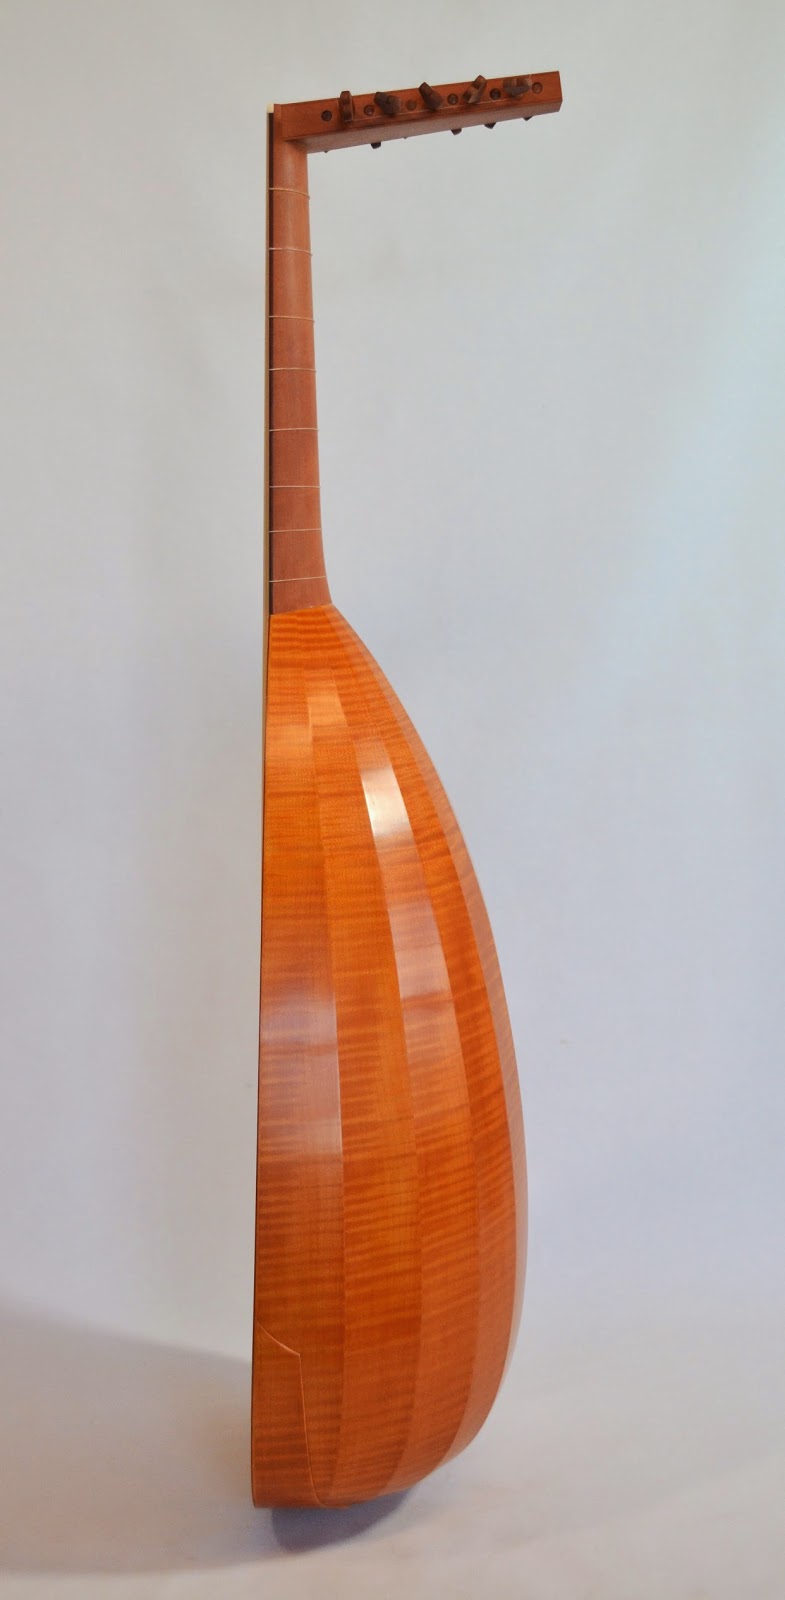
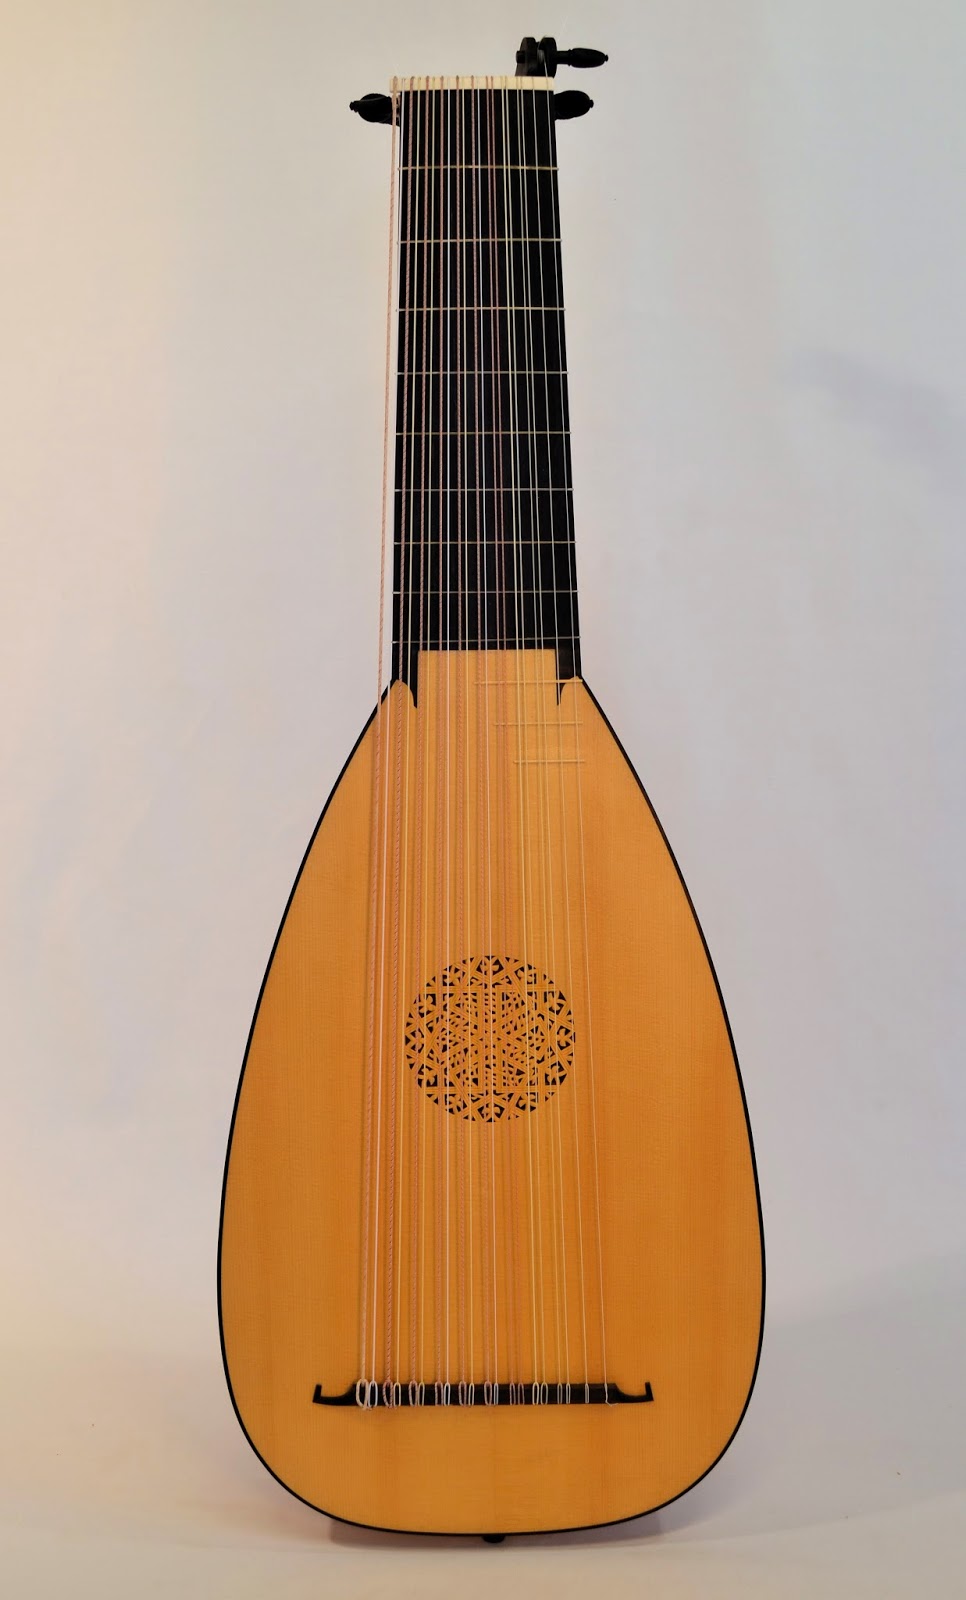
Sunday, 16 November 2014

How I Learned to Like My Bending Iron (or, The Return of the Betterizer)

Hi friends,

I was bending ebony soundboard edge-bindings for a new batch of lutes this week, and realized again how much I like my little bending iron.  It wasn't always this way--when I first got it, probably about a dozen years ago, I didn't care for it very much at all.  Over the years, though, I've modified it in a few ways to really make it work for me. 
The bending iron is one of the standard ones you can get from a guitar making supplier, like Luthier's Mercantile or Stewart Macdonald (I forget which one I bought it from).  It came a bit raw out of the box, a bit unformed.  The first problem I noticed was that the sides of the iron (which, incidentally, is not made of iron, but of aluminum) were really pretty wobbly, not straight at all, which didn't help the results of my attempts at bending.  I gave it a good workover with some files and sanding blocks, and got it to the point where the faces were reasonably true.  Making good bends, especially with wider material (like for 9- or 11-rib lute backs) became a whole lot easier.

I also screwed a plywood base to the thing, so I could clamp it more conveniently and securely to the work bench. 
The main thing that I disliked about the bending iron was the way it sets up to bend small strips of wood, such as edge bindings or rib spacers.  It comes with (or maybe you have to buy these separately) a pair of aluminum hoops that fit around the bending iron, one on top of the other, which you tighten in place by means of a nut and bolt.  This is what they look like when they're not on the bending iron, which they haven't been on mine for a few years.  (I didn't care to put them on just for the sake of the photo op, so here they lay, lifeless.)

There are a couple of problems with this setup, the main one being setting the width between the hoops.  To work best, the hoops need to be very evenly spaced apart, and the distance needs to be just ever-so-slightly wider than the material you're working with.  If it's not (and this is the way it usually went for me), then on one side of the iron the material will be pinched, while on the other there will be too much wiggle room.  I had real trouble adjusting these hoops accurately--you can hold them in place, but as soon as you start tightening the nut, they'll move.  A small, but constant, source of frustration.   

A second problem arose when I first began building lutes in batches, because occasionally the rib spacers for one back would be a different thickness from the spacers I was using on the other.  This meant as I went back and forth, fitting ribs alternately on the molds, I would need to adjust the space between the hoops back and forth too, to accommodate the different sizes.  Frustration multiplied.  It was clearly time to call in--the Betterizer!

I have found that when I'm stumped about how to modify a piece of equipment, it sometimes helps just to take things apart and have a look at the insides.  That's what I did with the bending iron, and found that it's basically hollow--just a teardrop-shaped aluminum tube with a small heating element that plugs into it.  All that space gave me an idea.
I flattened the top surface of the iron and drilled a couple of holes into it, then threaded the holes and screwed a couple of 1/4" bolts up from the inside.  Then I drilled slightly larger holes, the same width apart, into a couple of pieces of 1/8" brass stock I had on hand.  I shaped these pieces carefully on the bench grinder so they were the same teardrop-shape profile as the top of the bending iron.

Then I drilled holes into some other pieces of brass stock, of various thicknesses (to be exact, the thicknesses were 0.2mm, 0.4mm, and 0.8mm).  I also shaped these pieces on the bench grinder, but I made them a little smaller than the 1/8" pieces--about 3mm smaller, all the way around.  (I stacked these pieces and clamped them together for shaping on the grinder, so they would all turn out with the same profile when I was finished.)

Here's what I made, a veritable Roman hoard of brass shims (or perhaps a beautiful school of brassfish swimming by.)   You can see the two larger 1/8" pieces at the bottom of the photo:
 Stack up some of the smaller shims on top of the bending iron, and here's what you get:

 Put a larger 1/8" piece down on top.
Add yet more smaller shims on top of that--
And another 1/8" piece.  Screw the pieces down tightly with some wingnuts--
And there you have it, a bending iron with grooves built in for bending ebony edge bindings (shown here), sycamore rib spacers, or just about anything else your heart desires.  Need to adjust the depth of the slot?  Just remove the wing nuts, add or remove or stack a different combination of shims so that the slot is just that tiny bit wider than your material.  Are you building multiple lute backs that use different widths of spacers?  No problem--this set up gives you two slots that you can set to whatever depth you want.  No muss, no fuss, no guesswork, no switching back and forth, just... calm.  Peace.  Oneness with the universe.   Betterization accomplished.

I usually have a few spacers left over, so I just stack them on top before screwing down the wing nuts.

I really like this setup.  I feel that I've taken a tool which, when it came from the supplier, was really not that well made or well-designed for the job, and turned it into a piece of equipment that's essential to my professional workshop.  For any builders out there who have experienced the frustrations I have, I recommend this fix.  And I wish you well in your own adventures, shaping your tools to your needs.  Do let me hear about them, if you like... and Happy Betterizing!  


Sunday, 13 July 2014

Designing a Medieval Lute

Note: I've recently written a new blog post that reviews some of the aspects of iconography and lute design that I've discussed here. Check it out: The Backside of an Angel


Today I'd like to talk about how I designed a recently completed 5 course fretless medieval lute. This instrument is the culmination of a couple of years of research, thinking, discussion and design with the client, Gus Denhard, of Seattle—a fascinating journey which (as always) I hope has yielded a playable and convincing musical instrument that the owner will get a lot of mileage out of.

Initial discussions between Gus and I focused on the basics: the size (and pitch) of the instrument, number of courses (5, instead of the usual 4), tuning (in fourths), and so on.  Gus didn’t have a specific design in mind, but he did have a firm idea of how he wanted to use the lute, which was to explore, with his musical collaborators, the connections between European and eastern/Arabic music of the Middle Ages.  The lute's a natural for this, since its direct ancestor, the 'ud, was brought to Europe by the Moors about a thousand years ago.   The modern 'ud, and what we now call the renaissance lute, are both descended from this early 'ud, and are therefore very close cousins.  My hope was that by judiciously combining certain features of both these instruments, I could perhaps find a way back to that common ancestor.

The main problem in designing and building an instrument like this is that no historical examples of such an early lute have survived.  Probably the earliest surviving European plucked string instrument, the gittern by Hans Ott of Nuremburg, dates to about the mid-15th century, and that's about as far back as we can get.  For anything earlier than that--say, one or two hundred years earlier, which is approximately the period Gus and I had in mind--we really need to rely on iconographic evidence.
Hans Ott giettern (photo courtesy of Wikimedia commons)
But which iconographic evidence?  Depictions of lutes abound from the middle ages--in altarpieces, manuscript illuminations, frescoes, wood carvings and so on, in a seemingly unending stream.  One piece of advice that proved invaluable came from Crawford Young, the early lute scholar and performer.  Actually, it was two pieces of advice: build the instrument lightly, he said (more on this later); and for a model, look at Sienese pictures from the 14th century.  He also narrowed the search further, by suggesting I consult Howard Mayer Brown's "Catalogus, A Corpus of Trecento Pictures with Musical Subject Matter," a series of articles published in the journal Imago Musicae in the mid-1980s.  What a resource!  I heartily recommend it to anyone interested in the subject: a near-exhaustive collection of pictures, indexed by artist and type of instrument depicted, all keyed to a list of thumbnail versions of the pictures.

I located the journal at the University of British Columbia library, spent a day up to my elbows in pictures, and emerged with one good depiction of the kind of lute that I thought would work.  Here it is, a Coronation of the Virgin by Andrea Di Bartolo, from the Ca d'Oro in Venice.


And here's a close up of the lute.  Why did I choose this particular picture as my model?  Well, there are a number of details that led me to believe it might offer a viable design.  First, it seemed to be of a size (in relation to the angel holding it) that could work for a lute with a string length of around 60cm, with the top course tuned in g', which was Gus's request.  It also had a ratio of neck length to body length that would allow for the equivalent of around 5 or 6 frets on the fingerboard, and 8 to the upper soundhole rosette (another of Gus's requests).  So the proportions seemed right, and indeed, when I put together a drawing using a compass and straightedge, the body outline conformed quite nicely to some simple geometry, using whole-number ratios to draw circles and arcs.  That in itself is a convincing detail.

But much else in the picture looked appropriate too.  The bridge had a nice shape, and looked a lot like the kind of bridge you might find on a modern 'ud.  The scratch plate in front of the bridge was another 'ud-like detail.  The soundhole rosettes are simple (in comparison to those that we see in renaissance lutes), but they're elegant, and their simplicity is more than balanced by the busyness of the rest of the design, including the soundboard edging (which looked to me like a kind of 'herringbone' binding), and the tilework inlay in the soundboard.

I found another example of this type of lute (not, incidentally, in H.M. Brown's article, but on flickr).  It appears in a fresco among a group of musical instruments (including a gittern) by Lippo Vanni, in the Church of San Lorenzo al Lago.  The larger image first:

And then the detail.  The picture resolution is not great, but you get the idea: two soundhole rosettes (both of simple design), bridge with scratch plate out front, tilework inlays, binding all around the top, and curving neck joint (rather than a blunt joint, as one finds on a renaissance lute).  All very similar to the image I used for my design, and confirming for me a lot of the features, both functional and decorative, that I decided to include.

So I had the model--now to design and build the actual lute.

One principle to keep in mind when working with an iconographic source is that a painting is not a photograph.  Parts will be exaggerated, and proportions distorted, to create an effect specific to the painting.  In a way, that's frustrating, because you can't just copy the image, but in another it's liberating, since you have to trust your own sense of proportion and your knowledge and experience of what will make a good, playable, working instrument.

That's nowhere more true than with the back side of the lute.  All a painting like this gives you is the plan view--it gives no information on the body, how deep it might be, what shape it has, how many ribs it has, or even whether it's built up from separate ribs at all (maybe it's carved from a single block of wood).  In designing the lute, these were the first big decisions that had to be made.

I took to heart Crawford Young's advice to build it lightly, and that meant, first, building a ribbed back, rather than carving the body from a solid block.  A simple aesthetic seemed right to me, so I went with 9 ribs (about the smallest number that's practical), and kept the longitudinal section basically the same as one half of the plan view (in other words, the body is pretty much semicircular in cross section.)

With the body designed, I turned my attention to the soundboard, and its many features--bridge, scratch plate, rose designs, tiles and binding.  All of these things needed their proportions re-imagined to match each other, and to match the scale of the whole instrument.

The first element that I tackled was the herringbone edge binding.  In fact, I think that was the very first thing I made of the entire lute, before the body or anything else.  It became a minor obsession, because I needed to make sure of two things: one, that I could manufacture the binding (actually two identical  bindings, one for each side of the belly), in a width that was right for the lute's proportions; and two, that I could bend it to fit around the edge of the belly, without it falling to pieces under the stress and heat of the bending iron.  If I could figure a way to do those things I'd be fine, but if I couldn't, I was pretty sure I'd need to rethink my whole concept of the lute.

The binding turned out well, and so I felt free to build.  Most of the other features I figured out as I went along, and as they emerged in the building process.  The bridge design, for instance, was a product of three influences: the overall shape came from the painting, the width derived from the string spacings that Gus had provided, and the height and other dimensions were adapted from my observations of modern 'ud bridges.  The roses needed a bit of redesigning to better balance the ratio of negative to positive space; they also needed to be repositioned, slightly, to accommodate the body shape I'd created, and the internal barring system I'd worked out (you can read about the barring system here.)  Once I had the sizes and positions of the bridge and roses, I could then size, position and glue the scratch plate.  And once that was in place, I could create and position the four tiles that really give the lute its characteristic look.

The tiles were fun to design, and to make.  The photo I had of the painting was not of a sufficient resolution that I could see very well what their actual design was, so I was left to come up with something that would create the impression of the tiles, while fitting in with the proportions of the rest of the lute.  Once again, it can be a bit of a hassle not to have things spelled out for you, but it can also be quite liberating.
 The same principle applies to the peg box, which is not detailed in the painting, and is therefore free to be imagined.  I decided on slightly curvy peg box, in homage to the elegantly slim peg boxes on modern 'uds; I also designed a simple, square-ish peg head to go along with it.

There's one last feature of the design that I'd like to mention, and that's the smoothly curved joint between the body and the neck.  You see this type of joint everywhere in the iconography of the period, so we know it was commonly used, but figuring out why it was used, or why it continued to be used for so long, is a bit problematic.  It gives the whole lute a very organic shape (rather like a bulb of garlic), and to me, at least, it's pretty easy to see its evolutionary origins first in instruments made from gourds, and then, later on, in instruments whose neck and body are carved from a single piece of wood.  This is the case with the Hans Ott gittern, and, one suspects, most other gitterns of the period; it's also easy to imagine that up until a certain point, lutes were made this way too.

However, somewhere along the line,  someone decided to try for a different sound, something a bit more refined, a bit more responsive, and rather than carving the back from a single piece, built it from separate ribs--and attached the neck after it was made.  A different kind of lute was born.  But why preserve that old-style neck joint?  Isn't it incredibly difficult to bend the rib in two different directions, and still get a good, close fit between them?
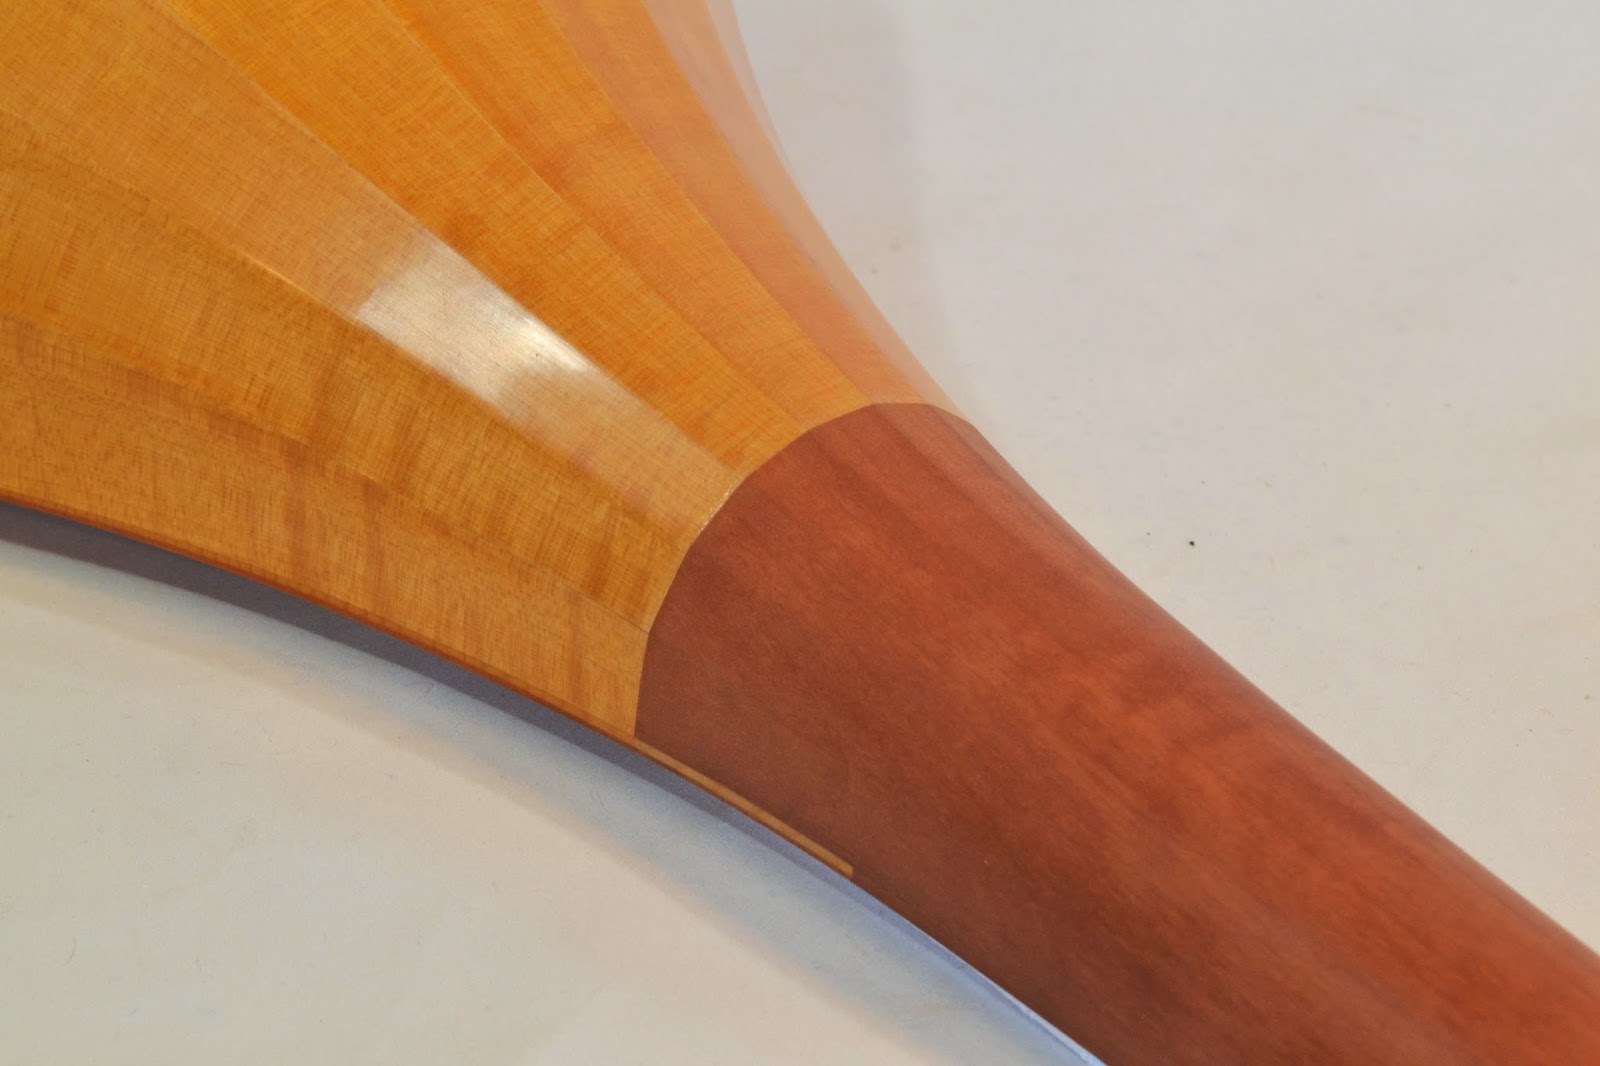
The answer to that question (as I found when I built the back) is that, yes, it is difficult, but not incredibly so.  In fact, I was a little surprised at how (relatively) easy it was.  The rib joints looked good, as did, indeed, the whole back, and the whole instrument.  Like much else about this lute, it represented a technical challenge that I was eager to accept.  (This is the way that I push myself to keep developing and refining my craft skills and why, even if I'm never asked to build another one of these lutes, it was well worth my while to do so this time around.)

And why did this kind of joint keep being used long after it was convenient to do so?  In my opinion, two reasons.  First, tradition is a very powerful thing: if the joint has always been made this way, why should it be changed?  Second, the joint itself feels very slick, and, I believe, lends itself to single-line playing up the neck and onto the upper part of the soundboard.  The joint, in other words, fits the music that was (and will be) played on it.

I hope this account has given you some idea of the kinds of choices I made to design and build this lute.  Most of the choices are, fundamentally, pragmatic ones, and have ultimately to do with the playability of the instrument: the width of the stringband dictates the size of the bridge and width of the nut, which both in turn dictate the dimensions of the fingerboard and neck, which then affect the size and contours of the body, which then, in turn, dictate the size and proportions of the decorative features of the soundboard.  Everything is of a piece, and all the features are based upon the body, hands, and technique of the player.

That player's name is Gus Denhard, and he drove up from Seattle about a month ago to pick up his new lute at my workshop.  His initial response was quite positive, and I'm looking forward to hearing from him in his musical journeys with this lute.  My impression throughout the design and building process was that the music and repertoire for this instrument were not already known, but were to be discovered, and for me that was an exciting feeling.  Without the spark that Gus provided, I may never have built an instrument like this; his encouragement and enthusiasm allowed me to follow my instincts, and try new techniques and designs.  He's promised to send me some musical postcards from his journey, and as he does, I hope to share them with you.


Thursday, 19 June 2014

The Unusuals

Today I'm pleased to report some new work completed, three new lutes making their way in the world.  Together they are "The Unusuals" because each in its own way has some oddities, or peculiarities, that mark it as memorable.

First up is an 8c lute based on the Tieffenbrucher archlute, C45 in the Vienna Kunsthistorisches Museum.  My version here is reduced to about 95% of the original body, which allows for a slightly shorter string length (this lute has a string length of 63cm, with 9 frets tied on the neck).  This lute was made for Dr. Ken Lee of Vancouver.
The back is of Honduras rosewood (with holly spacers), a wood that I haven't used for this model before.  My initial impressions of it are that it creates a very powerful, clear and focused tone. It's perhaps not the most complex tone that you might hope for, but it is quick and strong.  I think it will make a very nice concert instrument; my impression is that it could fill a small hall (relatively) effortlessly.

My client had some specific requests for this lute.  He asked for both the first and second course to be single strung; he also asked for a set of mechanical pegs (Pegheds) to be installed.  I find that I'm being asked to install these pegs more frequently, which I don't really a problem with, though it does hurt my pride in my own traditional wooden peg-making and fitting just a teeny bit.   In my limited experience, the Pegheds seem to work well, though I must say they are not without difficulty to install.

One other unusual request by my client was the rose design: the rose from the 1592 Venere lute in Bologna.  I usually think of this pattern as belonging to that particular model of instrument (since it's the only surviving historical instrument on which it appears), but that's no reason not to use it elsewhere.  I think it works well on this lute.


The next recently completed lute is a 6c version of the Warwick Frei lute.  I've made a number of 11c versions, but this is the first 6c version I've done of this lute.  It has quite a long string length at 71cm, but I must say I felt no difficulty in playing it--the shape of the body seems to fit easily against the player's body, and once one finds a correct way of holding it, it is quite comfortable to play.   I made this lute for Sten Hansen of St. Charles, IL.


The most unusual aspect of this instrument, for me, was the thickness of the soundboard and the dimension, number and location of the soundboard braces.  As outlined in my last blog post, I used barring and soundboard thicknessing that corresponded with the evidence that I saw in the historical lute: an unusually thick belly, a five-bar brace pattern, and a j-bar that spanned the width of the belly.  These may seem like small adjustments on their own, but taken together they are, I think, a fairly radical departure from conventional systems (or at least my own conventional systems).

I think the experiment was a resounding success (but I guess you should ask Sten about that to be sure).  The lute has quite a big sound, with a bright, singing chanterelle and a strong response across the whole range.  The timbre of the instrument is...well...unique.  I haven't heard anything quite like it, and I'm a little baffled at how to describe it.  (This is an ongoing issue for me--how to describe a sound.   Sten and the lute will be in Cleveland next week, at the Lute Society of America Summer Seminar, and I plan on listening for people's responses, and collecting their adjectives.  I will report back in a future blog post.)

 The rose pattern, as I've said before, is one of my favourites, both to look at and to carve.

And I love the way so many different woods arrive at one point, here at the body-neck joint: pear neck and fingerboard, snakewood fingerboard edging, curly maple ribs, spruce soundboard, pear belly edging, boxwood frets.
Last of The Unusuals is the most unusual of all: a five course, fretless medieval lute, built for Gus Denhard of Seattle.  This one is so unusual I will devote an entire future post to its design and construction.  This one stretched me to the limits of my craft skills unlike any other I've made.  At the risk of sounding a bit cocky, after building this one, I think I could build just about anything. 

The broad-ribbed, nearly semicircular back, along with the ribs re-curving into the neck were a fair challenge, but the tile work on the belly and herringbone edge binding--both shop-made--were no less tricky.  I'm quite pleased with the result.

Gus came to my workshop this week to pick up the lute, and in his hands it sounded great.  I think this lute has been a dream of his for a while, and now that he has it, he will be the one to create its repertoire.  That's a great reward for me, to be able to create the vehicle for another person's musical adventure.  A lot of the time, I feel like the luckiest guy on the planet.

And that is all for today.  I'm off to the LSA Seminar in Cleveland tomorrow--I hope to see you there!


Sunday, 16 February 2014

Work in Progress, February 2014

Three lutes are underway right now, an 8 course, 6 course and 5 course, and each presents unique design and construction challenges.   The 8 course lute is a version of the reduced Tieffenbrucher C45 model I've made many times, but with some very specific features requested by the client; the 5 and 6 course lutes are wholly new models for me, and in many ways take me into some rather interesting and uncharted territory.  

First to the 8 course: this lute has a back of Honduras rosewood, a material that I haven't used on this model before.  Other specific features of the lute arise from the fact that the client plans to play this lute with fingernails.  In response, I've made the bridge slightly taller than normal (to provide a bit more clearance of the strings above the belly); the string spacing at the bridge is a little narrower than my shop standard; and the second course will be single-strung.  One other unique feature of this lute is that the client has asked me to install a set of mechanical pegs.

This group of lutes is pretty far along in the construction schedule, and in fact, I glued the bellies into the bodies of all three last week.   Here's a shot of the 8 course just before gluing in.
Next up is the 5 course, a fretless, plectrum-style medieval lute.  It's based on a late-14th century painting, which I'll talk about in a future post.  For now, I'll just point out some features that make this lute unlike any I've built before.  It's more like an 'ud, in many ways--
As you can see, the belly has two roses, a pretty common feature in pre-16th century lutes, judging by surviving iconography.   It also has a 'scratch plate'--an 'ud-like feature--between the bridge and the main rose, to guard against damage from the plectrum, as well as a wide bridge, mosaic inlays, and rose patterns that are very simple in comparison to the kind of roses one sees on most Renaissance lutes.  (The simplicity of the roses is more than compensated for by the overall busyness of the belly's design, which you'll see better when I post pics of the finished instrument.)   The lute also has a curved neck joint, which is covered by the belly in this photograph (but you can see the shape of the joint by looking at the top of the belly, in the area of the upper rose).

The main difference between this lute and any other I've built is the soundboard thicknessing and barring.  Making mainly Renaissance lutes, one gets rather accustomed to building in a certain style, with a certain pattern of thicknessing and barring which, though it varies somewhat from model to model, is fairly well-defined both by the old treatises and by examples from historical instruments in museums.  That pattern looks a lot like this, which is the one on the 8 course lute shown above:
This is called a "seven-bar" pattern: there are three main bars across the belly below the rose, and three main bars above it, while the three small bars across the rose are counted as one.  There are also small bars at the bottom of the belly: two "treble bars" that poke in from the corner (that help to focus and support the sound of the higher-pitched courses) and the "j-bar" (that helps to control the lute's bass response.)

It's a pretty complicated system, well-suited to the sonic complexities of the late-16th century lute and its music.  But what kind of barring system should we use for a 5 course lute?  Besides all the structural differences (two roses, inlays, scratch plate, etc.), the origins of this lute lay at least 200 years earlier than the 8 course, in a vastly different musical culture.  And, unfortunately, there are no late-14th century lutes lying to hand for us to x-ray or pry apart to see how they built them back then.  For this lute, we are in the realm of educated guess work.

But we do have a guide... and his name is Ray Nurse.   Ray's well-known as a musician, teacher, lute maker, musicologist, and all-round giant brain (he's also my close neighbour here in East Vancouver).   In 1988 Ray wrote a paper called "Design and Structural Development of the Lute in the Renaissance," which, among other things, outlines a tantalizingly plausible line of development for lute belly thicknesses and barring systems.  I won't rehearse Ray's whole argument here (the article is available for download--just do a google search), but suffice it to say that, generally, the further back in time we go, the fewer the bars, and the thicker the soundboard.  How few the bars, and how thick the belly, are a matter judgment, and a reading of (admittedly scant) historical evidence.  Here's what I used for the 5 course:
A four-bar pattern--and a reasonably thick soundboard too.  Notice that on this lute, there are no treble bars, and no j-bar.  I'm banking a bit on the likelihood that there won't be much to differentiate the treble and bass responses of this lute, and therefore the small bars that 'balance' the sound in the 8 course lute won't be necessary.  (I'll let you know how this all works out when I string up the lute!)

Now on to the 6 course.

This one is based on the lute by Hans Frei in the Warwick County Museum, otherwise known as the Warwick Frei.  The Warwick Frei's present configuration is as an 11 course (which is how I've built it previously), but it would have started life somewhere in the early-to-mid 16th century as a 6 or 7 course lute (the conversion to 11 courses happened in the 17th century).  It's a reasonably easy task to figure out what the overall shape of the original instrument might have been--neck length, number of frets, string length, etc.--but as with the 5 course lute above, figuring out a plausible "original" belly and barring for this lute is a quite a different matter.

There is some evidence, though, of what these things might have looked like 'under the hood' in the 16th century.  The soundboard, for instance, appears to be original, and, especially in the lower half of the belly, from about the rose down, it is quite thick--as much as 2.5 mm at the very bottom.   As for the barring, what's on the belly now is not original, and is likely a part of the 17th century conversion (it's a pattern somewhat like the one on the 8 course lute, above).  However, glue marks on the underside of the belly show pretty clearly where an earlier set of bars (the originals?) were located.
For my version of this lute, I decided to believe the evidence: I used the thicker soundboard measurements, and the earlier barring pattern.  It's a five-bar pattern, as you can see, but there's another feature I've taken from the original: a j-bar that spans the whole width of the belly.  It's very unusual--I've never seen evidence of such a thing on another historical lute belly--and I'm quite interested to find out if I've been able to balance treble and bass responses without the aid of the little treble bars.

So that's the lute's progress for now.  Much work has been done, and there's much more still to come, but for now, with the bellies glued in place, it's a good time to stop and reflect.   All the thinking I can do, all the planning and testing, have been done, and there's nothing left but to say a little prayer for luck as I seal up my hopes inside each lute.  Every lute is, in a sense, a leap into the unknown, but that's true for these ones especially.  I really feel like I'm pushing at the boundaries of my knowledge with them.  Hopefully I'll make some useful discoveries--and the lutes will make some beautiful sounds.

Until next time....


Sunday, 12 January 2014

New Work from Last Summer

I want to tell you about the three lutes that I finished last summer, on the very anniversary of my birth in late July: a 10 course, an 11 course, and a 6 course lute.  It seems a bit odd to call these 'new work,' some months having passed since their births--they're practically toddlers by now--but they're the latest instruments I've finished, so I guess they qualify.  (I've done quite a bit of work on a new group of lutes since then, and I think I may write a post on their progress in the near future.)

Let's start with the most strings first.  This is an 11 course lute, based on the Warwick Frei, for Dr. Gary Boye, of Boone, NC.


The back is of eastern hard curly maple, the belly of spruce from Switzerland.  The neck and pegbox are veneered in ebony.

The rose, whose pattern is taken from the original Hans Frei lute in the Warwick County Museum, is a favourite of mine, and I've talked about its mystery and beauty in this blog before.
The second lute, with the second-most strings of the three, is a 10 course based on my reduced version (95%) of the body of the Tieffenbrucher archlute, C45 in the Vienna Kunsthistorischesmuseum.   I built it for Philippa Dunne, of Huntersville, NY.  This lute has become a popular model with me over the last few years, and I've built 7, 8 and 10 course versions of it with excellent results.  If anyone would care to try a 9c based on this model, just to complete the set, please let me know!


The back is of 17 pacific Yew ribs, with sycamore spacers.  For the 10 course model the string length is 64cm, which gives this lute 10 frets on the neck, with 9 of tied gut and the 10th of English boxwood.  

The rose is the familiar "knot of leonardo" pattern, with a chip-carved border; this feature is a nod to the rose of the Harton 10 course lute in the Folger Shakespeare Library.
The last lute to introduce today is a 6 course, which I built for myself.  It's not often that a lute maker finds the time to build himself a new instrument, and I was able to do so only because in the summer of 2012 I sold my previous lute, a 6 course after the small Frei, to Nelson Amos, of Ypsilanti, MI.  I loved that lute; it was my stalwart since I built it in 2007.  But many things had happened in my life, and in my lute making practice, since I made that lute, and over the years I had formed many ideas of what I would want in a new instrument: what string length,  what size and shape, what sound, what physical features concerning action and playability.  At the risk of sounding a bit grandiose, it was time to proclaim anew the state of the art of my lute making.  So here it is: 6 courses, 60cm string length, back of birdseye maple, the body shape of my own design, based on early 16th century Italian iconography.  I like my new lute a lot.  We get along really well, and look forward to getting to know each other very well over the years to come.


Grant Tomlinson taught me how to carve these flower-ends in a 6c bridge (Grant taught me just about everything I know).
Here's a nice detail shot showing soundboard, english boxwood body frets, pear fingerboard extending into the soundboard area, snakewood neck edging, pear binding around the belly.  Wood is beautiful!
The rose is my version of the Gerle pattern, which I've spoken about elsewhere.  What other choice did I have for my own lute, but what I consider to be the fundamental lute rose pattern?

That is all for now.  Stay well until we meet again; I'm off to play the lute.