Showing posts with label lute bellies. Show all posts

Sunday, 3 May 2020

Building a 13 Course Lute, Start to Finish, 17: Finishing out, Prep for Varnish

Hi again, and welcome back to the workshop. How are you doing during the Great Hush of 2020?  I'm still here making my lutes; and I hope you're keeping well, wherever you are.

Let's get to it. I've got a bunch of things to do to prep this 13 course lute-in-progress for varnish, including some preparatory seal- and ground-coats to the body and belly. First, however, I need to finish out the instrument.

But what does 'finishing out' really mean? To me, it means going over the entire lute, very methodically, to give it a complete and final physical shape. I've got a checklist of tasks that I go through from top to bottom, which bring the lute to a certain point of completion. This checklist ensures two things: first, that I don't miss out on any details in shaping the lute; and second, that the process doesn't go on forever. I have a task; I do it; I cross it off the list; I go on to the next. Magically, it seems, the lute gets done.

A small item to begin. Remember back in episode 3 of this series, when I bent and glued the ebony veneer onto the neck core? I used two pins to locate the veneer when I glued it, one near the nut end, and one in the middle of the neck. Those two holes are still in the veneer. The one at the nut end will eventually be obliterated by the peg box rebate, so I don't need to worry about that one. The one in the middle, however, needs to be filled.

With a jeweller's pin vise, I drill the hole to a slightly larger diameter.

Then, with files and a scraper, I make a dowel from a scrap of ebony that fits the hole. I glue it in, and when the glue's dry, I nip it off, and file it flush.
Next up: rectify the body-neck joint. My result was pretty good when I veneered the neck and glued it to the body, but you can see  here a small area where the match isn't quite exact. I'll make it exact with files; then I'll go on with the files to give a good shape to the back, starting with the top block area adjacent to the body-neck joint.

Then I move on to the rest of the back, and give the whole thing a final shape. This part of the process probably takes the longest of all the steps I'm describing in this post. I work with files and some small, curved scrapers, using strong side lighting to see how tight the rib lines are. You can see in about the centre of this photo that the rib above sits a little higher than the one below; I will file and scrape in that area until the facets of the ribs, and the line between them, are rectified. I then do the same thing with all other problem areas, all over the back of the lute.

I was going to say "I will file and scrape in that area until the facets of the ribs, and line between them, are perfect," but that's not exactly correct. Perfection is an ideal state, and therefore unattainable; I merely work until I have achieved a satisfactory result. I look at the lute in all sorts of different lighting situations; I set it aside and do some other work for a while, so that I may come back to it with fresh eyes. Each time I come back to it, I find a new spot to work on. Until I don't!--and then it's time to check this task off the list, and move onto the next one.

Here's a good shot showing how I brace the lute when I'm scraping the back--between my knees and the well-padded edge of the workbench.
I have made a few scrapers for myself with different curvatures. I  match the scraper I use to the width and curvature of the rib I'm working with.
From there, I move onto finishing out the neck. I mask off the top of the body (don't want ebony dust to get into the freshly-scraped back), and work with a series of files.
When I get a good overall look with my finest file, I move onto burnishing with shave grass. In this photo, you can see, at bottom, a segment of shave grass, and in the middle, a segment of shave grass that I've slit open, flattened, and backed with a piece of masking tape. I can then use this flattened piece with a cork sanding block (seen at the top), to get a very nice burnished surface on the neck veneer. 
Just a word about the scraping and burnishing process. You may have noticed that I have not mentioned the word "sandpaper" here, and that is because in finishing out this lute (and the other two in this group), I resolved not to use that material. In the past, I have finished out the veneers and backs of my lutes with a series of sandpapers of ever-finer grits, but I decided with this group--and, I hope, from now on in my lute making practice as a whole--not to use it to finish out necks and backs. (I have never used sandpaper on the bellies of my lutes.) I decided to do this for two reasons. First, over the years I have developed sensitivities to wood dust, especially ebony and rosewood. Sandpaper creates a lot of dust, so by eliminating it from the finishing-out routine, I hope to significantly reduce my allergic/asthmatic sensitivities. Second, I have long believed that while sandpaper offers a certain convenience in finishing out, it also tends to give an instrument a kind of 'rounded over' look overall, diminishing the crispness in texture that I would prefer to see in surfaces and edges. I'm not talking about creating sharp edges here; quite the contrary, in the next few photos I'll describe how I methodically eliminate any sharp edges that might interfere with the comfortable playing of this instrument. In this context, I am referring only to the visual aspect of the lute, how it catches the light, and the eye of the beholder, to create a bold visual interest.

So for the back and neck veneers of this lute, the finishing out process is as follows: file, scrape, and burnish with shave grass. That's it.

The biggest and sharpest edge on the lute, at the moment, is the edge of the fingerboard. I want to ease the fingerboard edges and create a radius in an orderly way not only so that it's comfortable to handle, but also so that gut frets will tie more easily and lie flat against the fingerboard. (A too-sharp fingerboard edge will make the frets sit up off the fingerboard, which will interfere with the sound of the first one or two courses.)

I use a file to chamfer a 45˚ surface about 1-2mm wide on the edge of the fingerboard. Then I use the file to relieve these two new edges I've created, until the fingerboard edge is smooth and well-rounded.

I then carry on to the belly edge-binding. Again, I use a fine file to make a 45˚ chamfer that goes about halfway down through the thickness of the binding.

Then I round those two newly-created edges over, until I've got a very friendly-feeling edge. Remember, the bottom of this belly edge will be resting on the player's leg, and the player's arm will rest against the upper bottom corner of the belly. The "softness" of these edges is, in my opinion, a crucial part of making this a very playable instrument.
Where these two chamfered edges meet, I ease off the rounding over, and try to match them simply and crisply.

Finishing out the belly is fairly straightforward: I scrape it carefully with a small, sharp, flat scraper along the grain, in whatever direction works best...

And then I burnish with shave grass. This stuff works best on the spruce if it's rubbed across, but held slightly askew, the grain.
At the end of the day, I wet the belly with distilled water, to raise the grain. I let this dry overnight, and next morning scrape and burnish the belly one more time.

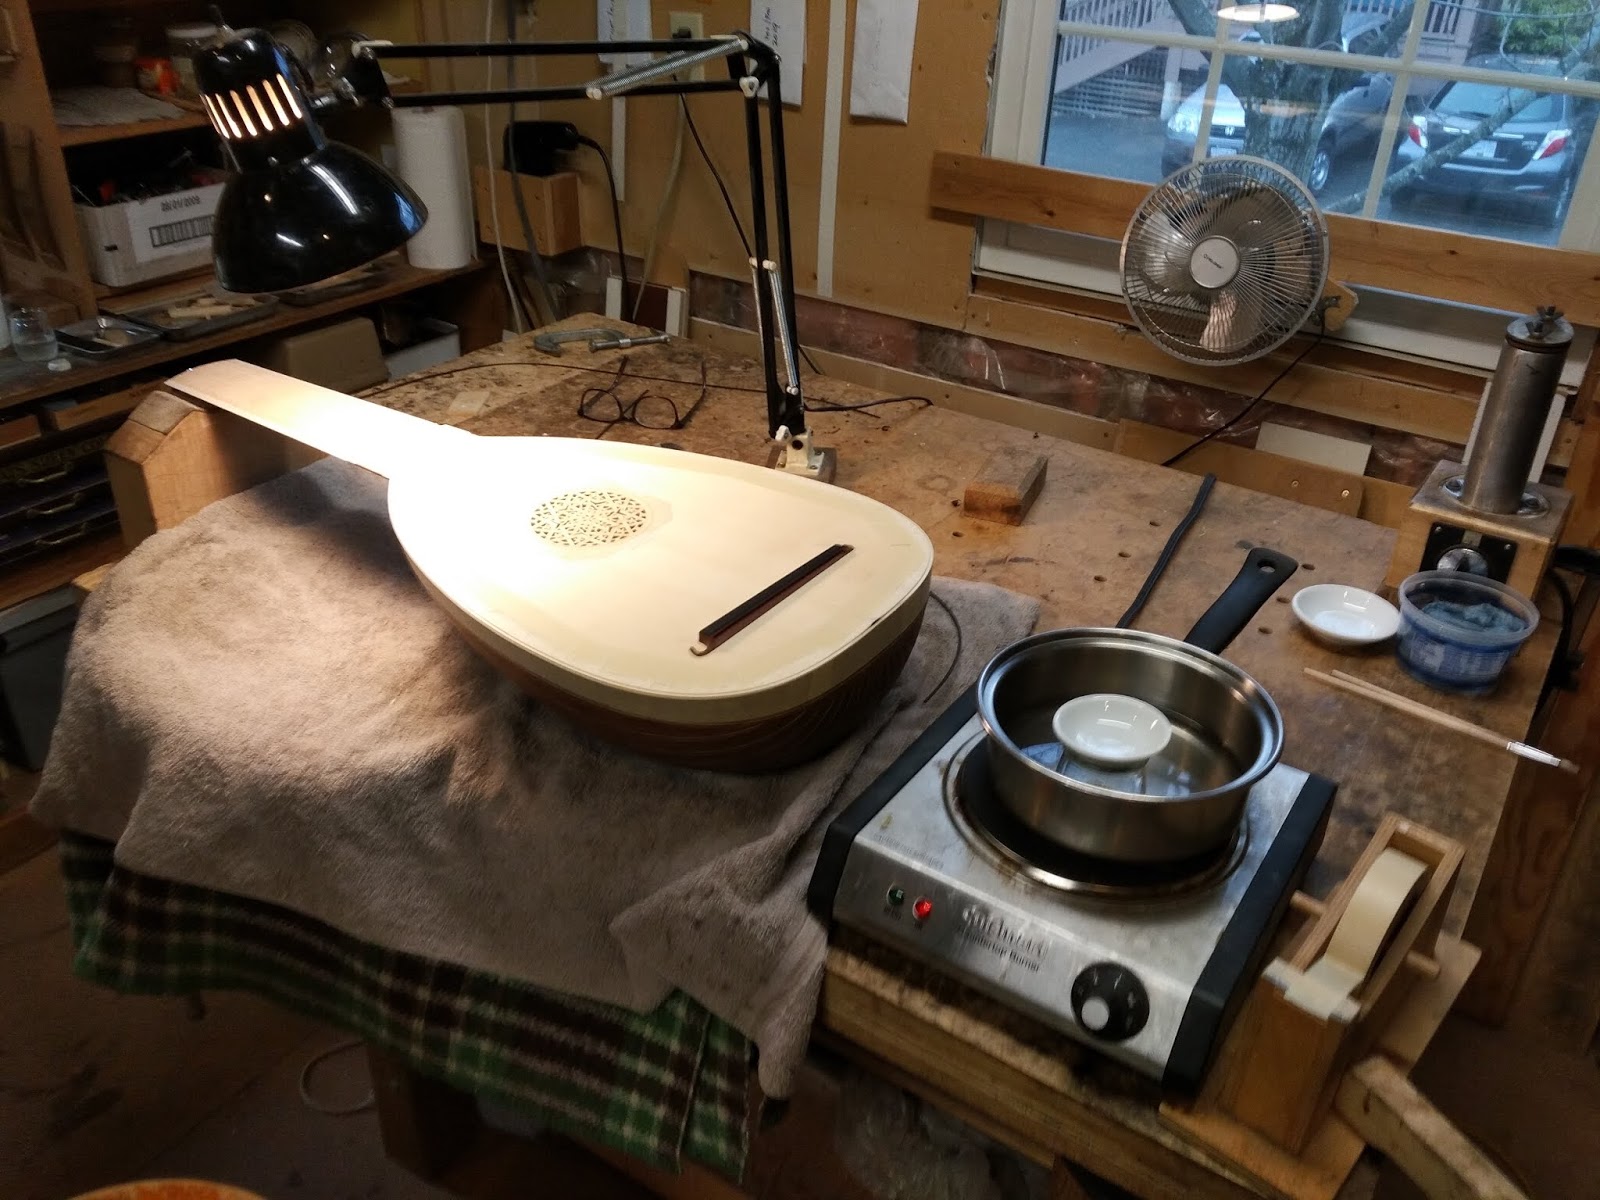
I then seal the rose with a brushed-on coat of Tried and True oil. Then I hang the lute in the UV light box for a couple of days, to let it tan up a bit, before I begin applying ground coats before varnishing.
Two days later....

I bring the group of lutes out of the light box, and make ready to apply the first seal coats to the belly and back. The first thing I need to do is mask of the neck and fingerboard carefully.


Then I mix up my sealer: a dilute mixture of casein glue. I use about a tablespoon of low-fat dry curd cottage cheese, a small amount of artist's slaked lime, and distilled water.


Stirring the slaked lime to prepare for use. 

Dry curd cottage cheese.

I grind the cottage cheese first to minimize lumps, then mix in the slaked lime. Finally, I dilute with distilled water.

Then I begin padding it on the front of the lute with a soft cotton cloth, starting out above the bridge, and working around the rose to the top of the belly, and around and down the belly below the bridge.

Around the bridge, I apply the size with a small brush. I'm a little sparing in my application of the size around this area.


I keep applying the size for a few minutes until I have a nice, even coat. Then I take a fresh cotton cloth and wipe the belly down, along the grain, to remove any excess specks of cheese that may not have been ground down well in the mortar.
Next step is to apply the casein size to the back of the lute. This time I apply it with a wide, soft brush, and brush along the length of the rib. (Notice also in this picture that I have swapped out my green cloth bench pad for a large piece of card stock. During this stage, and during varnishing, I handle the lute by holding onto the neck with my left hand, and allowing the edge of the lute to rest on the card.)


At this time I also apply my size/seal coat to a sample of the same material as the back of the lute. From now on, whatever I apply to the lute, I apply to this varnish sample.

When I've applied an even coat, I wipe down the back with a fresh cloth to remove any large bits of unmixed material. 
And--back in the light box for another couple of days, to let the seal coat harden up.

You might be asking: why apply a seal coat at all? Well, there are a number of reasons. First, a coat of dilute glue such as this will consolidate the wood fibres of the belly and back, and create a flatter surface on which to apply layers of varnish. Second, the seal coat will help with adhesion of varnish coats. And third, and most important, the seal coat will actually create a barrier between the wood and the varnish coat, which in the case of rosewood (which this back is made from) and yew wood (which another lute in this batch is made from), is essential. Both rosewood and yew have oils in them that, unless the woods are sealed off somehow, will interfere with the bonding and curing of varnish. For years I used a coat of shellac as a sealer for rosewood and yew, but that stuff is problematic for a couple of reasons (for one, it's a bit anachronistic to be using in an 'early' instrument such as this.) Grant Tomlinson introduced me to casein, and I've used it for a few years now. It works well, and it is easy to apply.

Okay--one more coat, this time a ground coat, the purposes of which are to penetrate and strengthen the wood of the belly and back, to give added depth to the finish, and to promote adhesion of the coming varnish layers. The three ingredients: marienglas, Tried and True oil, and my own oil varnish.

The three ingredients are measured out on a glass plate.

I mix them together with a muller.

I dilute the mixture with spirit of gum turpentine...

And then apply it in a thin layer to the belly with a cotton pad, in much the same way that I applied the casein size.

I apply this coat to the bridge...

As well as to the rose (I use a very dry brush in doing so.)

As a final touch, to even out the coat, I brush gently but quickly across the grain with a broad, soft brush. (By the way: this is the final coat of finish I put on the belly of my lutes.)
I apply a coat to the back of the lute, using a cotton pad.

I love the way the lute starts to look at this stage--I can already begin to sense the glow of the wood below just these preparatory layers. I'm quite excited to put a few coats of varnish on this lute!

There is my batch: from left to right, the 13 course in rosewood, a 7 course in yew, and an 8 course in rosewood.

Next time, I will tell you about my varnish, and I will show you how I varnish a lute back. There might even be moving pictures....

Stay well, and I'll see you next time.


Sunday, 8 March 2020

Building a 13 Course Lute, Start to Finish, 14: Soundboard Details in Ebony

Hello friends, and welcome back, after a bit of a break. There's a bunch of stuff to do that has a bunch of small steps, so let's get right to work.

Today I'll be dealing with the aftermath of the 'Great Glewing' of 2019, wherein I stuck the belly into this 13 course lute-in-progress. I'll be trimming the belly edge, installing the ebony half-binding, and inlaying fingerboard points and an ebony spade at the bottom of the belly.

You'll remember that in gluing the belly I used half-strength glue, and was also careful not to slop too much of it around. This makes cleanup pretty simple: I brush a bead of water around the narrow belly overhang, wait a few minutes, and clean up with a sharpened spruce stick.

Then I can trim the edge of the belly flush to the outside rib.
My knife blade has a sharp edge but also a fairly full cheek, which allows me to take a fine cut without the knife 'digging in.' I wrap a piece of masking tape around the tip, to guard against accidental nips into the edge rib.
I have to reverse cutting directions to follow the grain of the belly.
I must say I find this one of the most satisfying and meditative jobs in all of my lute making. If I've sharpened the knife correctly, I can trim the belly edge and get really close to the rib without worry.
That's true even at the bottom end of the belly, where the end grain can sometimes be tough to cut. However, with my knife I can get close enough that all I will need to do to finish off is a bit of work with a file.
At the body-neck joint, the result I want is a tight corner where the edge rib and neck edge meet. (I'm not quite there yet in this photo.)
At the tips of the capping strip, I leave the belly edge untrimmed for the moment. I need to do some careful work to taper the end of the capping strip, and integrate that shape into the outline of the belly. 
To get a good idea of what that final shape should be, I lay my belly template down and with a sharp soft pencil trace around it where the ends of the capping strip bump out.
I'll use this mark as a guide as I shape the area, mainly with a series of files.
Here's the contour as I begin my shaping work. At this point, the capping strip is its full thickness, and the belly overhangs the edge rib slightly. 
Here's my pretty-close-to-finished result.
At the leading point of the capping strip I've tapered the thickness almost (but not quite) to zero, while the upper edge (closest to the camera) I've left pretty much full thickness. I've also tapered the thickness of the capping strip back from the tip, toward the bottom of the lute, for approximately 2 to 3 inches.

With the outline finalized, I'm ready to inlay the ebony edge binding. I clamp the lute in the neck holder to keep it very steady.

Some tools of the trade. The one in the middle is a purfling cutter I made with a piece of square steel tubing (it was one of the first lute making tools I ever made for myself.) The bottom of the tool is toward us; the fence is on the left side of the tool as we face it; the blade is a couple of millimetres distant from it (only the merest tip pokes out.)


Another view...

And another. I'm proud of this tool. I made it at a time when I didn't have too many resources at my disposal, and it's worked like a charm for years. Decades, now, in fact.
And so I'll put it to work once more. The belly's between about 1.5 and just over 2mm at various places along its edge. I want to inlay a binding about half that thickness--say, 0.8 or 0.9--which is how deep my rebate needs to be. The purfling cutter is set ever-so-slightly deeper than this.

Three or four careful passes around the perimiter brings the cut to full depth.


At the body-neck joint the fence on the edge of the tool prevents it from going all the way into the corner, so the end of the cut needs to be made by hand.

Next step is to cut the rebate, which I do with this handy shop-made Dremel router base. 
If you're interested, I wrote a blog post about how I made this base a few years ago. It's another source of pride with me. Please have a look!

One shot of the router in action. I make three or four passes, lowering the cutter a bit each time, until I get to the full depth I want.
I set the router to cut a bit narrower than the line I made with the purfling cutter. The router leaves a burred edge, which I can then cut away with a sharp small knife. This leaves the purfling cutter line as the smooth inner edge of the binding channel.
The router won't reach into the body-neck joint, so I have to use a chisel to cut the rebate there.
Before I can actually install the ebony binding, I need to inlay the ebony dart at the bottom of the belly that's part of the spade. I shape the dart with this handy drill-press drum sander.
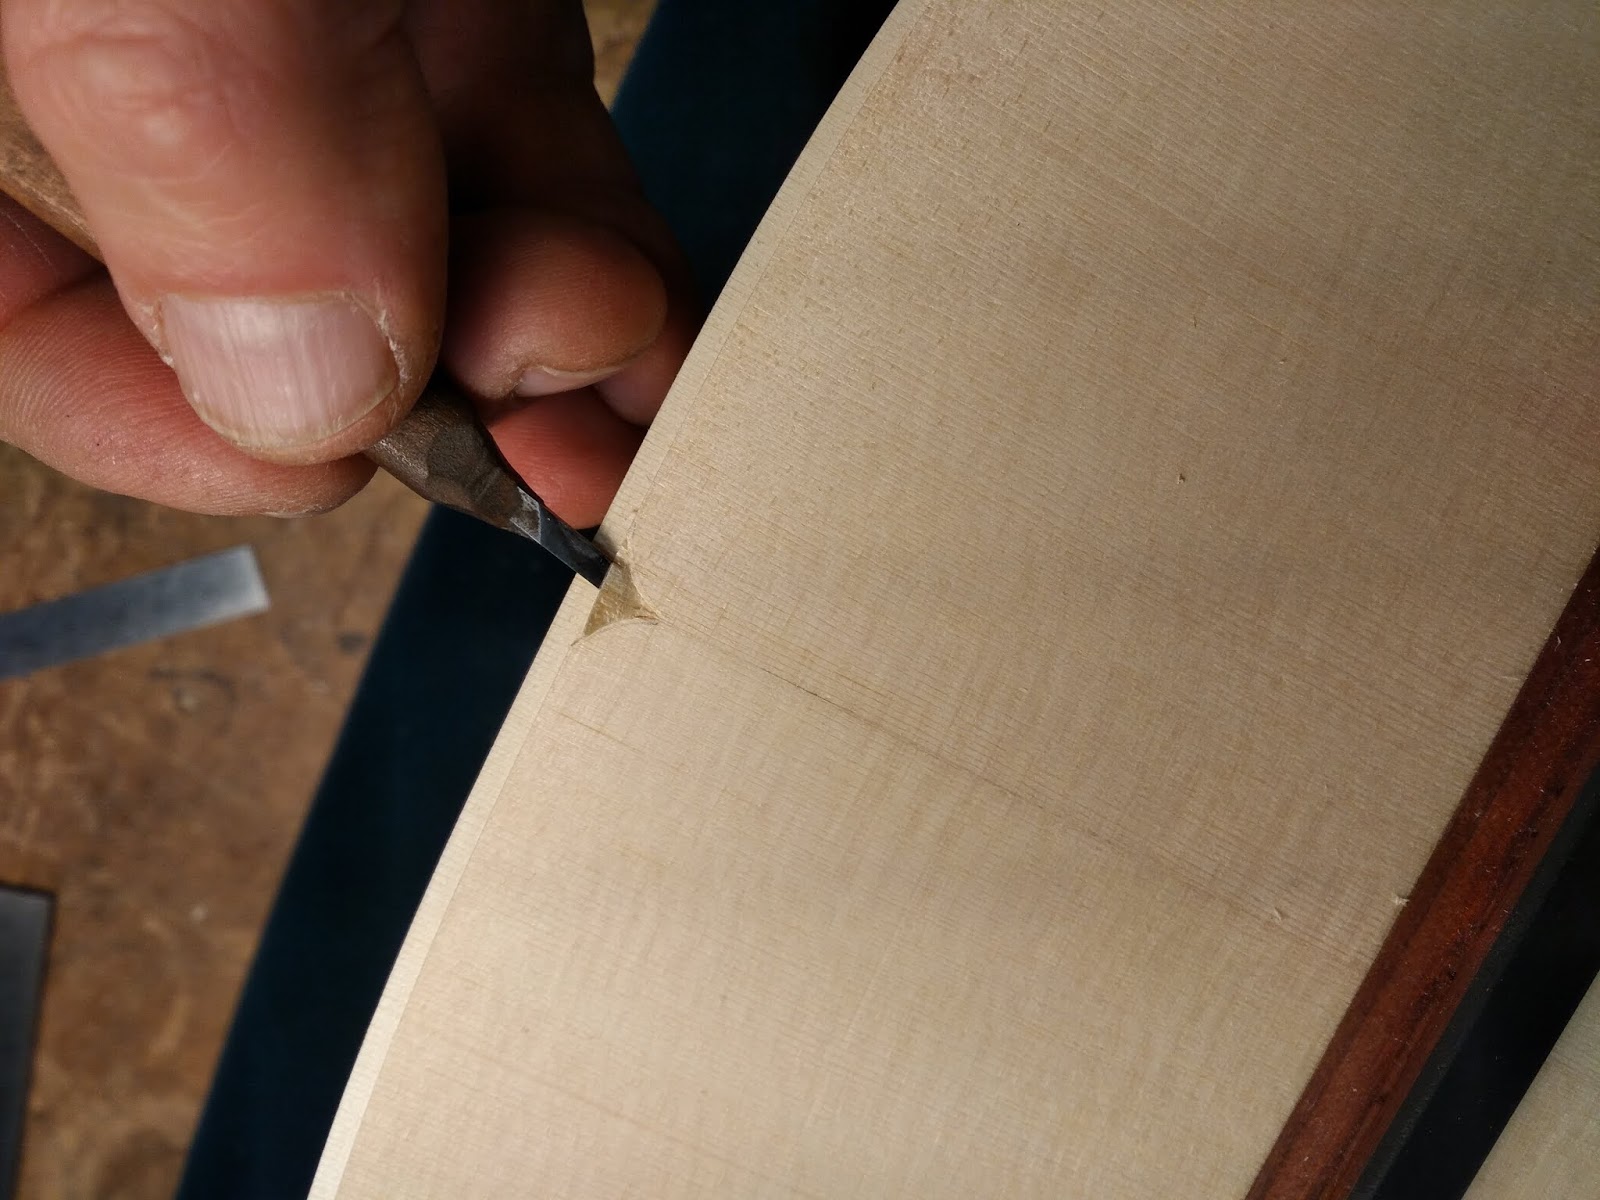
The heart-shape inlay, however, I like to shape by hand at the bench.
Here's the set, ready to go.
I trace around the shape with a sharp, soft pencil, then make vertical cuts with my rose chisel.


The dart is inlaid about as deep as the binding will be.

Chisels, knives and small files get a good fit. Then I cut the dart away from the larger piece of ebony veneer, and glue it in place.


Next day, I file the piece flush. I make sure to keep the blind/ blank edge of the file down, so I don't go filing away my carefully-made binding slot!

That looks fine. I test how flush the edge is by holding a small piece of my ebony binding in the slot, and seeing if it bends smoothly around the whole area.

This shows the area of the body-neck joint. Two details are worth noting here. First, I've cut a little notch for the binding to fit into at its very end--this is kind of an 'overflow' area for a small bit of excess length in the binding when I glue it in. Second, I've masked off the soundboard in the area just beside the binding channel. This, I've found, helps immensely with glue cleanup the day after the binding has been installed. (As always, though, I'll need to be very careful removing that tape so that I don't tear out wood from the belly.)


I can't go into too much detail here about how I make my ebony bindings, but in brief: I cut sheets of ebony veneer in the bandsaw, then thickness-sand them to a precise thickness, then cut strips from the sheets with the purfling cutter that was shown above. Then I size them up to a pretty specific dimension in my pull-through scraper. It's not rocket science, but it is a bit of work, and I try to do it in fairly large batches every few years.

Here's my bending iron, showing the modifications I've made to accommodate bending spacers (for lute backs) and ebony bindings. If you'd like more detail about how I modified this bending iron, I wrote a blog post about it a couple of year back. Please have a look!

Water is essential in bending these bindings. So is the very highest heat setting on the bending iron.

I don't bend the whole binding exactly to shape--I count on it being flexible enough (at least where the curve is long and shallow) to conform to the shape when I glue it in place. However, I overbend slightly at the top of the shoulder, near the body-neck joint, so that I'm sure the very tip will pull into place when I glue up. 

I also bend fairly closely around the tightest part of the curve.
Here's my setup for gluing in the binding.

Here's the beginning of my gluing routine. I've squared off the end of the binding, and located the end pretty close to the centreline of the belly. Then I tape the binding in place with one piece of masking tape, a few inches away. I lift the end of the binding and brush glue under it, then tape it in place all the way along. Then I remove the original location tape, lift the binding, and continue forward brushing glue and taping. I work in segments of two or three inches, so I can always keep a fresh glue edge going forward. 

Must confess, I use a fair bit of masking tape to do this work. Especially around the tightest part of the curve, overlapping the tape in this way exerts a nice, even pressure to pull the binding tightly into the channel.

A look at the end of the piece. Note that I've cut the binding just a bit over-long, and that extra length fits into the cut-out area. (The binding tip will be cut away when I install the fingerboard points.)

Second verse, same as the first! With the exception that before I can glue in the second binding, I need to fit it very closely with the squared-off end of the one that I just glued in.

Would Magno Tieffenbrucher recognize this mass of masking tape? One of the eternal, unanswerable questions I ask myself every day in the workshop.
Next day, I remove the masking tape very carefully, and clear away the glue with water. Later in the day, if the belly's nice and dry--or the next day, if it's not--I'll inlay the ebony heart.

The way I originally learned how to do this was to spot-glue the piece to the belly, and trace around it with a knife; but I find that a  piece of double-sided tape works just as well. I cut through the tape, into the belly itself.

This leaves an outline that I first deepen...
... and then cut toward, with my rose knife. I deepen the recess, and make sure it's quite flat-bottomed (using a small, flat scraper) before gluing the inlay.

The finished result.
Now I can scrape flush the spade and the binding, in preparation for installing the fingerboard points. (Note the masking tape on the back corner of the scraper, which prevents the scraper digging in to the belly.)
Here are both points, before shaping. I've glued two book-matched pieces of ebony together, and will shape them in this form so that they are identical. I've glued a piece of paper between them so that they will be easier to separate once they're shaped. The arrow I've drawn indicates the direction in which the material planes best; this enables me to orient the piece so that I can plane it from the body toward the nut.

I shape the piece first by shooting the inner edge, which will be my main reference when I lay out the location on the lute. The curved edge is shaped using the drum sander. 
You might notice that the tip of the 'point' is not exactly pointy--that is, I've angled the tip a little. I don't know where this shape comes from--I think I must have learned it from Grant Tomlinson, my teacher, but I don't know where he got it from, and I don't know if he uses it for all the points on all his lutes. I know I do--I think it's a bit elegant, and gives a sort of 'finish' to the piece. Also, I've seen a lot of modern and ancient lutes with pointy-points, and those pointy-points seem to have a tendency to crack the belly. I fancy that this way of shaping the point won't do that. That's the theory at least...

Exhibit A: the 1612 Tieffenbrucher in Bologna (photo courtesy Grant Tomlinson.) Will my work fare any better? Ask me in about 400 years.

I split the two points apart by soaking in a dish of water for a few minutes, then prying carefully with a palette knife. I then wash the paper and glue off.
There's one additional step I need to do with the points before they can be fitted, and that is to bend them slightly. Since the neck surface on which they'll be fitted and eventually glued is curved, to ensure a good fit they need to be curved too. While they're wet, I simply hold them against the bending iron, and apply a little pressure with a couple of cork blocks. I'm bending them across the grain, so the points bend very easily.

 I locate the points by laying a straightedge on the neck and down onto the belly. (The inside edge of the point basically follows the taper of the neck.) 

I lay the flat edge of the point against the straightedge, and position the curved edge exactly at the body-neck joint. I trace around the curved edge with a soft, sharp pencil, then remove the point and use a sharp knife against the straightedge to cut down into the belly. 

You can see the result here. The long straight inside edge is already cut, and now I'll use my rose chisel to cut just inside the traced line.

I can't use the rose chisel on ebony, so I must cut away most of the  excess binding with a razor saw.
I can then clear away the excess material, and start fitting the point. 
Getting a good fit on the point is not an easy thing, and it can be a bit of a time-consuming job. However, there are a couple of principles that I keep in mind that help me to do it. The first one is, the long straight cut I made against the straightedge must be made absolutely flat first (a chisel laid on its side, as well as files, are the tools for this job.) After that, the point will slide along that surface into position, and all I've got to worry about is fitting the curved edge--which is largely a matter of using some fine files, and being very patient. The second principle I keep in mind is that the very tip of the point is not fitted by cutting away material across the grain--instead, I make small cuts with a rose knife along the grain. Then as the fitting process goes along, I gently tap the point into position with a hammer, and the tip of the point compresses those fibres. I can get a very tight fit in this way.


There's my fit. Time to heat up the glue!


This shows the immediate aftermath of gluing. If the points are well fitted, I don't need to worry about using an elaborate clamping system--I can just put glue in the recess, tap the point into position, and tape the points down securely.
And this is my result, the next day, with the excess glue removed. Now I'm ready to fit and glue the curved fingerboard, which will be the subject of my next post.