Showing posts with label lute repair. Show all posts

Monday, 10 August 2020

Building a 13 Course Lute, Start to Finish, 21: Fitting and Shaping the Bass Rider; Gluing in the Peg Box

Hello friends--welcome back to the ongoing tale of a 13 course lute. In our last episode, I fitted the pegbox, and glued and carved-in the chanterelle tuner. Today, I shall finish the pegbox installation by making, fitting and carving the bass rider, and then gluing the completed peg box into the neck.

I make the bass rider of quarter-sawn pear, the same material that I've used for the peg box and the chanterelle tuner. The piece I've selected is a couple of millimetres thicker than the finished dimension. There's enough material in this piece for two bass riders, so I'll trace them out back-to-back and rough in both at the same time.

My template has locations for peg holes and for some larger radii within the pattern that I will drill out with forstner bits.

I've screwed my blank down to a backing plate for a couple of reasons. First, I have to be able to drill through the material and into something beneath, so that the drill won't splinter out the backside of the piece. Second, I want to be able to clamp and hold the piece securely so it doesn't become a nasty out-of-control helicopter when I start drilling (I've seen it happen.)

The backing board is clamped securely to the drill press table.

The pear is pretty tough material, and there's a lot of thickness to get through. To ease the stress on both the drill press and the bit, I take small cuts and lift the bit up frequently, and rub wax on the sides of the bit.

With all the peg holes and radii drilled, I use a coping saw to remove material from the teardrop cutout.

Then I can cut out one of the blanks on the band saw, and get to work shaping it in the swivel vise. I use a chisel to shape most of the outer profile, cutting in from both sides across the width of the piece. For the cutout, I use knives and a small gouge. 

The overall shape looks pretty good for now. I've used my template to mark the approximate depth of the inside of the pegbox, and the approximate contours of the sides and foot.

Now it's time to fit up the peg box temporarily, and see how the bass rider should align on it. This is my basic gluing rig for peg boxes (you'll see it in action when I glue the peg box at the end of this post.)
I have a fairly good idea of how the bass rider fits on the peg box of the original Schelle lute in Paris, since I'm working with some very nice photographs of that instrument taken by Grant Tomlinson (as you'll see below.) However, I still need to clamp it to the peg box and stretch a string from the bridge to check its alignment, in both the horizontal and vertical axes, and adjust the position as needed.
One of the great advantages of the Schelle peg box-bass rider combination is that, unlike other peg box-bass rider pairs of the era, this one does not slope to the side. Instead, because the peg box is made over-wide and extends out the bass side about 10mm, the bass rider sits in direct alignment with the bass side peg box cheek, and there is virtually no torque being applied by the 12th and 13th course strings. In my experience it's a much more stable arrangement than some other examples I can name--one being the 13c Burkholtzer in the Vienna KHM. I've never personally examined the Burkholtzer lute, but from the photos below I get the impression that the bass rider may have drifted outward somewhat over the years.

Photo by Robert Lundberg, JLSA XXXII, 1999, p.42

Photo by Stephen Gottlieb, courtesy Grant Tomlinson
Perhaps I'm wrong and it hasn't moved a hair since it was built, but in any case it seems to me that such an arrangement is very vulnerable, an accident waiting to happen. Such an accident did, in fact, happen to an instrument based on the Burkholtzer belonging to a friend of mine, and he sent it to me to fix. My repair involved figuring out a way of removing the bass rider's tilt and straightening it out to improve its strength, somewhat like the Schelle bass rider. You can read about my solution to the problem here:  A Bass Rider Fix, For Nelson. 

Back to the task at hand. With the bass rider clamped to the peg box and aligned carefully, I am able to mark out locations both on the peg box cheek and the bottom of the bass rider. Then I can lay out the basic contours of the cheeks, and start carving out the recess.

I set up the rider in a portable vise in the drill press, and drill a number of holes to a certain depth.

I remove most of the material with gouges.

Eventually I can work with small flat chisels to square up the sides and bottom.

I also cut and file a small channel, into which the nut will eventually be fit.

Then I remove as much excess material as possible, with flat chisels, gouges and knives. (It's much easier to do in the vise than after it's glued onto the peg box!)  
The small violinmaker's knife with a curved blade allows for very good control when removing material. (Notice the little piece of dowel, which makes the bass rider a lot easier to hold in the vise.)

There's my working shape--I've still got a ways to go, but I think it's good for gluing in.

Fitting the bass rider into the peg box is a lot like fitting the chanterelle tuner, which I described in last week's episode: the slot is about 2.5mm deep, with the front edge square to the cheek, and the back edge angled slightly. I have chiseled out this area by hand, but will run over it with my dremel router and then clean it up with files and a chisel. (The block of wood inside the peg box provides a flat surface for the router to ride on.)

With the channel cut and the rider fitted into it, I can check the alignment one more time before gluing up.

Here's my nylon fishing line stretched from the position of the 12th course octave on the bridge. I know how far away I want that string to be from the 11th course bass string, and I know how high I want it to be in relation to the nut slot on the rider. This alignment looks good to me--I'm going to heat up my glue, and get this bass rider glued into the peg box.

Here are all the pieces. Along with three c-clamps, I've got a small piece of spruce to protect the front of the foot, and a small shaped caul that fits in the back end of the rider. There's also a thick piece of spruce on the back of the peg box, to protect it during clamping.

The length of the foot means that unlike the chanterelle tuner, the bass rider needs to be clamped in place.

When the glue has dried and I've cleared the excess away next morning, I can carve the piece in. I hold it on a piece of leather in my lap and work mainly with the small, curved-blade violinmaker's knife across the grain. 

I like the textured surface I get with that knife--it allows me to see the developing shape pretty clearly, and I can get a good overall form before moving on to finishing tools.
The tools I use for that part of the process are a set of Japanese finger rasps from Lee Valley Tools; fine files; and small curved scrapers.
I like the finger rasps--they cut well but aren't too aggressive, and leave a nice surface that can be finished with scrapers.

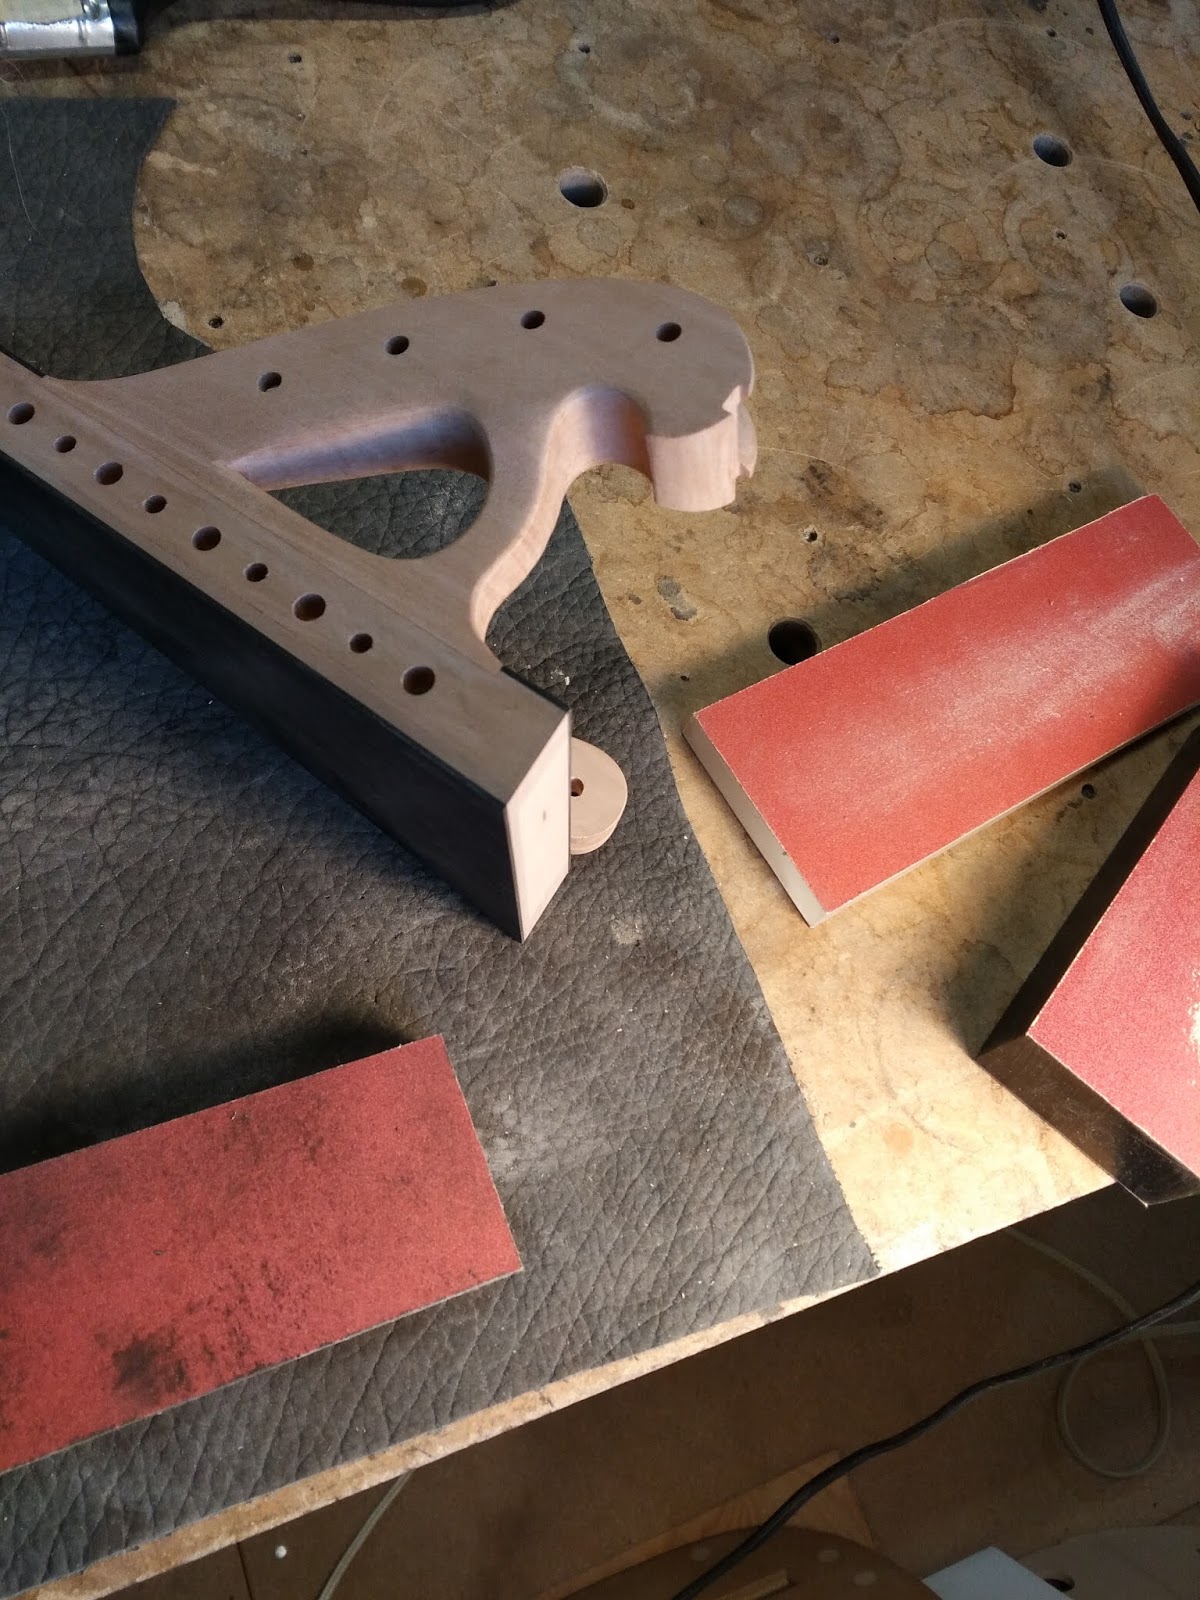
Here's my result: I think it's an elegant shape. The front leg needs to balance lightness with strength, as do the cheeks, and the width of the rider must gracefully taper to width of the peg box cheek into which it's glued. In addition, that teardrop cutaway wants elegant curves and well-chamfered edges (and I quite like the way it mimics, a little, the shape of the chanterelle tuner on the far side of the peg box.)
It's a lot of fun to sit down and carve something like this, and actually figure out the shape of the thing by doing it. It's a process of continual discovery, a period of intense looking and observing--turning the thing in your hands, adjusting the light source, seeing how the curves and recurves work and evolve, trying to get a sense of the overall visual and physical balance. It's a very satisfying experience, one of the most satisfying of my whole lute making practice.

Of course, I'm greatly assisted in this work by the set of photographs I have of the Paris Schelle, some of which you see in the photo above. These were taken by Grant Tomlinson on one of his European research trips in the 1970s and 1980s. It's been my privilege throughout my professional career as a lute maker to have had ready access to Grant's entire collection of his photographs of historical lutes. I've also benefitted immensely by having access to the notes Grant wrote on those trips for all the lutes that he examined. He looked at instruments in museum collections in England, France, Italy, Germany, Belgium; dozens and dozens of instruments altogether, a real treasure trove of information. Many of the dimensions of the lute I'm telling you about building were adapted from measurements that Grant took in his travels. And, of course, the photos are extremely helpful in puzzling out shapes and details. I owe Grant a ton; I owe Grant a house.

Let me ask you a question. After reading that last paragraph, are you not the least bit jealous of me, and the access I've had to all this wonderful information about historical lutes?

Well, you needn't be. At least, you'll only have to be jealous of me for a little while longer. A few years ago, Grant approached the Lute Society of America and offered to give it his archive: hundreds of photos, and hundreds of pages of hand-written notes, on dozens and dozens of historical lutes. The LSA accepted, and for a few years now, Grant and Phil Rukavina, the LSA's web master, have been toiling away at scanning the pages of Grant's notebook, digitizing photo negatives (many of which had never been printed before), and getting the results up online. I know that it's been a great deal of work, for both of them, and I know that not quite all the work is done yet. However... a little bird has told me that the work is finally nearing completion, and in a little while, the whole world of lute makers will have access to this invaluable resource. I don't yet have a date, but when the launch happens, I will let you know. So please stay tuned.

But enough talk! Back to lute making. What's left to do is get this peg box, with all its encrustations, onto the neck of the lute.

I've sized a number of times, with hot glue size, the base of the peg box, and the rebate for the peg box in the neck of the lute. When that size has dried--next morning--I re-flatten the peg box and re-fit it in the rebate. 
My final fit. I'll warm up my glue, and get set up.

Here's my peg box gluing jig: just a piece of ply with cork lining the underside, and an angled block screwed on. I use the jig for pretty much all my peg box gluing jobs--depending on the lute, I'll swap out the block for one with a different angle. I also need to adjust the distance of the block from the end of the neck, again, depending on the lute.

This is pretty much the whole set-up. Four cam clamps on the back end of the jig, one up near the peg box rebate. That should be enough clamping pressure to keep the thing from pulling forward when I glue in the peg box and put clamps on it.

One feature I might draw your attention to here is the pair of wedges I've placed between the edges of the jig and the edges of the neck. I need them because of the fingerboard's rather extreme curvature. (If I use this jig on a renaissance lute, the flatter fingerboard means I don't need the wedges.) 

This is the basic posture of the instrument when I glue on the peg box--belly-down on the bench pad, propped up on the stems of the cam clamps. By the time I get the peg box on and a couple of ratchet clamps in place, the lute will be a little end-heavy. I've found that the best way to keep it from tipping over--and at the same time protect the lute from any mishap--is just to lay on pieces of fabric. I have a green velvet piece on the back, topped with a folded sheet of heavy green fabric (which I once used for a photo backdrop.) I'll probably put some towels on top of that too, just to be on the safe side.

To locate the peg box for gluing, I hold it accurately in place and press a piece of 1/2" masking tape over the front of the joint, from the bottom block of the peg box down onto the end of the neck. I will then take a small, sharp knife and cut that piece of masking tape in two, exactly at the joint. When I glue up, I will be able to align the peg box by aligning the edges of the bisected piece of tape.

This is one of the dry runs I do to work out details before gluing up. In a minute, I'll take of the clamps, then check my glue. If it's hot and the right consistency, I'll heat both the peg box base and the rebate with the hair dryer, then brush hot glue on both. Quickly but calmly I'll place the peg box in the rebate, and rub it side to side ever so slightly, bringing the locator tapes into exact alignment. Then I'll place one cam clamp, and snug it, then the other, and then snug both. And that will be that. 

I look for good glue squeeze-out all around the joint. I will also paint some hot glue around all the edges of the joint, so that the glue, as it cools and contracts, will help to pull the two sides of the joint together. (I've used this technique many times during construction; see, for instance, gluing on the neck, in episode 4.)

I think the fitting and gluing went very well, and I'm looking forward to coming in tomorrow morning, cleaning up the excess glue, and seeing how things look. There are a few more little jobs to do before finishing out the peg box and neck, and I will tell you all about them next time. 


Saturday, 18 April 2020

Building a 13 Course Lute, Start to Finish, 16: Shaping the Fingerboard and Setting the Action

Hi friends, and welcome back to the series. Hope you're all well, and taking advantage of the downtime caused by the Covid-19 quarantine to make the art you've always wanted but never had the time to do before. Or tidy up the house. Or do your taxes. Or read a good post-apocalyptic novel.

Here in Vancouver, it has never been a better time to ride a bicycle. The air is clear, birds are singing and the streets are snowed under with cherry blossoms. It is a strange--and in some ways, strangely good--time to be alive.

But I want to go back today to a former time, a time before the Great Hush of 2020. If you recall, I had just glued a curved fingerboard on the 13 course lute I'm building.

I've taken off the clamps, and now--a small problem. I've glued the fingerboard to the neck--but I've also managed to glue the caul to the fingerboard!

I'm pretty sure that the caul is stuck only along the edges, so as I use strips of paper towel to soften the squeezed out glue along the joint, I also try to soften it along the edges of the caul.
Eventually, I get a little impatient and gently tap some wooden wedges in from the sides. The caul comes up with a bit of damage, but it's only to the cork lining, which I can easily replace next time I use it. (Apparently, I placed a gluey thumb down on the fingerboard before placing the caul.) Note to self: cover the caul with plastic wrap!
Okay, the fingerboard edge is cleared of glue. You can see the overhang I have left to remove.
Here's a close-up of the joint. Not bad!
I make a start shaping the fingerboard down at the body-neck joint. I need to plane (very carefully) and then scrape to get the fingerboard close to flush with the belly tongue.

Getting close...
There we are. I don't use any sandpaper around this area, only scrapers from now on.
 I begin to trim the overhanging edges of the fingerboard with a standard block plane.  
The idea here is to get the edge pretty flat along its length, and pretty close to perpendicular to the mid-section of the neck (that is, to the glued line between the mahogany neck core and spruce fingerboard spacer.) Notice how I've got my left thumb hooked over the edge of the neck down by the body, to guard against accidentally whacking it on the recoil stroke of the plane.


Down by the body-neck joint, I set aside the block plane and work carefully back toward the body with a chisel (a skew chisel works well for this job.)
For the opposite side of the neck, drawing the plane toward me is the way to go.
The plane and chisel get me close, but eventually I need to start working with files.
A slight boo-boo with the file: I've chipped out a little bit of the fingerboard edge. This particular piece of ebony has quite swirly, interlocking grain, which is very tough, but also tends to chip and tear out. I need to fix this little problem before I can go on.
I add one drop of cyanoacrylate glue to a little pile of ebony dust that I've made with a file and a scrap of ebony.
I apply it like putty with a palette knife, and wait for it to dry thoroughly.
Then I can go ahead and shape the area with the file. 
Using a straightedge with a strong back light shows me how close to flat the edge is (I like to get it as flat as I can.)
On smaller areas, the file works best...
But over larger areas, a sanding block is the way to go.
That's my edge. I don't know if it's visible here, but I leave the fingerboard just the tiniest bit wider than the edge of the neck. I'll be rounding over the fingerboard edge very soon, and will use that extra half-millimetre or so to blend the underside of the fingerboard into the neck.
Right now, I try to keep the joints and edges square and tight. When I finish out the lute to get it ready for varnishing, I will take an overall approach to the whole lute, rounding over the fingerboard edges, half-binding edges, and so on, hopefully in a uniform and coherent way.
First, though, I have to finalize the action. I've already scraped flush the body-neck area, so I now need to focus on the fingerboard from about the end of the belly tongue to the end of the neck. I'm using a Japanese scraper-plane here, pulling it away from the belly.
This swirly ebony tears out so easily that at a certain point I needed to put away edge tools, and just use sanding blocks. I try to avoid using sandpaper in lute making for both aesthetic and health reasons; but sometimes, with difficult material like this, I just have to surrender to the modern woodworking world.

As usual, to check the action I have pieces of fishing line tied to each course on the bridge; I pull each one tight over a spacer at the first fret position, and then read the height at the eighth fret by slipping wooden spacer pieces under the string. The spacer used at the first fret, by the way, is 1.6mm, which represents the nominal height of the first tied fret (1.1mm) plus the necessary clearance for the string not to buzz (0.5mm).
One other thing: in the photo above, note that I have masked off the upper part of the belly with a couple of pieces of masking tape, to keep ebony dust from contaminating it.

I feel I must pause here in order to try to convey to you the exquisite boredom of the work that I'm about to describe. I don't want to rush over this part, and give the mistaken impression that it's a quick job, Bob's your uncle, and we're off to the next stage. No. This job, shaping the baroque lute fingerboard to set the action before varnishing, is, to me, the slowest, most tedious, most excruciatingly boring bit of business in all of lute making. Here is the sequence:

1. Scrape, or shape with sanding block, all, or some, or small, strategic areas of the fingerboard, in order to lower the action at the nut end and/or the body end of the fingerboard, as appropriate.
2. Carefully vacuum all ebony shavings and dust from the work area. Then wipe the fingerboard (from the body toward the nut end) with a piece of paper towel, to remove the finest dust particles.
3. Re-draw the trajectories of each of the courses as they cross the fingerboard from the body to the nut. Re-draw the positions of the 1st and 8th fret.
4. Pull each piece of fishing line for each course tightly over the 1.6 spacer at the first fret, and slip spacers of various thicknesses under the fishing line at the 8th fret, to gauge the specific string heights of each of the courses. Write these numbers down beside the 8th fret mark.
5. Take the straight edge in hand, and with a strong backing light, hold it on the fingerboard exactly on the marked position of each of the courses and sight underneath it to see where the fingerboard is high, or low. Mark the high spots.
6. Take a moment to consider a strategy in the next bout of fingerboard shaping. How far do I need to go, and in what areas? Is there a discernible pattern--for instance, is the whole central area of the fingerboard high (or low?) Can I work in a larger area, or must I restrict myself to the line of only one course?
7. Begin again at 1. Continue repeating this sequence as necessary, until the action is set, and the fingerboard well-shaped (that is, smoothly curved in cross-section, but very flat in long section.)

Sound boring enough? I don't think so. I'd like to make it more boring, but I don't think I can. You'll just have to trust me on this (or, better yet, try it yourself.)

Here's a bit of an illustration, from rather late in the process. The squiggly lines are the high areas; the numbers are, of course, the string heights at the 8th fret.
Getting the final action is a job that can take an entire day, or more, depending on how well I am concentrating. If I can, I like to bite the bullet and get it done quickly. Ebony dust is bad for my health--I have asthma, and it's become a bad trigger. I wear a face mask, long sleeved clothing, and a cloth tied over my (short) hair. Periodically I need to go to the washroom and wash my face and hands. At the end of the day, I remove all work clothing, put it in a bag, change into street clothes in an outer room, and leave, pausing only to wash up carefully once more before getting on my bike and riding home.

These are my final action numbers for a baroque lute measured at the eighth fret. 
Just a word on that--these are 'final' action numbers before varnishing only. I fully expect to have to re-shape the fingerboard at least one more time before the lute is done. Why? Well, over about the next 3 to 4 weeks, this lute is going to spend quite a bit of time in the UV light box, a warm environment; and even though I'll be running a humidifier in the vicinity, the neck, and fingerboard, will continue to subtly change shape. Not too, much, I hope... But I think I've left myself enough leeway in setting the action thus far, that I will have the flexibility to make some small corrections later on.

By the way, the distance in time between the earlier photo and this one--showing string height differences of 0.1mm--is probably a couple of hours. As I said, very slow work, for very small gains.

Okay. Enough boredom for one blog post. I'll see you all next time, for the finishing out-stage--and perhaps some foundation coats to prepare for varnishing. Stay well, and I hope to see you back here again soon.