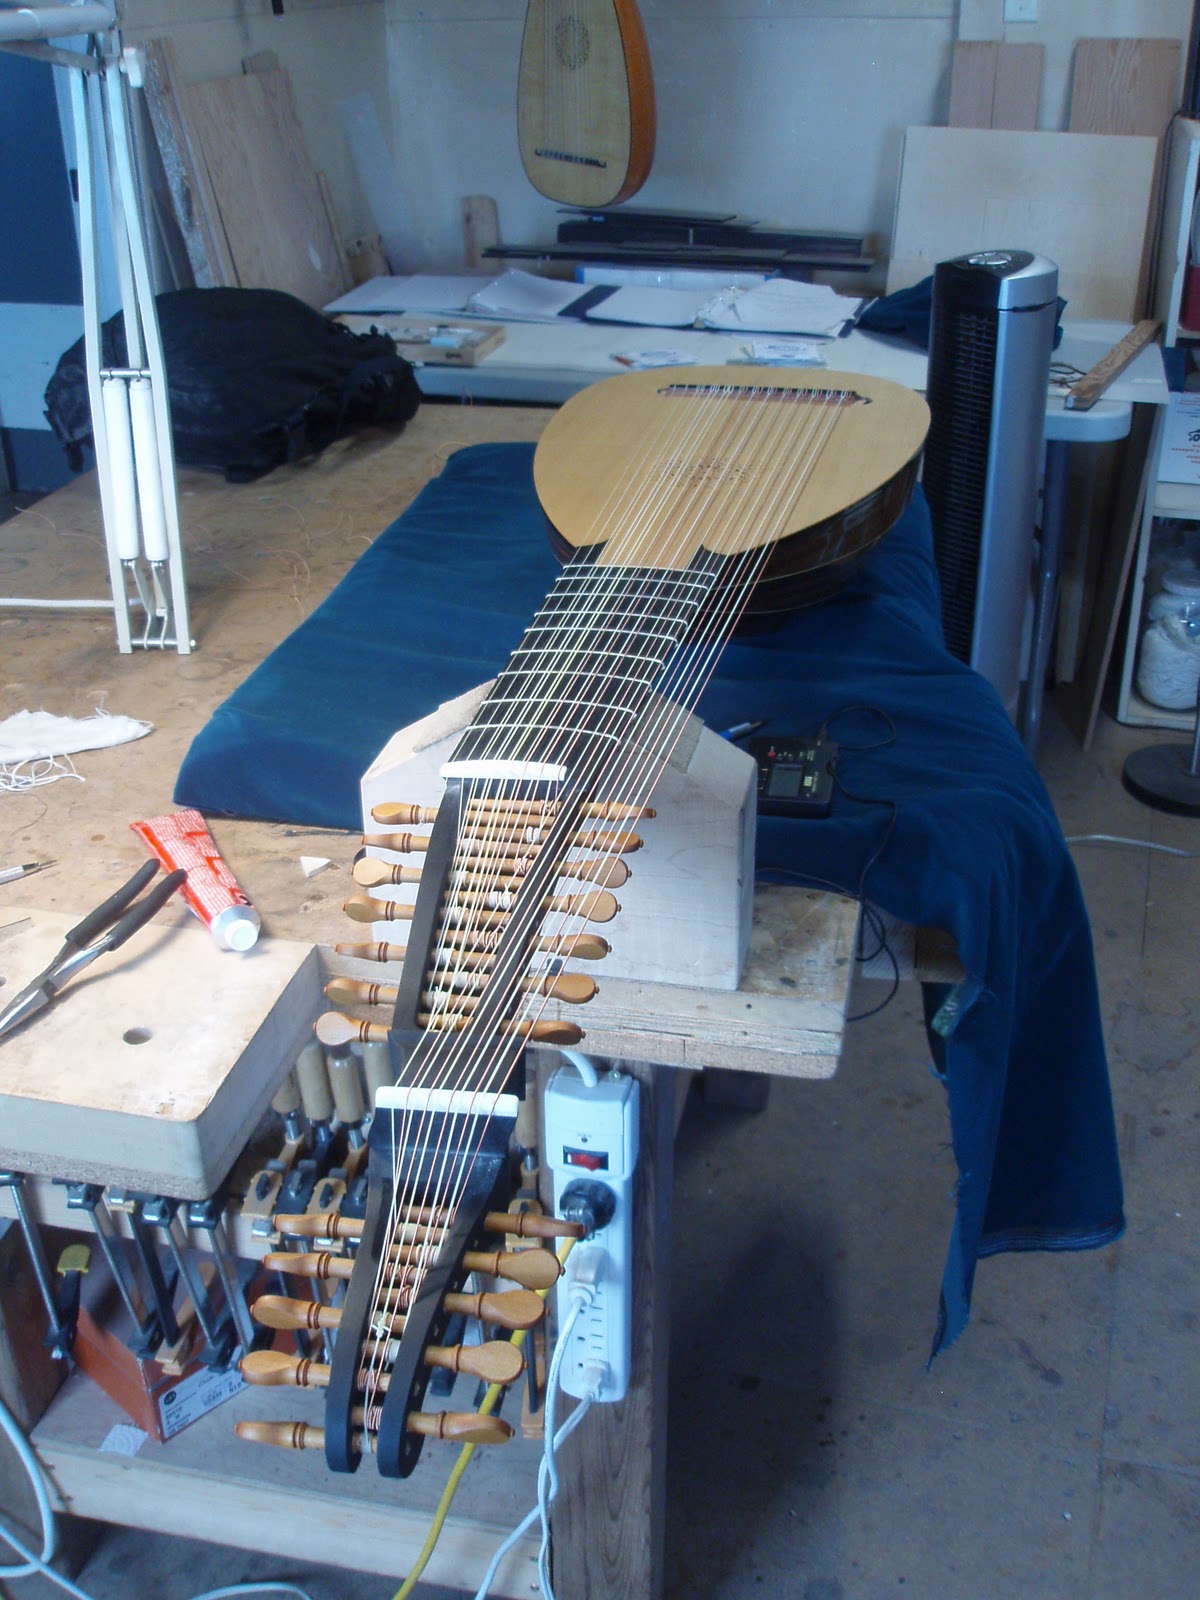
Today, as promised, a brief description of making the Widhalm 'swan-neck' extension--the elegant, elongated double pegbox on the 13 course lute that I completed earlier in the summer.
But why a
Widhalm extension? you ask. Who is this
Widhalm you keep talking about, Travis?
Well, the full name is Martin Leopold Widhalm, Leopold to his friends, and he was a lute and violin maker in Germany in the middle 1700s. Originally from Vienna, he came to Nuremberg to work in the shop of the master luthier Sebastian Schelle shortly after Schelle's death, in 1744. At this time the workshop was being run by Schelle's eldest daughter Barbara. Apparently sparks flew (a dangerous thing when there's sawdust around!), because she and Leopold were married within the year. They worked together to the end of their lives--Leopold died in 1776, Barbara in 1781--making lutes and violins of the highest quality, and they raised three sons who carried on the family trade.
I mention this not just because it's an interesting and happy story of true love in the lute shop (though I am all in favour of that)--it also shows a direct connection between the model of lute I've made and the model of pegbox extension I want to use with it. Whenever I consider the design of an instrument, I try to make sure that my choices are historically informed--that there's some sort of evidence, whether pictorial, or documentary, or physical (a surviving instrument) that supports what I'm doing. I'm not dogmatic about such things, but I do want to guard against creating any glaring historical anachronisms. In the case of the Widhalm extension, it's a good historical fit, but it's also a really good model. If it's executed well, it looks great, and most importantly, it
works.
Anyway, on to the process. And to give credit where credit is due: the method I've used here was shown to me by my mentor, master lute maker Grant Tomlinson. One cannot go far astray with such a generous teacher to show the way!
Begin with an appropriately sized chunk of beautiful, creamy English Sycamore, and two patterns, showing the plan and side views of the extension. Draw the patterns on the planed surfaces of the blank, and proceed to the bandsaw--
I've cut from the side first, but as you'll notice, I haven't cut the waste pieces away completely--I've left little 'bridges' of material at strategic places so that the entire blank remains intact for the time being. This is so I can now lay down the blank flat on its back, and cut out the plan-view shape.
And this is what it looks like after cutting the plan view. I can now take the piece to the workbench and cut away the waste pieces with a hand saw.
And here's what I'm left with: the basic shape that I can now refine with rasps, files, and scrapers.
No sooner said than done! This sycamore is lovely stuff to work.
Next, I locate and drill all the peg holes in the pegbox extension. There are 24 pegs, so 24 holes in each side of the pegbox...48 holes in all... and they'd better be in the right place! Once I've engineered all that, I can use patterns to lay out the areas that I need to carve out. I avail myself of the modern technology of the drill press and forstner bit to remove the bulk of the material, and then I'll finish off these cutaways with hand carving tools.
I need to fit a tall nut on the extension, so I carefully cut a slot and fit a tapered piece of hard maple.
Everything looks good so far--I'll start fitting the extension to the neck of the lute.
The main things to keep in mind while fitting this is that the extension needs to be aligned in two axes, up and down
and side to side--but the joint itself needs to be perfectly fitted.
When I'm absolutely sure that everything is in proper alignment, I can set up my gluing rig, take a deep breath, and glue it in place. As always, hide glue is the perfect adhesive for the job.
To give myself a little extra room for adjustment during the fitting-up process, I've left the root end of the extension a little over-size. Once the extension's glued on, I can carve away this excess, and make a smooth transition between the neck and the extension.
When it's all in shape, I dye the extension black, using a dyestuff called
logwood. It comes in powder form, and it's taken from a South American tree. It's a very reliable, colourfast dye, and it's been in use for a long time (I've read that the Puritans used it to dye their clothing black.)
You'll notice that I'm dyeing not only the Widhalm extension, but also the pegboxes and pegs of a couple of other lutes (the 8c and 11c that I built alongside this 13c). Dyeing is a bit of a messy and involved process, and I try to arrange my work so I can do a number of different jobs all at the same time.
The colour of the dyed extension is a little cold at this point, and so far not a good match with the warmer tones of the ebony veneered neck. The colour changes, though, as soon as I apply an oil finish to the extension. The oil warms up the colour considerably, and now there's a nice match of colour and surface texture between the veneered neck and the extension.
Now we're ready to fit the pegs, fit the two bone nuts, and string up the finished instrument.
There we are! Now all I've got to do is learn how to play the Baroque lute. (So far, at least, I'm a Renaissance man only....) If there are any Baroque players out there, maybe you could leave a comment telling me if I'm at least holding the lute properly!
And that's the end of the process. What I've described here is by no means a blow-by-blow of the entire procedure of making and fitting this extension--I've just given some highlights. The end product turned out really well, and I'm quite happy with the process and the result.
Until we meet again....