Showing posts with label medieval lute. Show all posts

Tuesday, 16 January 2024

The Return of the Betterizer

 Hi. I recently experienced a tiny brainwave in my workshop, and I'd like to share it with you.

I've got a couple of lute backs here, and both are for a 5 course late medieval plectrum lute. The one nearest is made of curly ash; the one behind is of curly sycamore.

In the foreground is a contraption that I have described in a previous post, a locking turntable and block that are screwed up to the underside of the lute mold, and then held in a large ratchet clamp in my bench vise. The setup looks a little ungainly but it works great, since it allows me to hold the mold in practically any orientation. It's very useful when I'm building the back, fitting and gluing ribs, and working side-to-side (that is, working alternately on bass- and treble-side ribs), since I can simply loosen the knurled nuts under the turntable to spin the mold around. It's even more useful when I'm carving a lute mold, because that's an operation where it's helpful to see and carve the developing shape from as many angles and perspectives as possible.


So here's my brainwave. I decided to try attaching this universal-joint contraption to the lute back after it's been taken off the mold, to see if I could use it for scraping the back, resolving the rib lines, and giving the back a beautiful shape.

Now, I always do some initial filing of rib joints and scraping of ribs while the back is still on the mold; it's necessary, for instance, to get a shape that's pretty close to perfect at least on the bottom end of the body, in preparation for fitting and gluing the capping strip. 

But once the capping strip is glued on, I'm usually happy to get the back off the mold and reinforce it from the inside: glue paper strips on all the rib joints (and sometimes across the ribs too), glue in the counter cap, fit the false belly, and so on. Generally I don't work with the shape of the back again until later in the construction process, when I'm finishing out the whole lute in preparation for varnish.

The trouble with leaving rib/ body work till that late stage is that by then I'm working with an almost fully assembled lute, and there's no way to hold it completely steadily. The best way to hold it securely is in my lap, against the padded edge of my workbench. And as you can see, that puts me in the middle of a lot of wood dust (which I'm becoming more and more sensitive to every day.)


So, in an effort to separate me a bit from that cloud of dust, I thought I might try doing some of this work earlier in the process, by holding the back steadily in the vise.

Here's what I came up with. The false belly--the closely-fitted piece of panel board that temporarily maintains the shape of the body during the construction process--has been spot-glued into the completed back. I then pre-drilled four screw holes.


I screwed the block/ turntable assembly to the false belly, with a coupe of #10-2" screws. 


I then mounted the thing in the clamp in my bench vise. My only question at this point was whether the whole thing would be tight and sturdy enough to withstand the pressures of being worked on with files and scrapers (or whether, for instance, the spot-glues on the false belly might not hold.) The answer is: yes, it is strong and steady. I feel I need to be a little careful in handling the back when re-positioning it, but otherwise the assembly is very stable. 


That's my brainwave. It doesn't seem like a big deal, does it? And yet in a way, it is. It gives me a little more flexibility in assembling lutes, because it allows me to change up the sequence of construction. So, instead of waiting to the very end of the building process to resolve and tighten up all the rib lines, I can do it earlier on, and with more control. Or, I can do it later. It doesn't matter. The important thing is, I now have the choice. And the best part is, it didn't cost me a dime!

As some of you may know, I love betterizing: taking a contraption and adding to it or modifying it to extend its life or usefulness. I encourage you to betterize in your own workshop, and share the news with the world.

Here's a short video I made of the contraption in action. Enjoy.


Tuesday, 12 July 2016

The Backside of an Angel

Greetings! I was recently in Cleveland for the Lute Society of America Lute Fest, our biennial celebration of all things lute.  You may have seen photo and video highlights posted to the LSA Facebook group, or the LSA website. As always, a fantastic time was had by all--classes, concerts, lessons, lectures, much fellowship and affection all helped to create a beautiful world for a week on the Case Western Reserve University campus. If you haven't attended the LSA Fest, you should make plans to be there in 2018!

One thing that I've always loved about attending the LSA Festival at Case is the proximity to the Cleveland Museum of Art--it's literally a ten-minute walk from the dorm where the Lute people live. The last couple of times I've attended the Fest, I've elected to arrive a day early, just so I can go check out what's happening at the Museum.  In 2014, there was an amazing exhibition of prints by Albrecht Dürer, an artist who's dear to the heart of lute makers everywhere.  This time, there was something (dare I say) even better for a complete lute-nerd like me: a selection of single, large, illuminated vellum pages from Italian choir books of the 14th and 15th centuries.

Of course, when I learned about this exhibit, I headed straight there, looking for images of lutes (and other musical instruments)--and I found them.  I'm not sure how many individual pages were on display in the small gallery--maybe twenty at most--and probably a third of them had initial or marginal illuminations that included angel musicians.  Among those, there were at least three pictures of lutes, all very good, and one which I consider to be a iconographical discovery of some consequence--to me at least.  Let's have a  look!

First up: one that I think I've seen before, probably in Howard Mayer Brown's "Catalogus: A Corpus of Trecento Pictures with Musical Subject Matter," a series of articles published in the journal Imago Musicae in the mid-1980s.  (I discussed this article in a previous blog post, Designing a Medieval Lute.)  Here's a pic of the entire choir book page, whose origin is Bologna and which dates to 1408:


And here's a close-up of the illuminated initial E, showing King David playing a long necked lute.  There are a few things to note about the lute, even though not much detail can be seen in the photo: it probably has four courses; the neck is probably fretless; the bridge and rose are positioned low on the belly. The two main points of interest for me are the length of the neck in relation to the body, and the curved joint between the neck and the body. Of the latter point, I would also note that there appears to be a body-neck joint clearly marked on the lute, suggesting at least a separate fingerboard, if not an actual separate neck (which is joined to the body, rather than the body and neck being carved from a single piece of wood).


Moving on: a marginal illustration from a Mass of the Dead, from 1480s Ferrara, by Jacopo Filippo Argenta.  The entire page is magnificent, dominated by the large historiated R with a realistic scene of a priest and acolytes in a chapel, standing over the body of the deceased, reading the Office of the Dead.


One could get lost in the extraordinary detail of the entire work, but my eye moves almost automatically to the bottom margin, where we find two angel musicians, one with a lute.


What kind of lute is it? Hard to tell, but I would say it has four, perhaps five courses; the body-neck joint is blunt, suggesting that the neck is a separate piece joined onto the body; and the right hand position, while not exactly clear from my photograph, suggests the possibility that the angel might be playing with his fingertips, rather than with a plectrum. All of these features are what one might expect to find in a picture from the 1480s, a time of transition for the lute, when playing technique was evolving from single lines played with a plectrum to polyphonic music played with the fingertips.

And now to the third lute picture, my favourite, and to me the most exciting of the bunch.  It dates from the 1370s, and is the masterpiece of Don Silvestro dei Gherarducci, a Camaldolese monk who produced this illumination for a multivolume set of choral books for his monastery of Santa Maria delgli Angeli in Florence.  Here it is, in all its splendour, a magnificent illuminated G (which would have introduced the text Gaudeamus omnes in Domino, "Let us rejoice in the Lord"):


Indeed, let us rejoice--and let us focus on the extraordinary depiction of the angel musicians at the bottom of the page.


What have we here? Five kneeling angels, with their backs turned to us, the two farthest away apparently without instruments (perhaps they are singers), the three nearest to us playing fiddle, portative organ, and lute.

It's a pretty common combination of instruments in pictures from this period, but what makes it extraordinary to me is the fact that the musicians are shown from the back side. Frontal depictions of such musical groups are (to put it crudely) a dime a dozen; this is the first one I've seen that shows the rear view of these instruments.  And to me, the depiction is (sorry!) highly illuminating.

I'm not sure what modern makers of medieval fiddles might have to say about this picture, but from what I've seen of modern recreations of this instrument, the depiction looks pretty accurate. The head stock appears quite clearly to be hollowed out from the back, which I think is the way most modern versions of this instrument are built. Why are they built this way? I don't know--maybe there is other iconographical evidence somewhere, or surviving historical instruments, that show this feature. (If there are any medieval fiddle makers reading this post who can comment, please do so at the bottom of the page. I'd appreciate it.) At the very least, I think the reasonable accuracy of the fiddle in this picture lends credence to the rest, including the lute, which is what I'm most interested in.

So let's have a look:


To me, this picture is a treasure trove of information.  The positions of both arms and hands suggest much about the playing technique being used: the left thumb wraps around the back of the neck, which I take as indicative of single line playing, 'ud-style, on an unfretted neck, while the right arm wraps around the very bottom end of the lute, bringing the right hand and forearm parallel to the strings, in perfect position for playing with a plectrum. In fact, to me this picture suggests a playing position very much like the one shown in another picture from roughly the same time period, the Coronation of the Virgin by Andrea Di Bartolo, from the Ca d'Oro in Venice.

Here's the big picture:


And here's the detail of the angel with the lute:


They could be the same angels--they could be the same lutes!

As some of you may know, I made a five course unfretted medieval lute based on this painting a couple of years ago--and I wrote about the process of designing and building it on this blog (as I mentioned above, the post is called "Designing a Medieval Lute"). To refresh your memory, here's what it looked like--from the front:


In my description of my process, I lamented the fact that when designing a three dimensional object using a two dimensional model like this painting, all you get is a plan view, without any information on things like the depth of the body, the materials used, how many ribs it has (if indeed it is built of ribs, and not carved out of a single block of wood). For my model, I chose to build lightly and simply, using nine ribs (the least number that's practical) and a semicircular cross section.  Here's what I got:


I thought this lute turned out really well as a musical instrument, and I've always felt that it was very plausible from a design point of view, but I've never had support for this opinion until now. I think the rear-view illumination that I found in the Cleveland Museum of Art confirms much of what I decided to do with this instrument. A direct comparison:


The bowls look very similar. You can't quite count the ribs on the lute in the painting--the angel's arm is in the way--but nine seems right. And even the shortened capping strip at the bottom of my lute seems to correspond to the painting.  As well, the overall rounded shape of the body seems very similar to me--I think they're near-twins.

The only real difference between them seems to be the peg box--mine is tapered and the back is closed (that is, it's covered with a plate), while the one in the painting is more square, and the back is open. It also appears to have 7 or possibly 8 pegs, which would make it a four course instrument. But I think the peg box in this painting matches very closely the one in the Di Bartolo painting, in the square-ish look, the number of pegs, and the style of the peg head (which to me looks sort of heart-shaped.)

So that's my story.  I realize that as a lute maker I get excited about things that probably don't matter much to the vast majority of humanity, but I guess that's one of the reasons why I make lutes! A little discovery like this pleases me much, and it's like a little miracle, one that's made possible by the fact that the Lute Society of America has its Lute Fest in Cleveland every two years.  Really, next time around you should come and join us. It will blow your mind!

Sunday, 13 July 2014

Designing a Medieval Lute

Note: I've recently written a new blog post that reviews some of the aspects of iconography and lute design that I've discussed here. Check it out: The Backside of an Angel


Today I'd like to talk about how I designed a recently completed 5 course fretless medieval lute. This instrument is the culmination of a couple of years of research, thinking, discussion and design with the client, Gus Denhard, of Seattle—a fascinating journey which (as always) I hope has yielded a playable and convincing musical instrument that the owner will get a lot of mileage out of.

Initial discussions between Gus and I focused on the basics: the size (and pitch) of the instrument, number of courses (5, instead of the usual 4), tuning (in fourths), and so on.  Gus didn’t have a specific design in mind, but he did have a firm idea of how he wanted to use the lute, which was to explore, with his musical collaborators, the connections between European and eastern/Arabic music of the Middle Ages.  The lute's a natural for this, since its direct ancestor, the 'ud, was brought to Europe by the Moors about a thousand years ago.   The modern 'ud, and what we now call the renaissance lute, are both descended from this early 'ud, and are therefore very close cousins.  My hope was that by judiciously combining certain features of both these instruments, I could perhaps find a way back to that common ancestor.

The main problem in designing and building an instrument like this is that no historical examples of such an early lute have survived.  Probably the earliest surviving European plucked string instrument, the gittern by Hans Ott of Nuremburg, dates to about the mid-15th century, and that's about as far back as we can get.  For anything earlier than that--say, one or two hundred years earlier, which is approximately the period Gus and I had in mind--we really need to rely on iconographic evidence.
Hans Ott giettern (photo courtesy of Wikimedia commons)
But which iconographic evidence?  Depictions of lutes abound from the middle ages--in altarpieces, manuscript illuminations, frescoes, wood carvings and so on, in a seemingly unending stream.  One piece of advice that proved invaluable came from Crawford Young, the early lute scholar and performer.  Actually, it was two pieces of advice: build the instrument lightly, he said (more on this later); and for a model, look at Sienese pictures from the 14th century.  He also narrowed the search further, by suggesting I consult Howard Mayer Brown's "Catalogus, A Corpus of Trecento Pictures with Musical Subject Matter," a series of articles published in the journal Imago Musicae in the mid-1980s.  What a resource!  I heartily recommend it to anyone interested in the subject: a near-exhaustive collection of pictures, indexed by artist and type of instrument depicted, all keyed to a list of thumbnail versions of the pictures.

I located the journal at the University of British Columbia library, spent a day up to my elbows in pictures, and emerged with one good depiction of the kind of lute that I thought would work.  Here it is, a Coronation of the Virgin by Andrea Di Bartolo, from the Ca d'Oro in Venice.


And here's a close up of the lute.  Why did I choose this particular picture as my model?  Well, there are a number of details that led me to believe it might offer a viable design.  First, it seemed to be of a size (in relation to the angel holding it) that could work for a lute with a string length of around 60cm, with the top course tuned in g', which was Gus's request.  It also had a ratio of neck length to body length that would allow for the equivalent of around 5 or 6 frets on the fingerboard, and 8 to the upper soundhole rosette (another of Gus's requests).  So the proportions seemed right, and indeed, when I put together a drawing using a compass and straightedge, the body outline conformed quite nicely to some simple geometry, using whole-number ratios to draw circles and arcs.  That in itself is a convincing detail.

But much else in the picture looked appropriate too.  The bridge had a nice shape, and looked a lot like the kind of bridge you might find on a modern 'ud.  The scratch plate in front of the bridge was another 'ud-like detail.  The soundhole rosettes are simple (in comparison to those that we see in renaissance lutes), but they're elegant, and their simplicity is more than balanced by the busyness of the rest of the design, including the soundboard edging (which looked to me like a kind of 'herringbone' binding), and the tilework inlay in the soundboard.

I found another example of this type of lute (not, incidentally, in H.M. Brown's article, but on flickr).  It appears in a fresco among a group of musical instruments (including a gittern) by Lippo Vanni, in the Church of San Lorenzo al Lago.  The larger image first:

And then the detail.  The picture resolution is not great, but you get the idea: two soundhole rosettes (both of simple design), bridge with scratch plate out front, tilework inlays, binding all around the top, and curving neck joint (rather than a blunt joint, as one finds on a renaissance lute).  All very similar to the image I used for my design, and confirming for me a lot of the features, both functional and decorative, that I decided to include.

So I had the model--now to design and build the actual lute.

One principle to keep in mind when working with an iconographic source is that a painting is not a photograph.  Parts will be exaggerated, and proportions distorted, to create an effect specific to the painting.  In a way, that's frustrating, because you can't just copy the image, but in another it's liberating, since you have to trust your own sense of proportion and your knowledge and experience of what will make a good, playable, working instrument.

That's nowhere more true than with the back side of the lute.  All a painting like this gives you is the plan view--it gives no information on the body, how deep it might be, what shape it has, how many ribs it has, or even whether it's built up from separate ribs at all (maybe it's carved from a single block of wood).  In designing the lute, these were the first big decisions that had to be made.

I took to heart Crawford Young's advice to build it lightly, and that meant, first, building a ribbed back, rather than carving the body from a solid block.  A simple aesthetic seemed right to me, so I went with 9 ribs (about the smallest number that's practical), and kept the longitudinal section basically the same as one half of the plan view (in other words, the body is pretty much semicircular in cross section.)

With the body designed, I turned my attention to the soundboard, and its many features--bridge, scratch plate, rose designs, tiles and binding.  All of these things needed their proportions re-imagined to match each other, and to match the scale of the whole instrument.

The first element that I tackled was the herringbone edge binding.  In fact, I think that was the very first thing I made of the entire lute, before the body or anything else.  It became a minor obsession, because I needed to make sure of two things: one, that I could manufacture the binding (actually two identical  bindings, one for each side of the belly), in a width that was right for the lute's proportions; and two, that I could bend it to fit around the edge of the belly, without it falling to pieces under the stress and heat of the bending iron.  If I could figure a way to do those things I'd be fine, but if I couldn't, I was pretty sure I'd need to rethink my whole concept of the lute.

The binding turned out well, and so I felt free to build.  Most of the other features I figured out as I went along, and as they emerged in the building process.  The bridge design, for instance, was a product of three influences: the overall shape came from the painting, the width derived from the string spacings that Gus had provided, and the height and other dimensions were adapted from my observations of modern 'ud bridges.  The roses needed a bit of redesigning to better balance the ratio of negative to positive space; they also needed to be repositioned, slightly, to accommodate the body shape I'd created, and the internal barring system I'd worked out (you can read about the barring system here.)  Once I had the sizes and positions of the bridge and roses, I could then size, position and glue the scratch plate.  And once that was in place, I could create and position the four tiles that really give the lute its characteristic look.

The tiles were fun to design, and to make.  The photo I had of the painting was not of a sufficient resolution that I could see very well what their actual design was, so I was left to come up with something that would create the impression of the tiles, while fitting in with the proportions of the rest of the lute.  Once again, it can be a bit of a hassle not to have things spelled out for you, but it can also be quite liberating.
 The same principle applies to the peg box, which is not detailed in the painting, and is therefore free to be imagined.  I decided on slightly curvy peg box, in homage to the elegantly slim peg boxes on modern 'uds; I also designed a simple, square-ish peg head to go along with it.

There's one last feature of the design that I'd like to mention, and that's the smoothly curved joint between the body and the neck.  You see this type of joint everywhere in the iconography of the period, so we know it was commonly used, but figuring out why it was used, or why it continued to be used for so long, is a bit problematic.  It gives the whole lute a very organic shape (rather like a bulb of garlic), and to me, at least, it's pretty easy to see its evolutionary origins first in instruments made from gourds, and then, later on, in instruments whose neck and body are carved from a single piece of wood.  This is the case with the Hans Ott gittern, and, one suspects, most other gitterns of the period; it's also easy to imagine that up until a certain point, lutes were made this way too.

However, somewhere along the line,  someone decided to try for a different sound, something a bit more refined, a bit more responsive, and rather than carving the back from a single piece, built it from separate ribs--and attached the neck after it was made.  A different kind of lute was born.  But why preserve that old-style neck joint?  Isn't it incredibly difficult to bend the rib in two different directions, and still get a good, close fit between them?
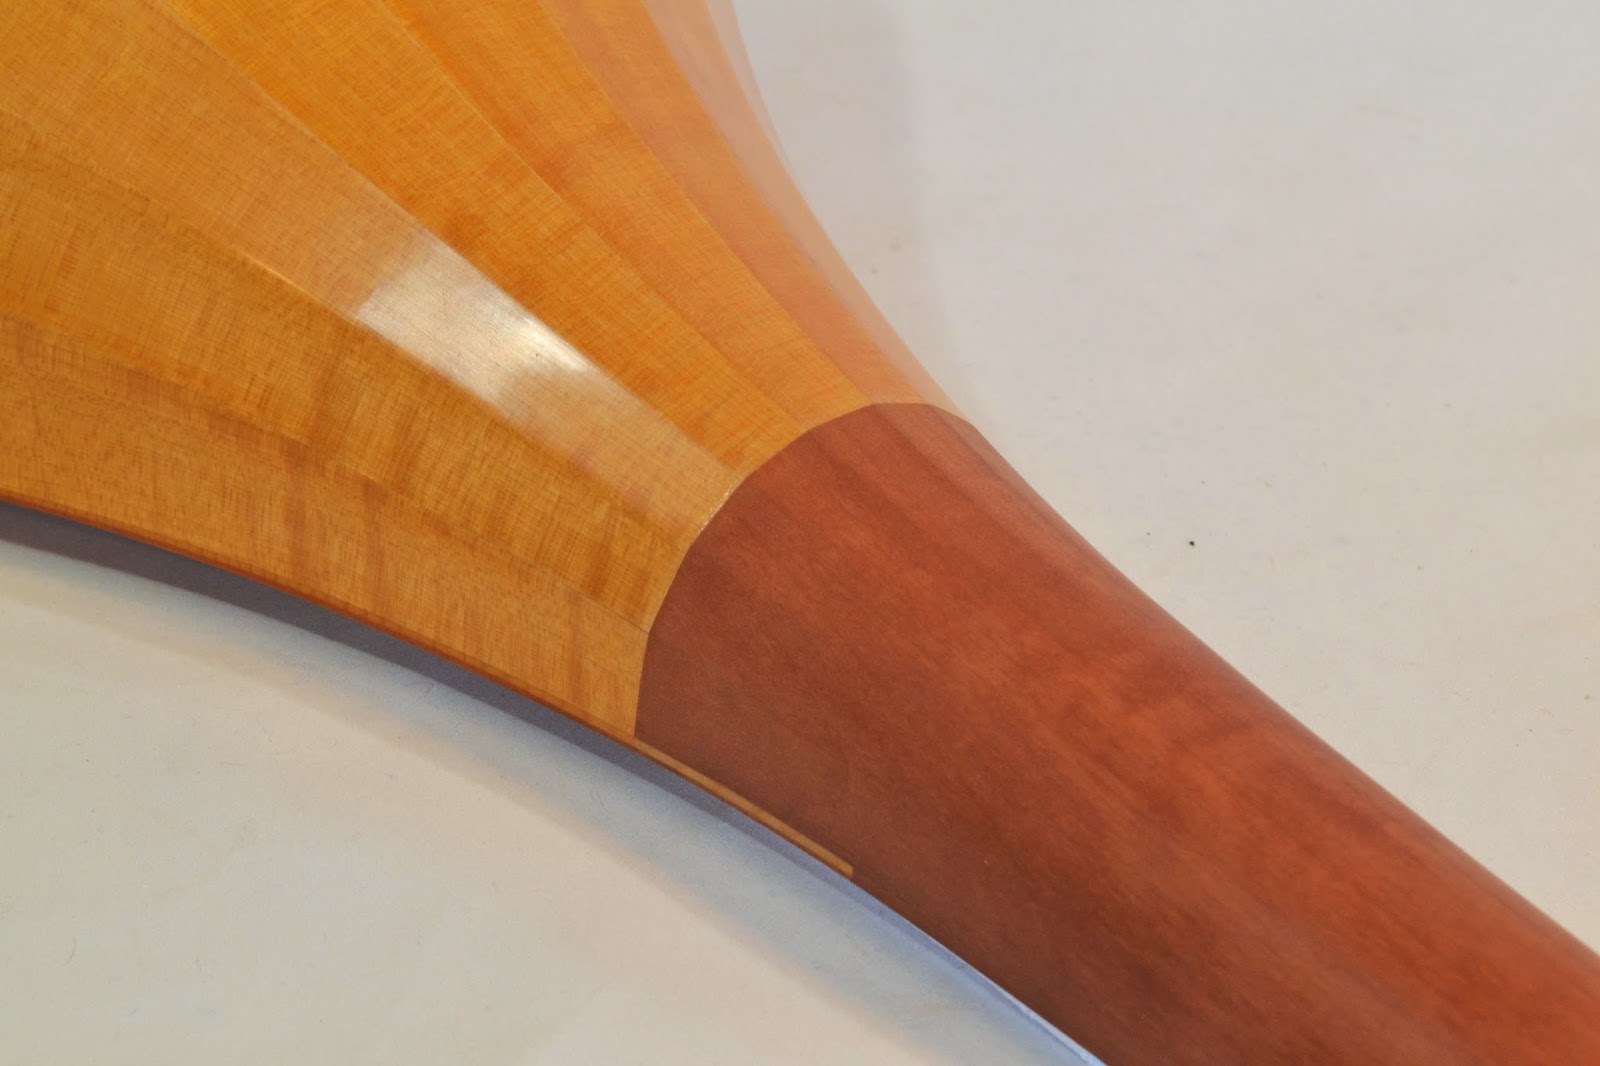
The answer to that question (as I found when I built the back) is that, yes, it is difficult, but not incredibly so.  In fact, I was a little surprised at how (relatively) easy it was.  The rib joints looked good, as did, indeed, the whole back, and the whole instrument.  Like much else about this lute, it represented a technical challenge that I was eager to accept.  (This is the way that I push myself to keep developing and refining my craft skills and why, even if I'm never asked to build another one of these lutes, it was well worth my while to do so this time around.)

And why did this kind of joint keep being used long after it was convenient to do so?  In my opinion, two reasons.  First, tradition is a very powerful thing: if the joint has always been made this way, why should it be changed?  Second, the joint itself feels very slick, and, I believe, lends itself to single-line playing up the neck and onto the upper part of the soundboard.  The joint, in other words, fits the music that was (and will be) played on it.

I hope this account has given you some idea of the kinds of choices I made to design and build this lute.  Most of the choices are, fundamentally, pragmatic ones, and have ultimately to do with the playability of the instrument: the width of the stringband dictates the size of the bridge and width of the nut, which both in turn dictate the dimensions of the fingerboard and neck, which then affect the size and contours of the body, which then, in turn, dictate the size and proportions of the decorative features of the soundboard.  Everything is of a piece, and all the features are based upon the body, hands, and technique of the player.

That player's name is Gus Denhard, and he drove up from Seattle about a month ago to pick up his new lute at my workshop.  His initial response was quite positive, and I'm looking forward to hearing from him in his musical journeys with this lute.  My impression throughout the design and building process was that the music and repertoire for this instrument were not already known, but were to be discovered, and for me that was an exciting feeling.  Without the spark that Gus provided, I may never have built an instrument like this; his encouragement and enthusiasm allowed me to follow my instincts, and try new techniques and designs.  He's promised to send me some musical postcards from his journey, and as he does, I hope to share them with you.