Showing posts with label barring. Show all posts

Thursday, 2 January 2020

Building a 13 Course Lute, Start to Finish, 12: The Fingerboard Spacer; and, Preparing to Glue in the Belly

Hello, friends--I hope you're enjoying a fine holiday. I'm in the midst of travels these days, but I thought I'd put together a little treat to celebrate the new year.

As the title of this week's post indicates, I'll be dealing with two themes today--gluing and shaping the fingerboard spacer, and preparing to glue in the belly. They are very closely related, and really need to be done in tandem (and I think they're best described in tandem), since the shape of one essentially dictates the shape of the other. 

At the outset of this series, a reader posed a fundamental question that I've been coming back to ever since: how different is building the baroque lute from building the renaissance? My answer: very different, and though the differences are many they all find their source in the shape of the fingerboard. If you've been following the series, you'll know that at practically every step of the way I've been making allowances for and anticipating its arrival--I've taken account of it in checking the neck angle and developing action; I've arched the belly in subtle ways by gluing curved braces across it; and I've curved the bridge slightly, during both the making and gluing of the bridge, to match that belly arching. Now it's time to see how all that preparatory work pays off.

For those who may not know, one of the distinguishing characteristics of a baroque lute is its sometimes very highly curved fingerboard. The amount can vary, but I've designed this lute to have a fingerboard arch of around 4.5mm at the nut end, and around 2.5mm at the body-neck joint. Compare that to a renaissance lute, which, depending on how many courses it has and consequently how wide the neck is, might have an arch of around 1mm or less at the nut end, and about 0.5mm or less at the body-neck joint. On a renaissance lute, this curvature is achieved by gluing down a thick piece of ebony for a fingerboard--between 3 and 4mm thick--and planing the curve directly into it. However, this option is not available on a baroque lute, since for the curves I'm looking at, the piece of ebony would need to be somewhere around 7mm thick. The result would be a) a very heavy neck; b) a ton of work to shape the piece; and c) a terrible waste of a precious material.

The solution to the problem is to glue and shape a piece of strong, stable, light material on the top of the neck--a fingerboard spacer--and then, ultimately, cover that with relatively thin piece of ebony (as we'll see in a later episode, around 2mm thick--barely more than a rather thick veneer.) The material I use for this fb spacer is sitka spruce--which is strong, stable, light, readily available locally, and easy to work. Here are some process photos to show how I glue it on.

On the left is a caul that matches the twist I've planed into the neck's top surface (see post #8 in this series for an explanation of that.) The fingerboard spacer is on the right, and will be glued onto both the neck and the top block. It's a bit oversize in length as well as width, so I've masked off the upper portion of the body to keep glue from dripping down inside.

After lots of dry runs (where I figure out how many clamps to use, what sequence to use them, where to set them, etc.), I'll warm the parts up with a hair dryer, paint glue on both surfaces, and then put them together and clamp. With such a big gluing surface things will tend to swim around a bit during clamping, so I need to check frequently as I tighten to make sure all the pieces end up in the correct position.

I paint extra glue on the outside of the joints--as I've mentioned before, the glue shrinks as it dries, and will help to pull together the edges of the two pieces.

Careful planning--and lots of dry-run rehearsals--help me to achieve a nice orderly result.

Next day, I clear away excess glue on all edges, and then trim the piece. I begin by cutting off excess length at the top block and the nut.


Then I trim the sides--first with a knife...


...and then with my trusty low-angle block plane (and a lot of wax on the sole.)

I leave a small bit of excess along the sides, but trim the ends very closely.

Now with templates I can lay out the fingerboard profiles at the body end... 

...and at the nut end.

And then I can get to work putting a good shape on the thing.

It can be handy, when doing so, to chamfer down to the line with a sharp chisel.

As I near the shape, I start working with rasps, then files, then finally a sanding block.

Although the surface is curved in cross-section, it must be kept very close to flat in long section. As I'm working, I draw (and re-draw) lines that follow the layout of the courses in order to keep track of the flatness. 

The straightedge held on each line, with strong light behind, shows the developing profile clearly.
Here's what the edge of the shaped fingerboard spacer looks like (I put a piece of paper behind to show it more clearly.) The spruce is feathered out pretty precisely to meet the edge of the neck veneer.

There's the nut end profile (sorry for the lack of focus!)
And here is the profile at the edge of the top block. You will notice that at each side of the fingerboard spacer, the ends of the curved profile meet up, rather bluntly, with the flat top block surface. I'll need to ease the corners of the top block a little, to continue and blend in the curve gracefully.

In practice, that means I also need to ease (slightly) the edge of the outside rib. I use a sanding stick for this little job--just a strip of particle board with a piece of sandpaper stuck to the end.

Here's what it looks like without me in the way. It's long enough to use lengthwise as well as across the body, and it keeps the top surface of the edge rib pretty flat while I'm shaping the contour. 
This is the kind of shape I'm looking for--the curve of the fingerboard spacer extends to the outer edges of the top block, and that curve blends smoothly into the forward part of the edge rib.

It's time to see how the belly looks inside the body. You can see here how the arched braces I glued to the upper part of the belly  match the arching of the fingerboard spacer. So far, things look good.
Two other things I'll be paying close attention to are, first, how the belly fits into the curves that I've just shaped into the top block/ edge rib area, and second, what the action looks like. This is the very first time during construction that I will be able put on an actual string and stretch it from bridge to nut to see what the true string height above the fingerboard will be. It's a bit of an exciting moment!

Here's what it looks like. I've marked the string spacings at the nut, so I know exactly where to stretch my piece of nylon fishing line. I've also marked the positions of the first and eighth fret, which is where I want to put down wooden spacers to get a representation of the action of the lute as it is now (and how much I need to adjust it before I can glue in the belly.)

Another view. Notice two things in this photo: my collection of very accurately made wooden spacers (I've made them in sets of ten, graduated in tenths of a millimetre); and the leather collar on the tip of my index finger, around which I can wind and pull tight the nylon line without it cutting into my finger.
A quick word about the method used here to check the action. The spacer I use at the first fret represents the theoretical height of the string above the finished fingerboard, so when I stretch a nylon line between it and the bridge, I can slide a spacer under the string at the eighth fret to derive the exact string height. I measure the action this way for the first eight courses only. What I'm looking for--what I'm hoping for, actually, when I do the preliminary action check at this point--is an action that does two things: first, rises very gradually by a small amount from one course to the next; and, second, is overall very slightly higher than the action I am hoping for, before I glue in the belly.

My initial assessment of the action is that, as I hoped, overall the action is slightly too high. However, I've also noted that the action of the middle courses--roughly courses 2-7--is a little bit low, relative to the outer courses. The arch of the fingerboard spacer is a bit too high down at the lower end, so I'll need to remove the belly and do a bit of reshaping.

During the re-shaping process, it's handy to use a contour gauge to get a clear look at how sweet the fingerboard curve is. (I also use this gauge to 'take notes' on the developing arch, by tracing the shape into my notebook.)

I write notes and squiggles as I work, to indicate where I need to remove (or not remove) material.

Here's how the action ended up looking after I had finished up re-shaping the spacer. As you can see, the action rises gradually--by 0.1mm from one course to the next. This looks very good to me. 
The action across the string band looks good, but as I said above, it's all a little bit high--about 0.2mm. This is a good thing--I've been planning for and anticipating this all through the building process. It means that I'll be able to lower the action, in a very controlled way, to get it to the exact place I want before gluing in the soundboard.

In order to lower the action at the 8th fret by 0.2mm, I'll need to lower the edge rib by about 3 times that amount--somewhere around 0.5 or 0.6mm. It's hard to say exactly; all a person can do is start shaving it down, lowering it a little, then taping the belly back in, and checking the action.
To give a little visual guidance, I use a marking gauge with a sharpened pencil lead to mark a line about 1mm away from the edge, all the way around the bowl.

Then I get out my low-angle block plane and get to work. Most of the material I remove will come from around the location of the bridge--say, the bottom third of the body.

As I come up around the sides, I'm looking to blend in with the curve already planed in the edge rib (the 'belly scoop'--see episode 2), including the curves that I've just made on each side of the top block.

I use the sanding stick to blend in the work I've done with the block plane, and make nice, even transitions all the way around.

The only way to get a clear look at my progress is to tape the belly in place, and check the action. I will do this two or three times--removing some material from the edge rib, taping in the belly, and checking--before I get the action to the place I want. 

I want to make sure the action has come down equally on both sides, there is still a good belly scoop, and the curves and contours I've shaped into the edge rib are smoothly integrated. It's tough to show this in a photo; here's my best effort.

I think this is a good point to leave things for today. There are still about a dozen little jobs to do before I can glue in the belly; I'll show them all next time, and I'll show how I glue the belly in as well. This episode has not been the most spectacular or dramatic, perhaps, but I trust it's shown the kind of detail and concentration needed to bring together a lot of different strands of the building process. What I've shown in this post is essential work in creating a playable instrument.

Happy new year, everyone!


Saturday, 30 November 2019

Building a 13 Course Lute, Start to Finish, 9: Fine-fitting the belly, Locating the Bridge

Hi there, friends. This time out, as the sign says, I'm going to talk about fine-fitting the belly into the waiting body of this 13 course lute, and then locating the bridge. I've already done a 'rough' fit of the belly, by doing a preliminary trimming of the bar ends; now I'm going to get down to the business of giving this lute a sweet shape that corresponds to the outline that I drew on the belly a couple of episodes back, before I glued on the braces.

Just before I do, could I ask a small favour? I get a few comments and questions regarding these blog posts. Some--though very few--appear in the actual comments section of the blog; most have come to me either through social media, personal messaging, or email. The favour is this: if you have a question or comment, would you mind leaving it on the blog, in the comments section below? I'm happy to answer, but I would prefer to do it here, so that those questions and answers become part of the post, to clarify, correct, or otherwise comment on it--for the benefit of all readers.

(There's no reason to be embarrassed to ask a question, but if you'd rather not use your real name, please feel free to use a pirate name or your luchador alias. Your secret's safe with Google.)

On with the show.

As you might recall, when I initially cut off the bar ends I left them a bit long, on purpose. It's difficult to saw the bar off at exactly the right spot on the first go, so that the length of the bar and the angle of the cutoff are both correct. I leave them a bit long, so that I may trim them more carefully, using a small chisel rather than a saw.

To figure out exactly how much to trim them, I need to fit the body down over those bar ends. So, the first thing I need to do is remove the false belly, which I do simply by slipping a palette knife around the false belly edge, separating it from the rib where I originally spot-glued it with weak size.

I then set the edge rib carefully down against the ends of the bars. The photo below shows how I hold and view the work, though I haven't quite got the edge rib all the way down yet (that's one of the problems with using a camera with tripod and 8-second timer--I don't always get the event staged exactly as I want to.)

Imagine about one second into the future: the edge of the rib will be down against the belly, and the ends of the bars will be resting against the inside surface of the edge rib. I can then take a sharp, soft pencil, and make a mark on the belly, right against the rib, opposite each of the bar ends.

Please keep in mind that during this process, I'm not attempting to press the entire outline of the lute down over the bar ends (since the all the bars are over-long, it won't actually fit.) Instead, I do it in three sections. In the photo above, I'm working with the bass side. When I've made marks for all of the bar ends there, I'll turn everything around and mark the treble side. Finally, I'll work with the bottom of the body, and mark out the bar and tab ends there.

Here's a well-focussed photograph of my knee. Actually, what I meant to show here is how I hold the edge rib against one of the tabs on the bottom of the belly while I make my mark.

Here's what I get when I lift the body away--a pencil mark outside the drawn body outline that shows me exactly how much I need to trim this tab. 


And so I trim it, using a small chisel (1/4", with the handle cut off--perfect for small operations like this.) On the upper left corner of the photo, sitting on the edge of the bench you see a little jar of water and a brush: if I dab the end of the bar with a bit of water, the chisel cuts through the end-grain a lot more cleanly and easily.

When I get close to the outline, I start fitting the body down all around and looking carefully at the way the edge ribs curve. I want a smooth outline, so if I see a bar end that needs a little trimming, I'll take the time to do it. (Even a small adjustment can make a big difference to a graceful shape.) I also carefully flex the edge rib against each bar end, to feel whether the angle of the bar-end cutoff matches the true angle of the rib.

When the bar ends are trimmed and the outline looks good, I tape the belly securely into the body with masking tape. I make sure at this point that I've really located the belly carefully, by matching body and belly centrelines at the bottom, and neck edges (marked on the belly) at the top.
Now I'll move onto the next step in the process: locating the position of the bridge on the belly. I want to do this very accurately, because I'm finding and marking the exact spot where I want to glue the bridge.

Most of the time during the working process, I protect the sharp veneered edges of the neck by covering them with masking tape. However, right now I want to see the edge of the neck clearly, because that's one of the crucial references I use to locate the bridge. I've rolled back the masking tape, and there it is.
When I originally lay out the shape of the lute on my working drawing, I have a very clear idea how far I want the first string to lie from the edge of the neck (which, essentially, is also the edge of the fingerboard.) This distance is very important for the playability of the instrument--and anyone who has ever tried to play a lute with a first string that's too close to the edge of the fingerboard will know what I mean. The distance can vary a little bit, according to a few factors--the length of the neck, for instance, or the preferences of a client who's a very experienced player--but whatever those factors are, I want to have them worked out completely before I start building the lute.

So, I have the edge of the neck, and I have the position of the chanterelle in relation to it. This means I should be able to run a straightedge down that line, and somewhere along it will be the location of the first course on the bridge. But where? And what will be the angle of the bridge in relation to the first course?

The clearest and most foolproof way for me to find this out is just to set my layout drawing down on top of the lute, and see how things match up.

The drawing is done with 4H pencil on drafting mylar, and shows the positions of the neck edges, the first course, the bridge, the rose, and the body outline.
If I've done my work carefully so far, things should line up pretty well. The neck angle is good, the location of the rose is very close, the belly outline is fine... I should be able to just go ahead and mark. (If on the other hand some crucial piece of alignment is off--for instance, the neck angle's not quite where I want it to be--then I need to move the drawing around a bit, to compensate, making sure that the crucial relations of the neck edge and chanterelle are maintained.)

The rose centre and the bottom of the belly are two reference points I use to locate the layout drawing.

Using the working drawing to mark the position of the bridge allows me to get the correct angle of the bridge, which is tilted slightly upward on the bass side. 


Here's how I mark: a pin prick right through the mylar, at exactly the point where the chanterelle meets the glued front edge of the bridge.
I make another careful pin mark on the bass side of the 13th course, at the bridge's glued front edge.

I tattoo the pin pricks lightly, with a sharp, soft pencil.

And there it is--one of my two bridge location marks.

Now all I need is a bridge to glue there--and making that will be the subject of my next post.


Sunday, 17 November 2019

Building a 13 Course Lute, Start to Finish, 8: Trimming the Braces, Fitting the Belly

Hello, good morning, welcome back to the shop. This time out, I'll be trimming the braces I've just glued onto the belly, adding a few more small braces, and preparing to fit the belly into the body--one of the turning points of lute making, since we're nearing the point when the sound box is closed, and the lute finally starts to look like a lute.

You might recall that I ended last week's post with an ode to randomness in placing and gluing the braces on the belly. I would like to assure you that that idea did not originate with me. Like all (or nearly all) my good ideas about lute making, it came from Grant Tomlinson, and he has told me that the observation originally came from Stephen Gottlieb, whom Grant studied with in London for a year in 1986. I worked with Grant for a year in 2009, and I remember him recalling to me, fondly, Gottlieb's advice to him: that one should put the braces on "higgledy-piggledy."

Words of the masters, passed down through the ages....

Here's my higgledy-piggledy result.

The very first thing I do is trim the edge of the belly on the band saw, taking it to about 5mm of my marked body outline. (It looks much more orderly already.)

All of the braces are glued on taller than their final height, since the go-bars bite into the tops a little bit. Now I use my low-angle block plane to trim them carefully to height. (Note that I'm supporting the ends of the curved braces with the same cauls that I used for gluing them.)

 I then chamfer the top edges of the braces. For this job I use a little Veritas miniature bull-nose plane, with a scrap of wood clipped to one side as a fence. (It works very well for keeping the plane at a 45 degree angle.)
There's my high-tech setup.

In preparation for scalloping the ends of the braces, I mark a height of 5mm with a wooden spacer.

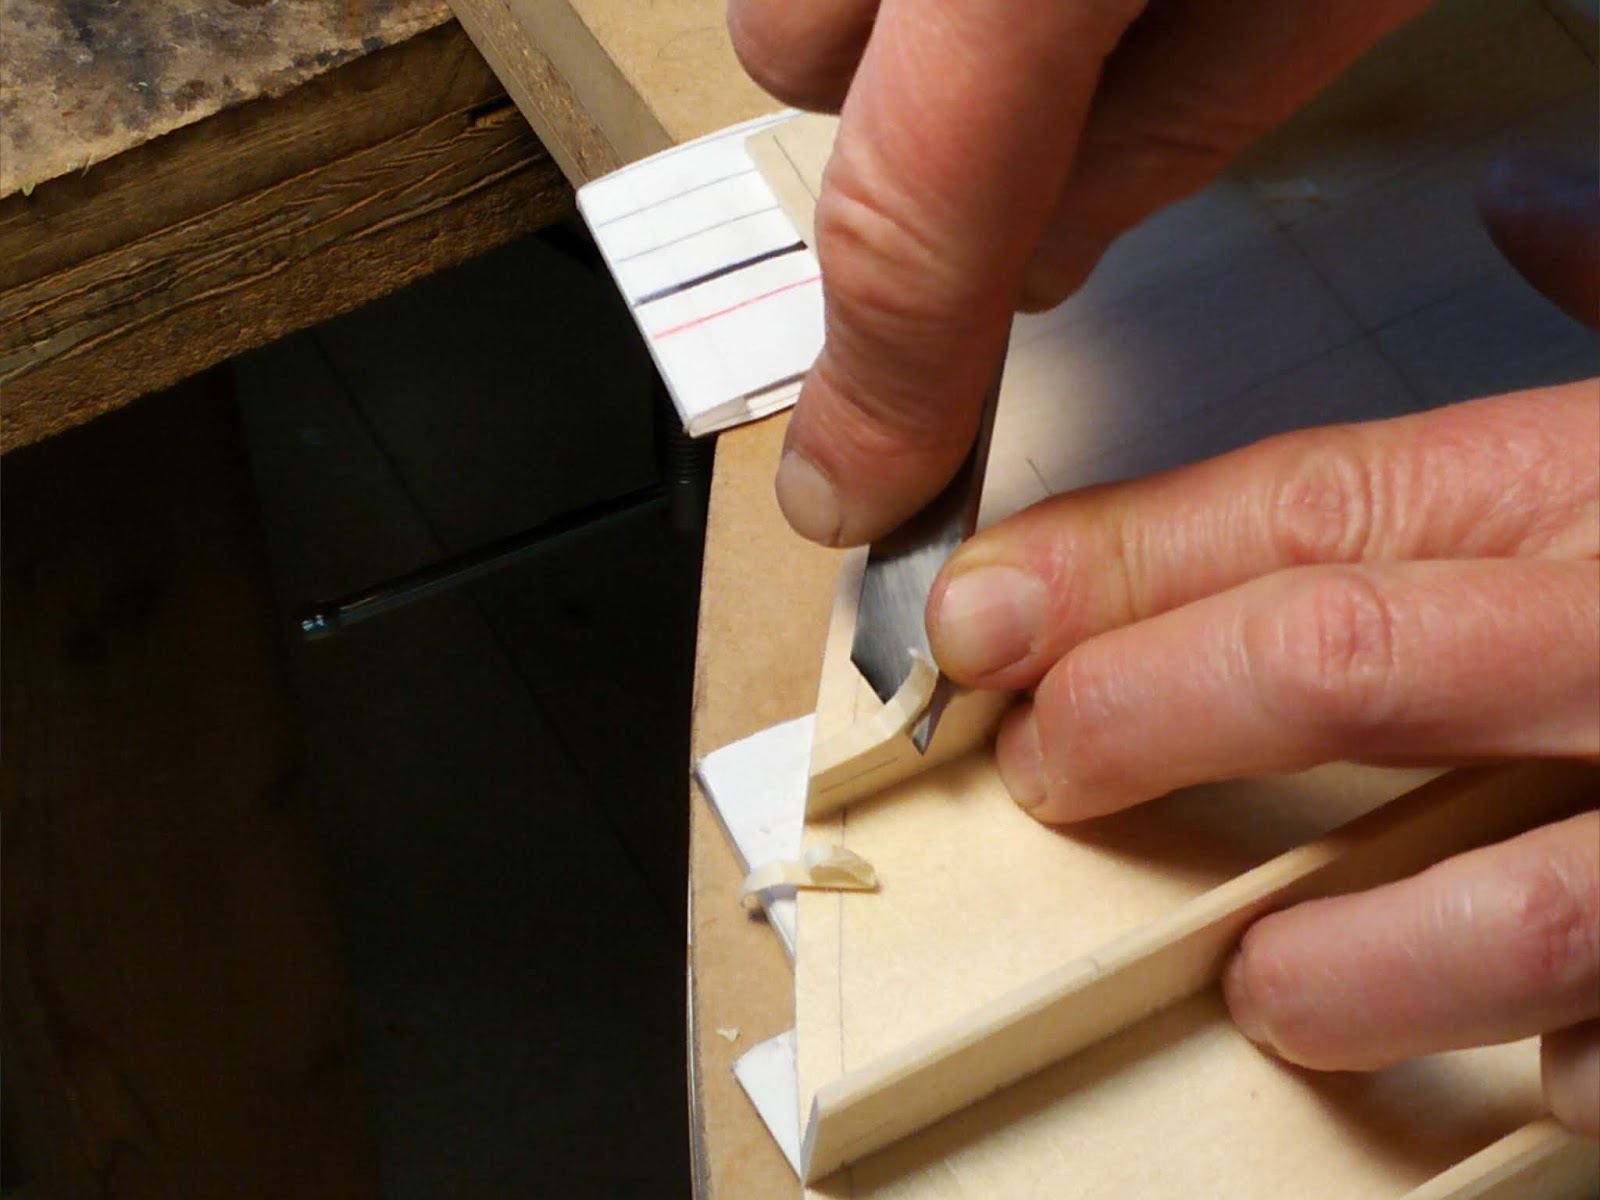
 I then scallop the ends of the all the braces with a skew chisel.

I look for a graceful and fairly uniform shape on the ends of all the transverse braces.
When I have a good shape on all the braces, I need to shape and glue down a few specialty pieces. I put spruce tabs in a few spots around the outline of the lute, where there are no bar ends to support the edge rib. The number and position of tabs varies with different lutes and barring patterns, but on this one I'll stick down a couple between the first and second transverse bars, and a couple on the bottom of the belly, below the j-brace.

Here's what the tab looks like--just a short length of bar material with a slipper-shape carved into one end.

And here it is, stuck down (with hide glue, of course.)
I also shape and glue a small "chanterelle bar" directly under the position of the first course. This bar helps to support the sound of the top course on the two highest frets. 
Now I need to take you on a small, rather boring detour (just to remind you, again, that lute making is not all glory!) My next step is to glue some small support bars across the rose, and normally I'd just go ahead and do that by reaching for my stock of ready-made rose bars, but... sadly, my stock is depleted. Oh well--nothing to do but take a couple of hours and make a hundred or so, so I don't have to do it again for a while.

I thickness some sheets of spruce brace material to 2.5mm, then shoot one edge clean.

I use my shop-made purfling cutter to cut off a strip about 3mm wide.

There's one--now I'll shoot the edge anew, and cut off another strip, and so on, until I have a whole bunch.

I stack them side by side in my planing box, rough side up, and....

Plane them flat, and a uniform 2.5mm thick.

I then chamfer the top edges with a ledge jig and my low angle block plane. 
That's it for the detour--now I can get back to the task at hand, which is gluing the rose bars on the rose.

Having cut the bars to length and blackened the bottoms, I carve a little scallop in the tip of the bar. Why the scallop? Because that makes it easier...
To scorch the tip!  I brush glue on the bar, stick it down in place, and then bring in my wood burning knife. Scorching the tip has the immediate effect of crystallizing the hide glue, sticking the tip of the bar fast to the belly. When I've scorched both ends, I don't need to use any other clamp to hold this bar down--it's secure. I can move on to gluing the next.

There they are, reasonably neat and orderly--and an illustration of yet another of the many miraculous properties of hide glue.


I'll let the glue dry thoroughly before working any further with the belly. In the meantime, I have to do a few things to prepare the body for fitting up the belly.


I remove the screw I used to attach the neck (a #8 deck screw)...
Drill out the hole, and swap it for something a little beefier (a #14).

I carve away the rough edges of the counter cap (which I glued in long ago.)

I don't want any edges inside the body to be too abrupt or too sharp. I have the notion (maybe it's a superstition) that they might impede the efficient production of sound.

Now I need to go back to the neck, and do a little more planing.

I want to make sure the surface is quite flat in long section (it's been a few weeks since I worked with the neck and it may have changed shape slightly since then.)
But that's not all I'm doing here. To tell you the complete story, I'm actually planing a twist in the upper surface of this neck. Specifically, I'm planing a slight downward slope across the neck, so that, at the nut end of the neck, the treble side will be somewhat lower (maybe about 1mm or so) than the bass side. (Even though it is twisted, however, the surface of the neck will continue to be flat in long section.)

This has the overall effect of lowering the action--that is, the eventual height of the strings above the fingerboard--of the treble strings in relation to the bass.

This operation is all carefully controlled and accounted for in the planning and building of the instrument, throughout even the earliest stages of construction. For instance, I know from the outset that I'll be planing this twist in the neck, and therefore I know that I will be reducing the neck's thickness by a certain amount (a bit less than a millimetre.) I have to account for that when I'm laying out and shaping the neck. Similarly, I know that if I plane away some material on the treble side of the neck, the neck will end up a little bit narrower--and so I have to plan for that too.

Just a few of the complications that make building a 13 course lute such special and challenging project!

All right--the body is pretty much ready to accept the belly. So now, I can get back to the belly, and begin fitting it up.

I use templates to mark the cut-off angles for the various bar ends (I've taken these angles from the mold.)

I use a razor saw (with a lot of wax on the blade) to make the cut. I make sure not to cut too far inside the line (the body outline, marked on the belly)--I want to leave myself some extra length, so that I can later trim the bar end to the exact length.

A small chisel removes most of the excess material, but I don't go all the way to the belly surface (because I don't want to mar it.)

Instead, I leave a bit of bar material right next to the belly.

To remove it, I use my wood burning knife and a strip of cotton soaked in water. I apply a little steam...

And the glue releases. I can remove the bit of bar with a sharpened stick, and the belly is left unblemished.

Last step for now is to trim the belly edge to within a couple of millimetres of my outline. I'm pretty much ready to start the fine fitting process, which will be the subject of my next post.