Hi. I recently experienced a tiny brainwave in my workshop, and I'd like to share it with you.
I've got a couple of lute backs here, and both are for a 5 course late medieval plectrum lute. The one nearest is made of curly ash; the one behind is of curly sycamore.
In the foreground is a contraption that I have described in a previous post, a locking turntable and block that are screwed up to the underside of the lute mold, and then held in a large ratchet clamp in my bench vise. The setup looks a little ungainly but it works great, since it allows me to hold the mold in practically any orientation. It's very useful when I'm building the back, fitting and gluing ribs, and working side-to-side (that is, working alternately on bass- and treble-side ribs), since I can simply loosen the knurled nuts under the turntable to spin the mold around. It's even more useful when I'm carving a lute mold, because that's an operation where it's helpful to see and carve the developing shape from as many angles and perspectives as possible.
So here's my brainwave. I decided to try attaching this universal-joint contraption to the lute back after it's been taken off the mold, to see if I could use it for scraping the back, resolving the rib lines, and giving the back a beautiful shape.
Now, I always do some initial filing of rib joints and scraping of ribs while the back is still on the mold; it's necessary, for instance, to get a shape that's pretty close to perfect at least on the bottom end of the body, in preparation for fitting and gluing the capping strip.
But once the capping strip is glued on, I'm usually happy to get the back off the mold and reinforce it from the inside: glue paper strips on all the rib joints (and sometimes across the ribs too), glue in the counter cap, fit the false belly, and so on. Generally I don't work with the shape of the back again until later in the construction process, when I'm finishing out the whole lute in preparation for varnish.
The trouble with leaving rib/ body work till that late stage is that by then I'm working with an almost fully assembled lute, and there's no way to hold it completely steadily. The best way to hold it securely is in my lap, against the padded edge of my workbench. And as you can see, that puts me in the middle of a lot of wood dust (which I'm becoming more and more sensitive to every day.)
So, in an effort to separate me a bit from that cloud of dust, I thought I might try doing some of this work earlier in the process, by holding the back steadily in the vise.
Here's what I came up with. The false belly--the closely-fitted piece of panel board that temporarily maintains the shape of the body during the construction process--has been spot-glued into the completed back. I then pre-drilled four screw holes.
I screwed the block/ turntable assembly to the false belly, with a coupe of #10-2" screws.
I then mounted the thing in the clamp in my bench vise. My only question at this point was whether the whole thing would be tight and sturdy enough to withstand the pressures of being worked on with files and scrapers (or whether, for instance, the spot-glues on the false belly might not hold.) The answer is: yes, it is strong and steady. I feel I need to be a little careful in handling the back when re-positioning it, but otherwise the assembly is very stable.
That's my brainwave. It doesn't seem like a big deal, does it? And yet in a way, it is. It gives me a little more flexibility in assembling lutes, because it allows me to change up the sequence of construction. So, instead of waiting to the very end of the building process to resolve and tighten up all the rib lines, I can do it earlier on, and with more control. Or, I can do it later. It doesn't matter. The important thing is, I now have the choice. And the best part is, it didn't cost me a dime!
As some of you may know, I love betterizing: taking a contraption and adding to it or modifying it to extend its life or usefulness. I encourage you to betterize in your own workshop, and share the news with the world.
Here's a short video I made of the contraption in action. Enjoy.
Hi my friends--I hope you're well. It has been a while since I posted, so let's get to it. Today I want to talk about my varnish: what it is, how I make it, and how I apply it to a lute.
A selection of varnish samples on various kinds of woods (honduras rosewood, curly maple, yew, and ash.) I make a varnish sample to go along with every lute that I build.
First, a note of caution. The process of varnish making that I'll be talking about today can be quite hazardous if proper precautions aren't taken. I don't think anyone should attempt to make this varnish without being properly trained. Please don't use this blog post as a 'how-to' for varnish making; it's a description (and not a very complete one), not a set of instructions.
The stuff that I make and use is a terpene resin varnish that's commonly called Fulton Varnish, after the person who formulated it, William Fulton, an aerospace engineer, violinmaker and varnish researcher and experimenter. Fulton published the results of his work in a series of articles in The Strad in the early 1970s; I was introduced to his techniques by Grant Tomlinson in the early 2000s. Grant had been working with Fulton's recipe for years, so by the time I came along he had worked out pretty much all the kinks (and there are a number of kinks that needed working out.)
You may have heard of modern violin makers' search for the 'Secrets of Stradivarius,' the lost methods of the old masters that, if only we could recover them, would allow us to build violins with the magical soul of the old instruments. High on the list of 'secrets' is the oil varnish used by the old Cremonese masters. Of course, varnish alone won't make a great violin (or a great lute), but if it's a good varnish, it will do a few things: be beautiful, in finish, lustre and colour; be stable over a long period of time; and be reasonably simple to make and apply. Fulton's varnish fulfills all of these requirements.
The old makers' varnish is not exactly a 'secret,' in the sense that it's somehow being purposely hoarded or withheld. It's simply a recipe, or more accurately a technique, that's been lost over the centuries, supplanted by the products of the industrial age. Mass-produced finishes took the place of the old and locally-made, even shop-made, varnishes. By the time instrument makers realized that these newer products might not be--ahem--all they were cracked up to be, the old techniques of making oil varnish were mainly lost. Human cultural memory is short.
Many old recipes for making oil varnish survive, but Fulton took seriously the idea that the ingredients named in them might not be quite the same stuff as their modern equivalents. For instance, one of the main ingredients in some of these old recipes is 'turpentine.' When I say that word, you may think of the clear, distilled liquid thinner for paint and varnish. But Fulton realized that the turpentine of 300 or 400 years ago would have been very different: more contaminates and oxygen in the mix, gummier, thicker and browner, more like the sap of the coniferous trees from which it had been derived.
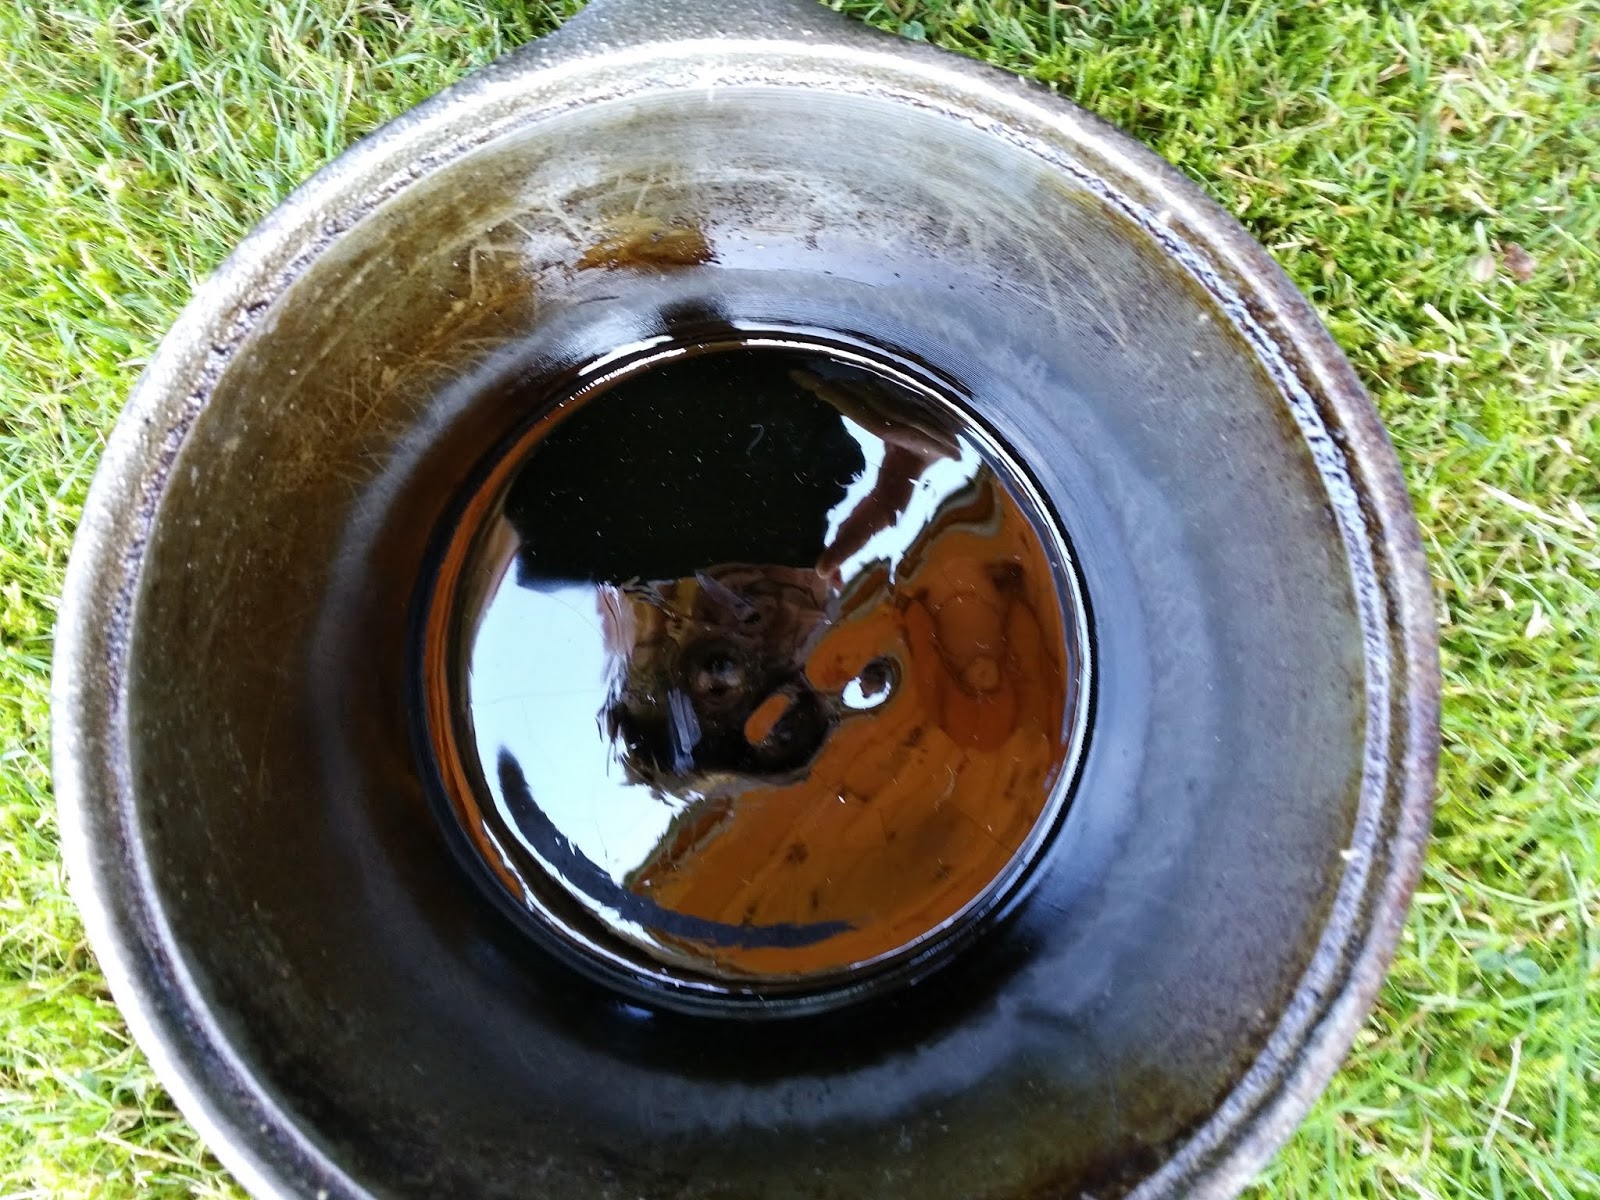
So Fulton decided to take the modern distilled spirit of gum turpentine, and turn it back into the turpentine of 3 or 400 years ago, by oxygenating it (bubbling air through it with an aquarium bubbler) and exposing it to ultraviolet light (in the form of sunlight) over a number of weeks or months. The result of this back-engineering is polymerized terpene resin. Here's what it looks like in a gallon jar: dark brown in colour, and about as viscous as blackstrap molasses.
Some of the turpentine evaporates during the polymerization process. The piece of masking tape shows the original volume of turps in this batch, so you can see that I'm left with less than half the original volume.
This particular batch of polymerized turpentine was made not by me but by Grant Tomlinson, and had sat high up on a shelf in his workshop for many years. Over the time I've known and worked with Grant he's shown me many techniques of the lute maker's craft, but few as valuable as varnish making. I first assisted him making a batch of varnish in 2005; then in 2010, Grant assisted me in my own first attempt. Last September, when the picture above was taken, I attempted to make Fulton varnish flying solo for the first time.
Now I said above that Fulton's varnish is reasonably simple to make, but that doesn't quite mean that it's easy to make. For one thing, the cooking process creates some pretty noxious fumes, so it must be done outdoors. This, in turn, creates some logistical problems, such as where to cook and when. When I made varnish with Grant in 2005 and 2010, we made it in the parking lot of the building next to our shops. This worked fine until a couple of summers ago when Grant was showing our colleague Wilma Van Berkel how to make varnish. That Sunday, I recall, was a beautiful day, with a slight breeze, which cleared away the fumes quite nicely; but unfortunately they were blown pretty directly toward an apartment building nearby, and partway through the cooking process an alarmed resident came over to see what in the world was going on, and whether she should call the fire department. I figured that this time, I should try to find somewhere more remote to do my cooking.
As for when to cook, since it is done outdoors, a clear day (or at least one without rain) is a necessity. In Vancouver, the end of September pretty much marks the end of decent summer weather; temperatures turn colder after that, and soon the rain--the torrential, unending months of it--begins. The window of time for me to do this cooking was running out fast. If I didn't do it soon, I would have to wait until spring.
I called my friend Bob, who has an acreage in Langley, about an hour out of town, and asked if he would host me. I warned him about the fumes, and he said it would be no problem, he wouldn't mind a bit.
So one Saturday morning in September I woke up, checked the weather forecast, and decided it was time to go. I drove to my workshop, loaded up my equipment, and headed out to Bob's. Here are some highlights of my varnish making day.
The full scene at Bob's beautiful acreage. I'm set up quite far away from a couple of houses on his property. You can see a yellow extension cord running to my work site from the outdoor kitchen a few feet away.
Here is the basic set-up. A milk crate provides a handy box for carrying equipment, and provides me with my seat. On the plywood, there are a hotplate; a cast-iron pot for cooking the resin; a pot lid for checking varnish hardness and colour; a pair of neoprene gloves; a heat diffuser for the hotplate; a lab thermometer (that reads to 400° C); and the jar of polymerized gum turps. Closer to the camera are wet towels, in case of emergency; and a tub of water, the presence of which I'll explain in a second.
On this day, my varnish making is divided into two parts. First, I must heat the polymerized gum turps to a certain temperature in the cast iron pot to make a brittle resin. I begin by pouring the gum turps into the pot, and heating slowly, stirring with the thermometer and keeping an eye on temperature. Around 125°C, a reaction takes place in which some volatile substances in the turps cook off, in the process creating a considerable amount of heat. This exothermic reaction can cause a rapid (and potentially dangerous) rise in temperature, as well as the creation of some heavy noxious gases. The tub of water in the photo above is available in case the reaction gets out of hand: I can lift the pot from the hotplate and dip it into the water to lower the temperature quickly.
In the event, there was very little exothermic reaction created by this particular batch of gum turps. I think one of the reasons why is that the batch was made long ago by Grant Tomlinson (he figured it might have been made twenty years ago), and it had simply mellowed, the volatile substances having dissipated over the years. Another possible reason why there was not much of a reaction is that the batch was not made using a certain chemical--manganese napthenate, to be specific--which Fulton recommended using as a catalyst in the original polymerization process.
Once past that rather tense phase of cooking, I could pretty confidently take the temperature of the gum turps slowly higher, ultimately somewhere above 300° C, the temperature needed for making a beautiful amber-brown shade of resin. (Lower terminal temperatures are used to create lighter-coloured resins and varnishes.)
Here I am, your humble narrator, enjoying the cooking process on a lovely late summer day.
This photo is courtesy of Bob, my host, who took a break from driving his tractor and cutting the grass while I made varnish.
Here is the result of the cooking the resin, after removing from heat and allowing to cool. Although it looks like a liquid, it is a solid--I've converted the gum turps to a brittle resin.
Now I just need to remove it from the pot, which I do by breaking it up with a hammer and screwdriver. I will use some of this brittle resin for the second stage of my cooking day, where I actually cook varnish. The rest of this brittle resin I will put into a jar and keep until I need to make varnish next--which hopefully won't be for a few years. (The brittle resin will keep indefinitely.)
The varnish-making part of the day can now begin. I crush a certain amount of the brittle resin in a mortar, and mix it in another pot with stand oil. Then I heat this mixture steadily, over the course of about an hour, to around 300°C.
I don't have any photos of this part of the process, because I was busy doing it and paying pretty careful attention, and Bob had left the area. But here's what happened. I sat beside the hot plate, stirring constantly with the thermometer, taking temperature readings every minute and jotting them down in my notebook. Even small variations in the rate of heating, as well as the amount of time the varnish is held at the terminal temperature, can make differences in the quality of the varnish. I keep careful records of the cooking process, in the hope of tracking down the origins of these subtle differences.
Fulton's recipe calls for holding the varnish at the terminal temperature 'until a firm pill stage is reached.' I'm not exactly sure what he means by that, but here's what Grant taught me to do: take the thermometer from the pot and let a drip of varnish fall onto the cold pot lid. Let the drip cool for a few seconds, then tap it with your fingertip and lift away. The varnish will stick, and you'll pull away strands of beautiful amber varnish that billow and drift in the breeze. The longer you hold at the terminal temperature, the finer and longer these gossamer strands will become.
The Sorcerer's Pot-Lid. Who can tell the varnishes it has known!
And then, when you judge that the varnish can become no finer, you take it off the heat and let it cool. You can't keep heating indefinitely; your varnish will gel in the pot. That's about it. When the varnish has cooled to below 150°C, you can add some distilled spirit of gum turps as a thinner, and then filter into jars. Here is the final product.
It's lovely stuff. Can't wait to make a lute, and slap on a coat or two.
Which leads us to the next part of today's post: applying the varnish.
For this part of the process I decided to make a series of short videos on my phone. This marks a first for The Lute's Progress: I've never done a video demo before. I don't want to get your hopes up or anything--they aren't the highest of fidelities, I'm not used to talking to a camera, and my framing of the shots may leave a little to be desired. (For instance, in none of the videos can you see my face clearly. That may be either a glitch or a bonus feature; I'll leave it to you to decide.)
But I couldn't think of a better way to illustrate what I was doing in flattening off the previous varnish coat, and then brushing on the next one. It's not a process that lends itself to taking a bunch of photos, as I usually do, then writing descriptions. So, with all their faults, I humbly present these videos and hope that you can get a reasonably clear idea of what I'm up to when I apply a coat of oil varnish.
And that will be that for this time. Next time, I'll tell you about making the peg box. Cheers!
Video #1: Removing dust particles
Video #2: Flattening off the varnish
Video #3: Brushing varnish on the first few ribs
Video #4: Brushing varnish on the last ribs and capping strip
Hi friends, today I want to document veneering the neck with a single piece of ebony.
If you've been tuning in to this series, you'll know that my rationale in these posts is to present a photo and one-or-two sentence description of each discrete operation in building a 13 course lute. It's not my intention to present a how-to blog, though of course there's much information to be found for those who want it.
I have to confess that, after making the first two posts in the series, I felt a little pang of something--maybe of guilt, maybe of jealousy--with which I've had to reconcile before continuing the series.
Guilt first: on one hand I'm happy to talk about my working procedures (and nobody's forcing me to do it, after all), but I've had a nagging feeling, as I've been doing it, that they are not quite mine to share. After all, I learned them from my great teacher, Grant Tomlinson; and he learned them from his own great teacher, Stephen Gottlieb. Am I not appropriating their ideas, and presenting them as my own?--And yet these procedures are mine; I've earned them with my hard work, and though they have their source in those great makers, for better or worse I've taken them and made them my own. And so, I share them humbly, and hope in so doing to show respect and pay tribute not only to Grant Tomlinson, but to all the teachers, woodworkers and luthiers who have guided me (and still do guide me) on my journey in craft.
Now, jealousy. As I write these posts, I sometimes wonder: am I not sharing too much? Am I not giving away the farm, by talking in so much detail about how I do my work? It's a good question; many makers have derived income by packaging and selling such information. Well, maybe I will too, at some point; maybe these blog posts will eventually form the basis of a best-seller on how to build baroque lutes, and my sweetheart and I will retire on the royalties to our private island in the Caribbean. Indeed!--For now, though, I've resolved not to feel jealous about sharing what I know, and what I've learned. For one thing, there is plenty of information that I am not giving away in these posts, information that can really only be imparted through personal contact between a teacher and student, side-by-side at the bench. For another, if what I offer here helps someone to build a better baroque lute, and in consequence there are more excellent baroque lutes being played, and more people listening to great players on excellent baroque lutes, then I'll count that a good thing, not a bad one. So by all means, dear reader: take whatever is useful to you, use it to build great baroque lutes, and please, pass it on.
To begin.
I've carved the neck, and allowed for the thickness of the veneer.
This is my neck veneering jig (and my cup of coffee.)
Another view.
And yet another: this view shows the length of thick cotton skate lace that I use to tie the veneer down to the neck. I use skate lace because 1) it is very strong woven cotton, and 2) it is wide and flat.
The neck must sit up from the jig at a particular angle so that the veneer will tie down closely at the edges. I've worked out this angle (and made these wedges) through trial and error.
The nut end of the neck must sit up higher than the bottom (joint) end.
Because the neck has a slightly asymmetrical shape, it must also sit slightly askew the centreline of the jig.
A dry run with the skate lace allows me to check whether I've got the angles right, and the veneer will tie down tightly all along both edges of the neck.
It also allows me to rehearse the best way to tie the lace around the bottom end of the neck.
I mark out the veneer, leaving a couple of millimetres extra in each dimension.
Then I cut it out and run it through the thickness sander.
I scrape the outside surface free of sanding marks, then run it through the sander one more time (with the outside surface face-down) to take the veneer to its final thickness.
My neck, my veneer, my jig, my glue, my bending iron, are all ready to go. I'll bend the veneer and glue it, working at a fairly quick but careful pace.
I've heated a saucepan of water, which I brush on the outside of the veneer. The veneer begins to curl immediately.
I also heat the underside of the veneer on the hot plate, which helps to curl the veneer even more. (The only use I have for the bending iron is to do some fine shaping on the outer edges of the veneer, near the nut end of the neck.)
I locate the veneer carefully and hold it in place while drilling a small-diameter hole through it.
I can then locate the end of the veneer securely with a push-pin.
I drill another hole about halfway up the neck for a second location pin.
Working quickly, I heat the neck surface and the inside surface of the veneer with a hair dryer, then brush hot glue on the neck core.
Then I brush hot glue on the inside of the veneer.
I get the veneer in place quickly, and locate it with my pins.
Then I start tying it down tightly with the skate lace.
So far, so good. I can remove the location pins...
And start applying heat and pressure with the iron. You can see I'm getting some significant glue squeeze-out through the hole for the location pin, halfway up the neck; I also check for squeeze-out along the length of the neck, on each side.
I continue tying off until the entire veneer is tight.
I also keep ironing until I'm quite satisfied that the veneer is glued closely to the neck core, and that there are no gaps or air bubbles.
The fit looks pretty good from the nut end...
... and from the bottom end too. I clean up the glue squeeze-out with a brush, and then give the surface of the joint a coat of glue size.
At this time, I would like to introduce my audio-visual aide, whose name (for some reason) is Carl. Without his sturdy assistance, none of the actions shots of me working would be possible. Thanks Carl!
Next morning: the glue is dry, and I can remove the veneered neck from the jig. Here I am beginning to carefully saw away the excess veneer at the joint end of the neck.
I use my low-angle block plane (with the sole well-waxed) to plane the veneer almost flush with the surface of the joint. I use the low-angle plane to bring all the other veneer edges flush to the neck core as well.
Top view of the veneered neck: I think I got a good result.
The back side looks good too. No big lumps or bumps, no air pockets; everything looks solid.
Now, I will set the neck aside for at least one week before re-fitting and gluing it to the body. This is because hot hide glue, when used over a large surface such as this, will take a long time to dry thoroughly. While it dries over a number of days, it will continuously contract, mainly across the grain, but also along the grain as well. (This property of hide glue to contract as it dries is one of the main difficulties of working with it, but also, in certain circumstances, one of its great benefits.) As it contracts, it exerts a great deal of force on the woods on each side of the joint, and ends up significantly distorting the shape of the neck. The upper surface of the neck was dead-flat when I began shaping it; it's no longer anywhere near flat, either in cross-section or long section. The same is true for the neck-joint surface. By putting the neck aside for a week, I hope to allow the woods and the glue enough time to reach an equilibrium before fitting and gluing the crucial neck joint.
And so the blog will take a break as well. Happy lute making--and happy lute playing--and I will talk to you again soon.