Hello, good morning, welcome back to the shop. This time out, I'll be trimming the braces I've just glued onto the belly, adding a few more small braces, and preparing to fit the belly into the body--one of the turning points of lute making, since we're nearing the point when the sound box is closed, and the lute finally starts to look like a lute.
You might recall that I ended last week's post with an ode to randomness in placing and gluing the braces on the belly. I would like to assure you that that idea did not originate with me. Like all (or nearly all) my good ideas about lute making, it came from Grant Tomlinson, and he has told me that the observation originally came from Stephen Gottlieb, whom Grant studied with in London for a year in 1986. I worked with Grant for a year in 2009, and I remember him recalling to me, fondly, Gottlieb's advice to him: that one should put the braces on "higgledy-piggledy."
Words of the masters, passed down through the ages....
 |
| Here's my higgledy-piggledy result. |
 |
| The very first thing I do is trim the edge of the belly on the band saw, taking it to about 5mm of my marked body outline. (It looks much more orderly already.) |
 |
| All of the braces are glued on taller than their final height, since the go-bars bite into the tops a little bit. Now I use my low-angle block plane to trim them carefully to height. (Note that I'm supporting the ends of the curved braces with the same cauls that I used for gluing them.) |
 |
| I then chamfer the top edges of the braces. For this job I use a little Veritas miniature bull-nose plane, with a scrap of wood clipped to one side as a fence. (It works very well for keeping the plane at a 45 degree angle.) |
 |
| There's my high-tech setup. |
 |
| In preparation for scalloping the ends of the braces, I mark a height of 5mm with a wooden spacer. |
 |
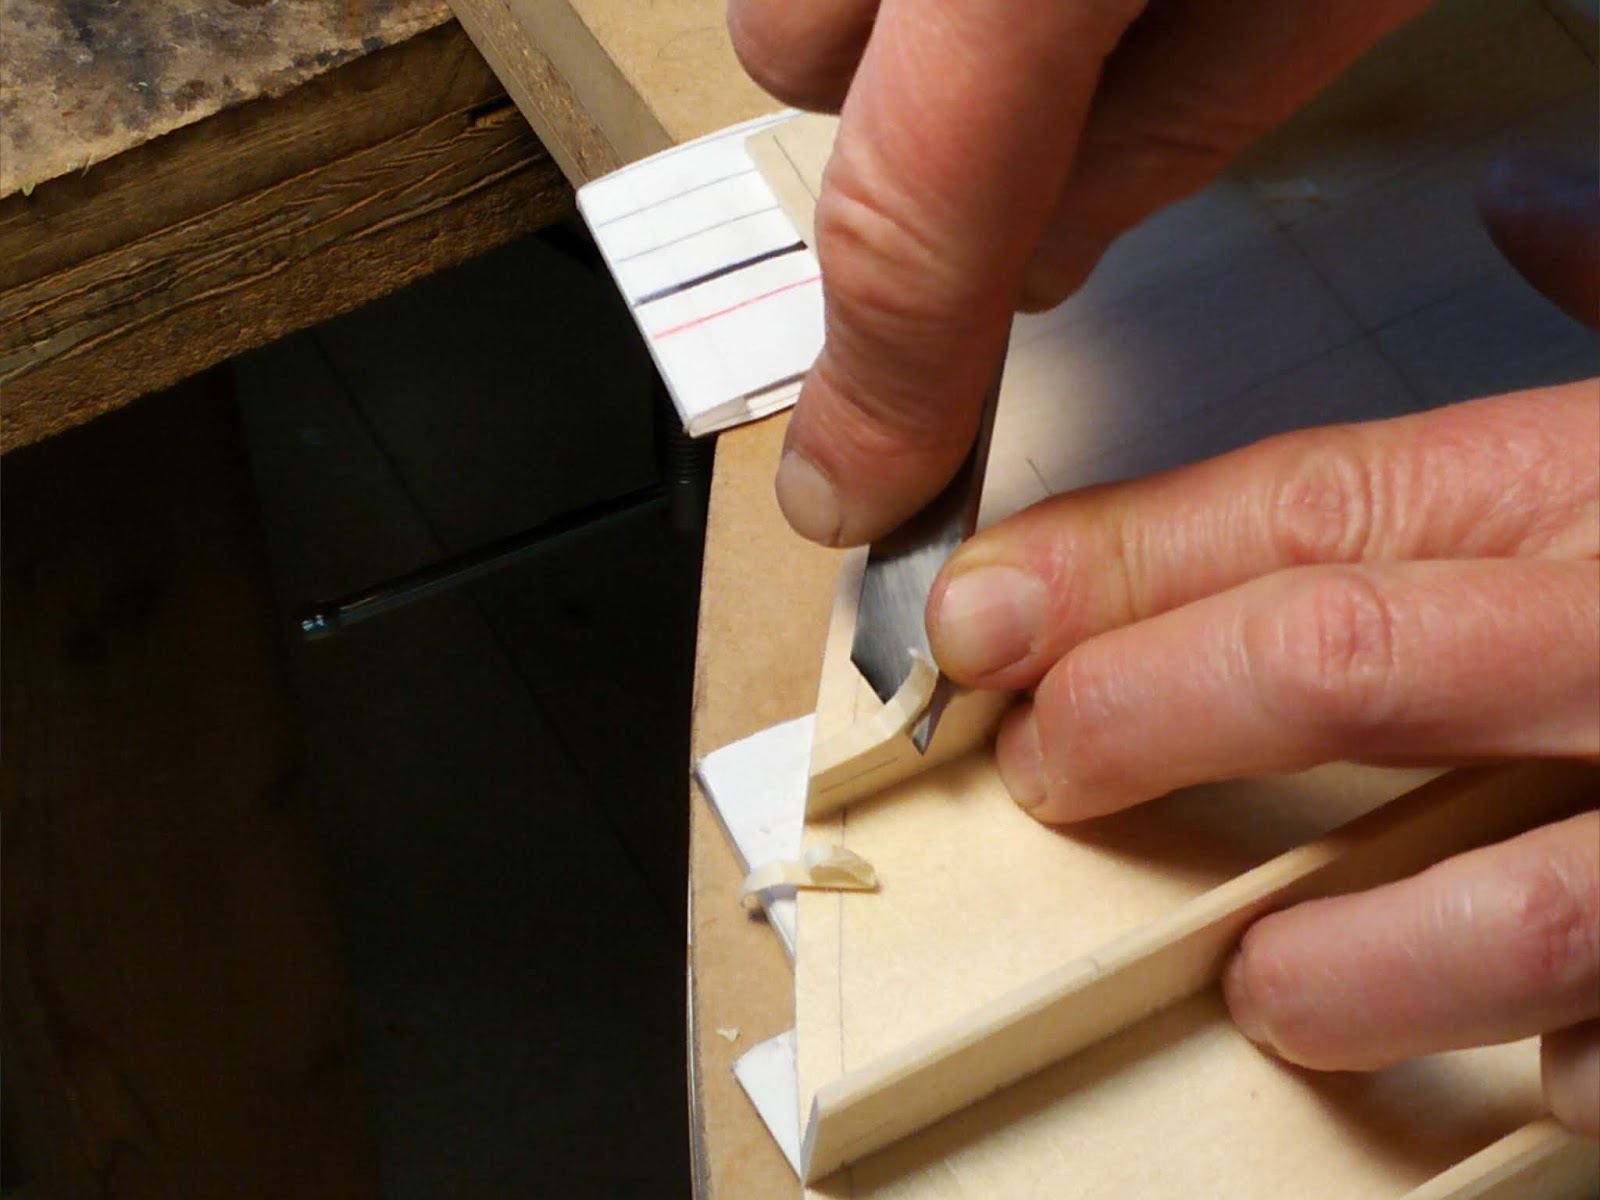
| I then scallop the ends of the all the braces with a skew chisel. |
 |
| I look for a graceful and fairly uniform shape on the ends of all the transverse braces. |
When I have a good shape on all the braces, I need to shape and glue down a few specialty pieces. I put spruce tabs in a few spots around the outline of the lute, where there are no bar ends to support the edge rib. The number and position of tabs varies with different lutes and barring patterns, but on this one I'll stick down a couple between the first and second transverse bars, and a couple on the bottom of the belly, below the j-brace.
 |
| Here's what the tab looks like--just a short length of bar material with a slipper-shape carved into one end. |
 |
| And here it is, stuck down (with hide glue, of course.) |
 |
| I also shape and glue a small "chanterelle bar" directly under the position of the first course. This bar helps to support the sound of the top course on the two highest frets. |
Now I need to take you on a small, rather boring detour (just to remind you, again, that lute making is not all glory!) My next step is to glue some small support bars across the rose, and normally I'd just go ahead and do that by reaching for my stock of ready-made rose bars, but... sadly, my stock is depleted. Oh well--nothing to do but take a couple of hours and make a hundred or so, so I don't have to do it again for a while.
 |
| I thickness some sheets of spruce brace material to 2.5mm, then shoot one edge clean. |
 |
| I use my shop-made purfling cutter to cut off a strip about 3mm wide. |
 |
| There's one--now I'll shoot the edge anew, and cut off another strip, and so on, until I have a whole bunch. |
 |
| I stack them side by side in my planing box, rough side up, and.... |
 |
| Plane them flat, and a uniform 2.5mm thick. |
 |
| I then chamfer the top edges with a ledge jig and my low angle block plane. |
That's it for the detour--now I can get back to the task at hand, which is gluing the rose bars on the rose.
 |
| Having cut the bars to length and blackened the bottoms, I carve a little scallop in the tip of the bar. Why the scallop? Because that makes it easier... |
 |
| To scorch the tip! I brush glue on the bar, stick it down in place, and then bring in my wood burning knife. Scorching the tip has the immediate effect of crystallizing the hide glue, sticking the tip of the bar fast to the belly. When I've scorched both ends, I don't need to use any other clamp to hold this bar down--it's secure. I can move on to gluing the next. |
 |
| There they are, reasonably neat and orderly--and an illustration of yet another of the many miraculous properties of hide glue. |
 |
| I'll let the glue dry thoroughly before working any further with the belly. In the meantime, I have to do a few things to prepare the body for fitting up the belly. |
 |
| I remove the screw I used to attach the neck (a #8 deck screw)... |
 |
| Drill out the hole, and swap it for something a little beefier (a #14). |
 |
| I carve away the rough edges of the counter cap (which I glued in long ago.) |
 |
| I don't want any edges inside the body to be too abrupt or too sharp. I have the notion (maybe it's a superstition) that they might impede the efficient production of sound. |
 |
| Now I need to go back to the neck, and do a little more planing. |
 |
| I want to make sure the surface is quite flat in long section (it's been a few weeks since I worked with the neck and it may have changed shape slightly since then.) |
But that's not all I'm doing here. To tell you the complete story, I'm actually planing a
twist in the upper surface of this neck. Specifically, I'm planing a slight
downward slope across the neck, so that, at the nut end of the neck, the treble side will be somewhat lower (maybe about 1mm or so) than the bass side. (Even though it is twisted, however, the surface of the neck will continue to be flat in long section.)
This has the overall effect of lowering the action--that is, the eventual height of the strings above the fingerboard--of the treble strings in relation to the bass.
This operation is all carefully controlled and accounted for in the planning and building of the instrument, throughout even the earliest stages of construction. For instance, I know from the outset that I'll be planing this twist in the neck, and therefore I know that I will be reducing the neck's thickness by a certain amount (a bit less than a millimetre.) I have to account for that when I'm laying out and shaping the neck. Similarly, I know that if I plane away some material on the treble side of the neck, the neck will end up a little bit narrower--and so I have to plan for that too.
Just a few of the complications that make building a 13 course lute such special and challenging project!
All right--the body is pretty much ready to accept the belly. So now, I can get back to the belly, and begin fitting it up.
 |
| I use templates to mark the cut-off angles for the various bar ends (I've taken these angles from the mold.) |
 |
| I use a razor saw (with a lot of wax on the blade) to make the cut. I make sure not to cut too far inside the line (the body outline, marked on the belly)--I want to leave myself some extra length, so that I can later trim the bar end to the exact length. |
 |
| A small chisel removes most of the excess material, but I don't go all the way to the belly surface (because I don't want to mar it.) |
 |
| Instead, I leave a bit of bar material right next to the belly. |
 |
| To remove it, I use my wood burning knife and a strip of cotton soaked in water. I apply a little steam... |
 |
| And the glue releases. I can remove the bit of bar with a sharpened stick, and the belly is left unblemished. |
 |
Last step for now is to trim the belly edge to within a couple of millimetres of my outline. I'm pretty much ready to start the fine fitting process, which will be the subject of my next post.
|


This comment has been removed by the author.
ReplyDeleteDear Travis,
ReplyDeleteare the ends of the treble bars glued to the body just like the other bars? As I see in your photos, they must touch the counter cap but I'm not sure. For me, gluing them to the body makes sense for stability, but I don't know how it effects the tone.
Thanks in advance,
Tamás
Hi Tamás, I treat the bar ends of the treble bars about the same as any other bar ends--they touch the counter cap or the edge rib. Like all the other bar ends, they are about 5mm or less tall where they touch the body. This helps with maintaining the outline of the body, and adding strength and stability to the shape. I don't find a change in tone because I do this, but you should experiment to see (hear) for yourself.
DeleteHi Travis, I've noticed your bars have wood fibres orientied otherwise than what i would expect (coming from guitar building) - do you know why they are tangential on lute and radial on guitar? Thanks! R.
ReplyDeleteHi, Thanks for your question. I'm not familiar with your use of "radial" and "tangential" to describe the orientation of bars on lutes and guitars; I would describe lute bars as having grain parallel to the belly, whereas guitar braces have it perpendicular to the belly. In any case, I'm not sure why this is so, but my best guess would be that the differing grain orientation has something to do with the wish to create a different tone in each instrument. I suspect that the orientation of guitar bars helps promote the creation of a strong fundamental tone, while that of lute braces helps to promote the creation of "upper partials", the multiple high harmonics that are responsible for the lute's bright, shimmering tone and quick decay. Everything in the lute is bent toward creating those tones, from the selection of wood types to the wood's thickness (or thinness, if you prefer), grain orientation, stringing, and so on. The lute's construction overall is a real balance between the tensions placed on the strung instrument, and the lightness of construction required to create these upper partials.
ReplyDelete