Hi everyone, and welcome back to The Lute's Progress! I have some exciting news...
I've been asked to join the faculty of the Lute Society of America's LuteFest 2024! As you may know, the LuteFest takes place from June 23-29 at Case Western Reserve University in Cleveland, OH. It's a beautiful campus, and a great setting for the LuteFest. The faculty is stellar, the classes look amazing, and the concert series is not to be missed! Check out all the details and sign up to attend at the LSA website: https://lutesocietyofamerica.org/events/
The Lute Building Class
I'll be teaching the Lute Building course, so whether you're an experienced maker, or you're interested in getting started building a lute, or just want an insight into how these incredible instruments get put together, the Lute Building class is the place for you. We welcome all participants, of all levels of skill and experience. We'll have a dedicated workshop room, and I'll be talking about, and demonstrating, lots of lute building techniques, including:
--building a mold
--rose carving
--fitting, shaping and grooving a nut
--material selection, shaping and thicknessing
--bending wood
--care and safe use of hand tools
--any other lute related topics that you would like to find out more about. Bring your questions to the Lute Shop!
The Lute Doctor
I'm also going to be the Lute Doctor at the LuteFest, which means that I'll be doing repairs and maintenance work on Festival participants' instruments throughout the week. Along with general maintenance items like tying a new set of frets and getting stuck pegs running smoothly, there is usually a fair amount of repair work that needs to be done. I've already been contacted by a festival participant who has two instruments, a lute and a vihuela, whose bridges have come off, so I will be going through the complete procedure for gluing these back down securely. There are bound to be lots of other challenging and interesting repairs that need doing throughout the week, and you are welcome to stay and watch.
If you have a lute that needs repairs or maintenance, bring it down to the Lute Shop. And if you want to find out more about how you can keep your lute in good running order, you are invited to stick around and see how it's done--and even try it yourself. Some lute maintenance topics I'll be covering include:
--tying frets
--changing strings
--stringing, materials and tensions
--peg maintenance
--general care and attention to keep any lute running smoothly
Topics in Lute Design
As a lute maker, I'm fascinated by the process of how we take information on historical lutes and use it to make instruments for modern players. I want to look at a few specific historical instruments that form the core of modern lute making practice, and see how lute makers have changed or adapted them suit the needs of modern players. Some of the topics include:
–Looking at museum drawings of a number of important historical instruments
–Thinking about how we can and should adapt them, to make them into useful instruments for modern players
–Thinking about how tuning and pitch level dictate the kind of model you can and should use for a given type of lute
–Short list of historical instruments under consideration:
–Warwick Frei
–C45 Tieffenbrucher archlute
–1592 Venere
–Sellas archlutes
–Sixtus Rauwulf 10-11c (Jakob Lindberg coll.)
–Surviving lutes and fragments by Laux Maler
Note to Participants
If you are thinking of attending my lute making course, I would encourage you to bring some things along with you. If you have hand tools that you have found especially useful (or that you have questions about how to use), please bring them, and we will discuss. If you have any tools or jigs that you have made that are especially useful in the shop, please bring them too. Sometimes the most satisfying part of lute making is inventing a tool or jig that helps you get the job done right!
I plan to bring with me a pretty comprehensive selection of drawings of historical lutes. Some of these are museum drawings; some are my own (unpublished) drawings of historical lutes; some are tracings of drawings of historical lutes that I have kindly received from other luthiers over the years. If you want to make copies of any of these drawings, I will make them available under two conditions: first of all, the drawings can’t be taken off the premises, and second, no electronic copying is allowed. In other words, if you want copies of any of these important and rare drawings, you will need to trace them manually. So, you’ll need to bring your own tracing paper (I suggest buying a roll of 24” wide tracing paper or drafting vellum), your own pencils, and your own drafting tools (e.g., compass, squares, straight edge, flexible curve, etc.) I’ve been assured that a large table will be made available for participants to use for this purpose. It’s a rare opportunity–some of these drawings are no longer available, and some were never made publicly available at all. If you are interested in historical lute making, or want to expand your repertoire of lutes, you should plan to do some tracing.
See you in Cleveland!
And now, a special added bonus...
A video of me in the workshop yesterday, gluing a peg box onto a five course lute. Enjoy!
Hi. I recently experienced a tiny brainwave in my workshop, and I'd like to share it with you.
I've got a couple of lute backs here, and both are for a 5 course late medieval plectrum lute. The one nearest is made of curly ash; the one behind is of curly sycamore.
In the foreground is a contraption that I have described in a previous post, a locking turntable and block that are screwed up to the underside of the lute mold, and then held in a large ratchet clamp in my bench vise. The setup looks a little ungainly but it works great, since it allows me to hold the mold in practically any orientation. It's very useful when I'm building the back, fitting and gluing ribs, and working side-to-side (that is, working alternately on bass- and treble-side ribs), since I can simply loosen the knurled nuts under the turntable to spin the mold around. It's even more useful when I'm carving a lute mold, because that's an operation where it's helpful to see and carve the developing shape from as many angles and perspectives as possible.
So here's my brainwave. I decided to try attaching this universal-joint contraption to the lute back after it's been taken off the mold, to see if I could use it for scraping the back, resolving the rib lines, and giving the back a beautiful shape.
Now, I always do some initial filing of rib joints and scraping of ribs while the back is still on the mold; it's necessary, for instance, to get a shape that's pretty close to perfect at least on the bottom end of the body, in preparation for fitting and gluing the capping strip.
But once the capping strip is glued on, I'm usually happy to get the back off the mold and reinforce it from the inside: glue paper strips on all the rib joints (and sometimes across the ribs too), glue in the counter cap, fit the false belly, and so on. Generally I don't work with the shape of the back again until later in the construction process, when I'm finishing out the whole lute in preparation for varnish.
The trouble with leaving rib/ body work till that late stage is that by then I'm working with an almost fully assembled lute, and there's no way to hold it completely steadily. The best way to hold it securely is in my lap, against the padded edge of my workbench. And as you can see, that puts me in the middle of a lot of wood dust (which I'm becoming more and more sensitive to every day.)
So, in an effort to separate me a bit from that cloud of dust, I thought I might try doing some of this work earlier in the process, by holding the back steadily in the vise.
Here's what I came up with. The false belly--the closely-fitted piece of panel board that temporarily maintains the shape of the body during the construction process--has been spot-glued into the completed back. I then pre-drilled four screw holes.
I screwed the block/ turntable assembly to the false belly, with a coupe of #10-2" screws.
I then mounted the thing in the clamp in my bench vise. My only question at this point was whether the whole thing would be tight and sturdy enough to withstand the pressures of being worked on with files and scrapers (or whether, for instance, the spot-glues on the false belly might not hold.) The answer is: yes, it is strong and steady. I feel I need to be a little careful in handling the back when re-positioning it, but otherwise the assembly is very stable.
That's my brainwave. It doesn't seem like a big deal, does it? And yet in a way, it is. It gives me a little more flexibility in assembling lutes, because it allows me to change up the sequence of construction. So, instead of waiting to the very end of the building process to resolve and tighten up all the rib lines, I can do it earlier on, and with more control. Or, I can do it later. It doesn't matter. The important thing is, I now have the choice. And the best part is, it didn't cost me a dime!
As some of you may know, I love betterizing: taking a contraption and adding to it or modifying it to extend its life or usefulness. I encourage you to betterize in your own workshop, and share the news with the world.
Here's a short video I made of the contraption in action. Enjoy.
Hello, and welcome back to The Lute's Progress. Today marks a return to the blog after a brief hiatus, and I hope everyone's doing well out there, staying safe and sane.
With this post I want to inaugurate an occasional series about where I work, and how I'm set up in my workshop space. I'll begin by introducing you to the building, and then invite you into my shop upstairs. I moved into suite 212 in February of 2021. It's the first time I've ever been able to move into a space and lay it out the way I want, pretty much without compromise. It's the best shop I've ever had.
I must tell you, though, that the beautiful building where I have my shop is unfortunately not long for this world. For many years it, along with a couple of adjacent properties, was owned by a local family company. Late last year, however, the company sold the properties to a multinational property developer. In a short time--nobody can tell us quite how long--our building will be razed to the ground, and replaced with a five-story concrete monolith. The spaces within this hulking-fortress-like-monster-to-be will be sold as industrial condominium units, so if you've got a couple of million dollars to spare, you too can be the proud owner of a thousand square feet of uptight, airtight, airconditioned office and warehouse space for your import-export concern. If not, well... good luck to you in finding a new space to rent for your little fine-craft workshop.
So while it lasts, and for what it's worth, here's the building: 8696 Barnard Street, Vancouver, BC, Canada. As far as I know it's never actually had a name, though these days some of us who have work spaces there have taken to calling it the "Barnard Street Studios."
Seems a bit fancy for what was, originally, a ladder factory.
The Barnard Street Studios
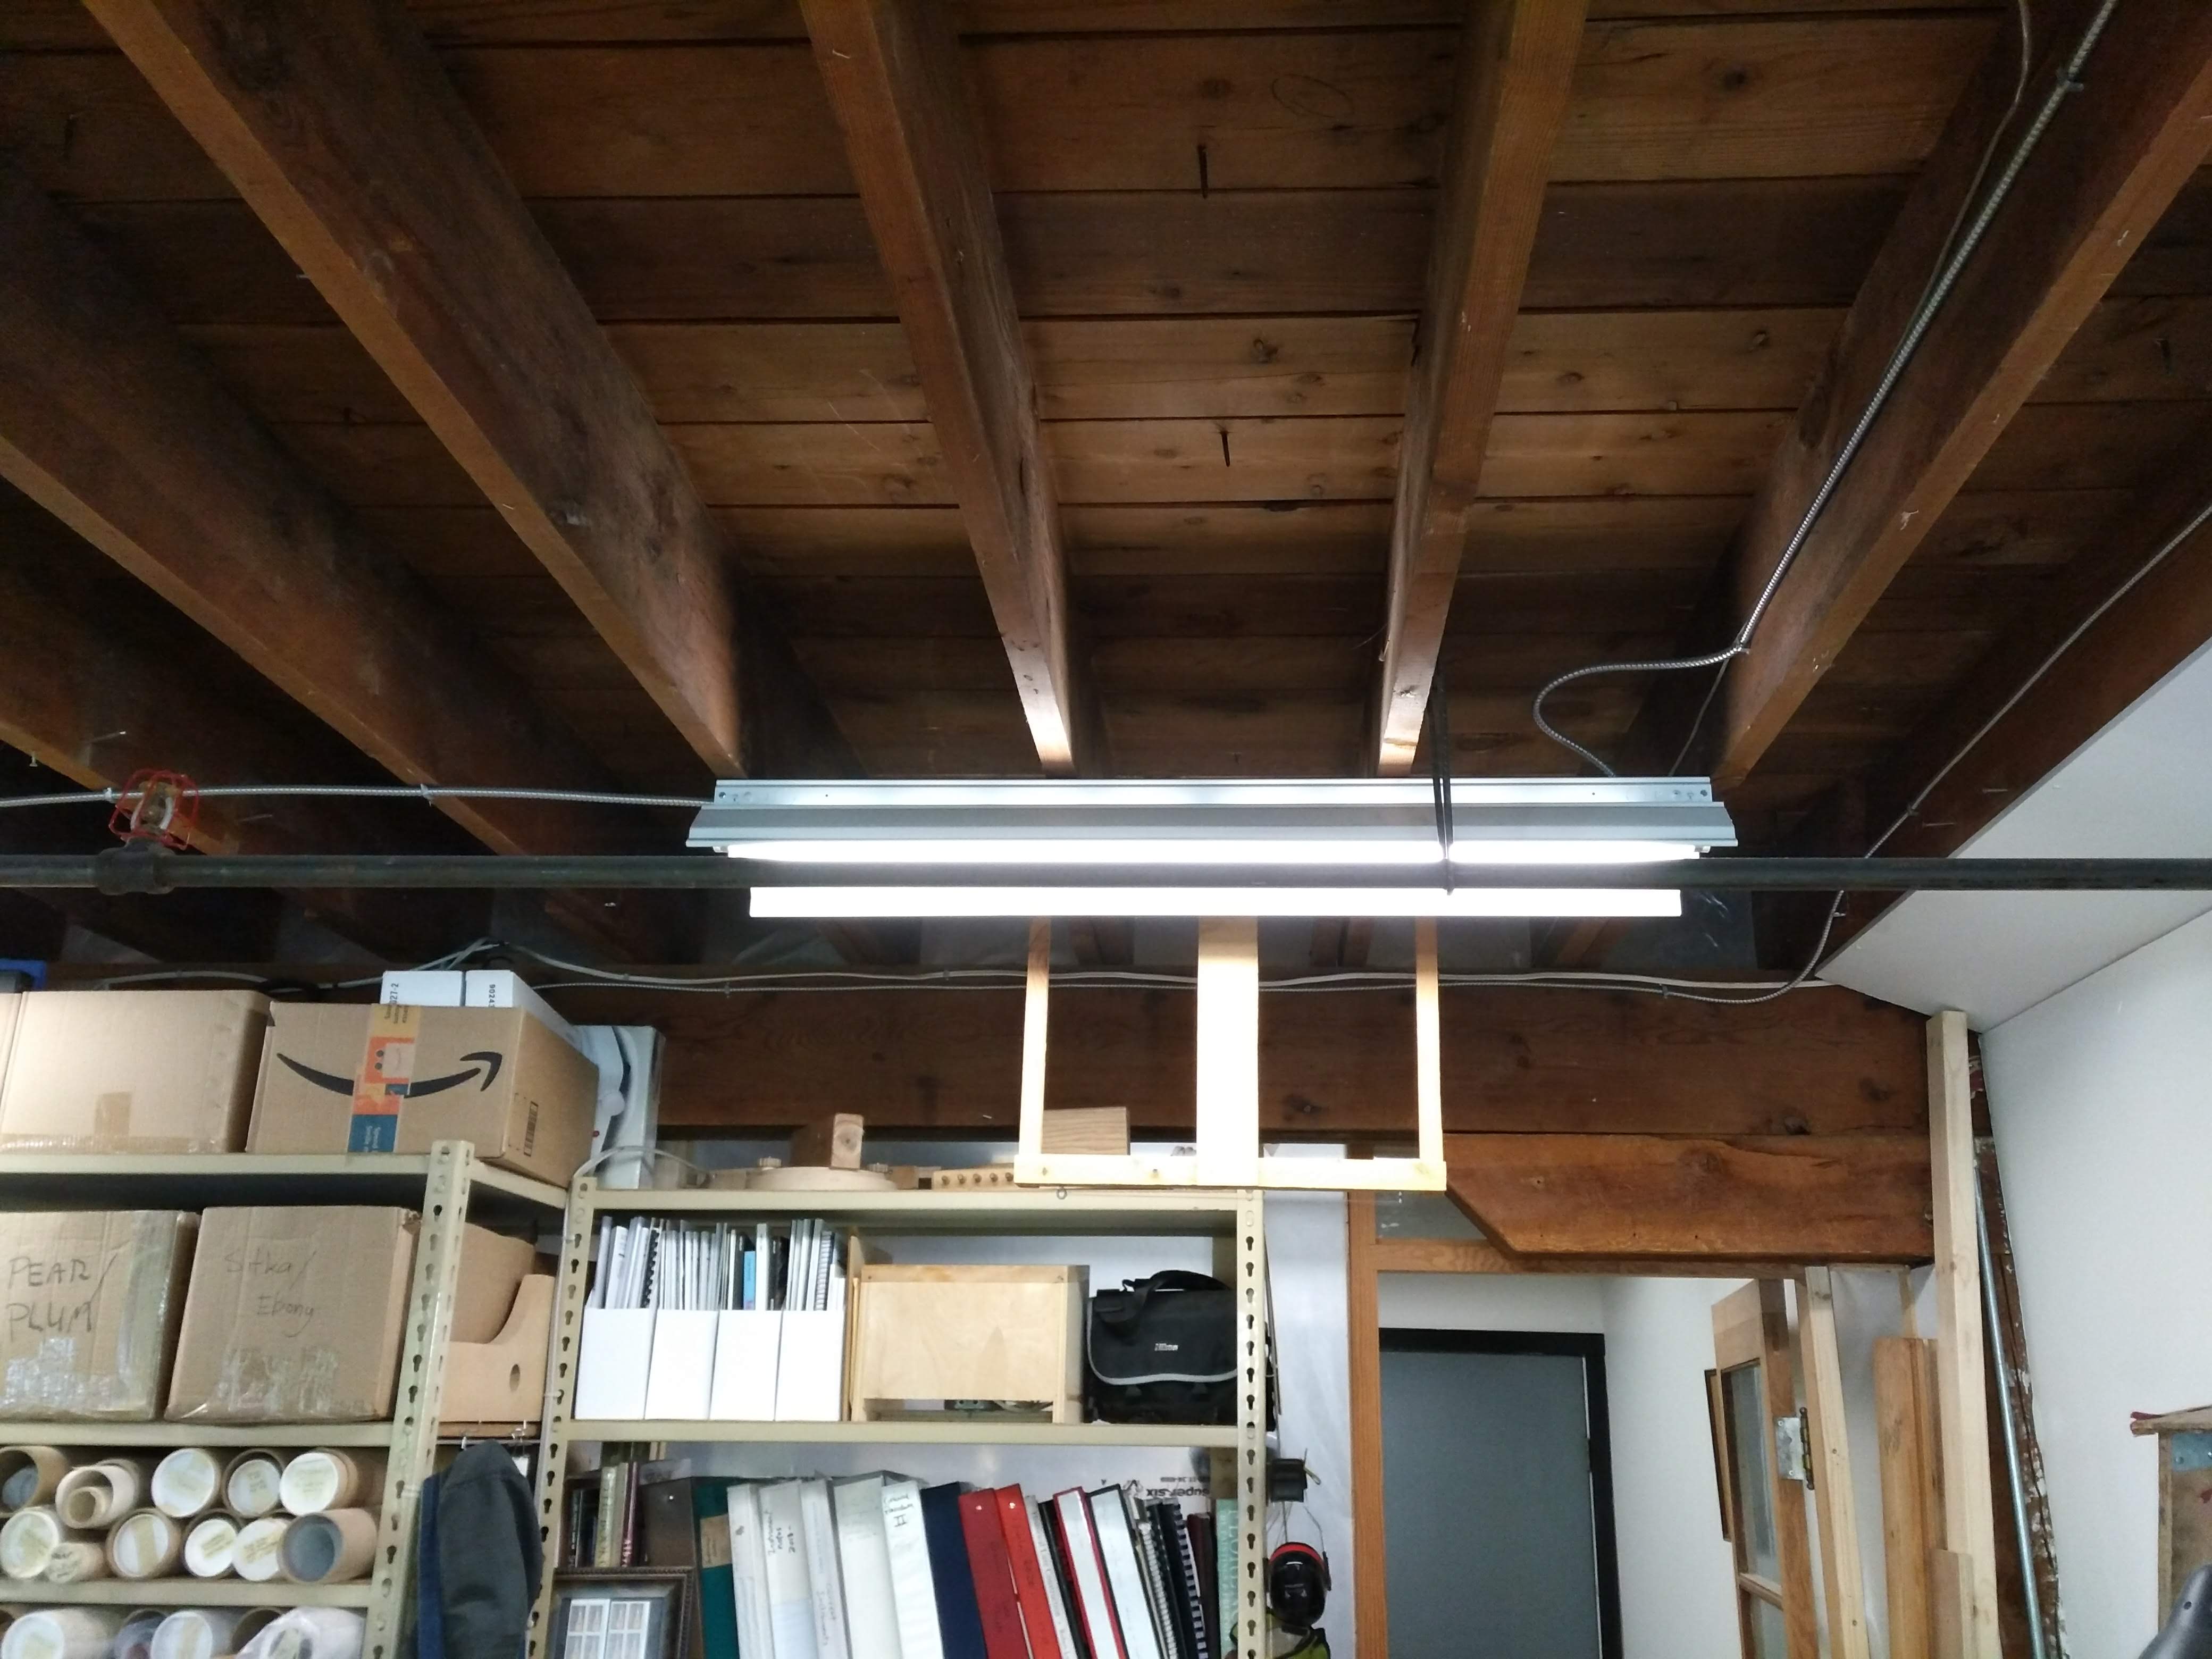
I'm told the building dates from the 1940s, but it's still very solid. It's been well maintained over the years, with a new roof and new siding recently installed. And, as they say, it has good bones: beams, pillars, and floor and ceiling joists of old-growth Douglas Fir. This stuff is so hard you cannot drive a spike into it (at least I can't.) You can see the joists, pillars and beams in my workshop--here's a shot.
Douglas Fir joists, beams and posts.
I know it was a ladder factory because I once met an elder gentleman from Vancouver who had been inside the building, in the factory, in the 1950s. No doubt the ladders were made of local timber, most likely old-growth Western Red Cedar. I imagine at that time, the raw logs would have been floated down the mighty Fraser River and sawn into lumber in one of the mills along the water, then the lumber delivered to the factory by boat or barge. The north arm of the Fraser is only a couple of blocks away, down the hill from the Barnard Street Studios. There's a nice park there now, where I can go after a tough day at the salt mines and clear my mind by watching the tugboats haul log booms and barges up and down the cold, turbid river.
North arm of the Fraser River, at low tide. Vancouver International Airport (YVR) is just to the south, across the river. The Strait of Georgia, the salt body of water that separates Vancouver Island from the mainland, is just around the bend, to the right.
I first came to this building in the early 2000s, when I brought the second lute I'd ever built to show to Grant Tomlinson and ask his advice on lute making. Grant has had a workshop here since the late 1980s; when he arrived, along with lute maker and Early Music guru Ray Nurse and the guitar maker Eichi Izikawa, the whole second floor was wide open, and they were among the first to put up walls and divide the floor into workshop spaces. By the time I started bugging Grant about lute making, the building was alive and abuzz with people and their small businesses. It seemed like a happy place to work.
I eventually got to learn about the place more intimately, when I received a grant from the Canada Council for the Arts in 2008 and was able to work with Grant in his studio for an entire year. He chained me to a small bench by the door, and I spent the year learning the trade and craft, and observing how a professional lute maker organizes a day, a year, a career.
A recent photo of Grant Tomlinson's workshop. Grant has the cleanest, best organized woodworking shop I've ever seen, and his way of working and setting up a space has been a great influence on me. (I did not work at either of these benches while I was with Grant.)
When the year of residency was finished, I was able to find a space to set up my own workshop pretty much right away. A small anteroom of an office down the hall was available to sublet, and I snagged it. It was tiny, hot, and L-shaped (being laid out around a stairwell), but I made it work. I carved this rose in that workshop: it was for an 11 course lute based on the Warwick Frei, which was my first professional commission after leaving Grant's shop. I set the belly in the south-facing window, and took this shot. I did a pretty good job on the carving, and it's the best rose photo I've ever taken.
Did I mention this space was miserably hot? It was also pretty miserably loud. It faced south, onto an alley/ parking lot, at the end of which was Peter Fenger's workshop. Peter and company made custom windows and doors for the big old houses in Vancouver, and there was a large dust collector out my window that ran pretty much constantly. I'm not sure how I stood that noise, but I did, for seven whole years as a matter of fact, in that small space. One thing a lute maker likes to have is some peace and quiet, every once in a while at least, to do things like tap a soundboard and trim the bars so that the finished lute will sound good. When the dust collector was shut off, it sounded to me like the whole world had suddenly gone completely silent. I could hear birds singing, my own thoughts suddenly ringing in my head. I treasured those moments, and made good use of them, I think. I made a lot of really good instruments in that space.
Here's the Fenger shop, at the end of the alley. Peter retired recently, so the shop is pretty quiet these days--it's being used as warehouse space by one of the businesses in the main building.
You see here some wonderful examples of the doors and windows that came out of this workshop. Here's another example of Peter's attention to detail, a handsome exterior door for one of the workshop spaces on the main floor.
Isn't that sweet? A door like this is emblematic of the whole building: solid, beautiful, and full of soul.
By the way, I don't mean to begrudge Peter and company the noise they made in those years. They were working hard, putting in the hours, and I was too, as we all were in the Barnard Street Shops.
Peter was also very generous to me, and a lot of other people in the building. Every Christmas season he distributed his fruitcake, and it was wonderful stuff, dark, sweet, spicy, soaked through with booze. In return I would give him a jar of apricot jam, his favourite he said, if Julia and I had made some that year--
Hand crafted in Julia and Travis's kitchen.
--or if we hadn't, perhaps a jar of highbush cranberry jelly from the bush of Northern Saskatchewan, land of my ancestors.
Hand crafted in my mom's kitchen.
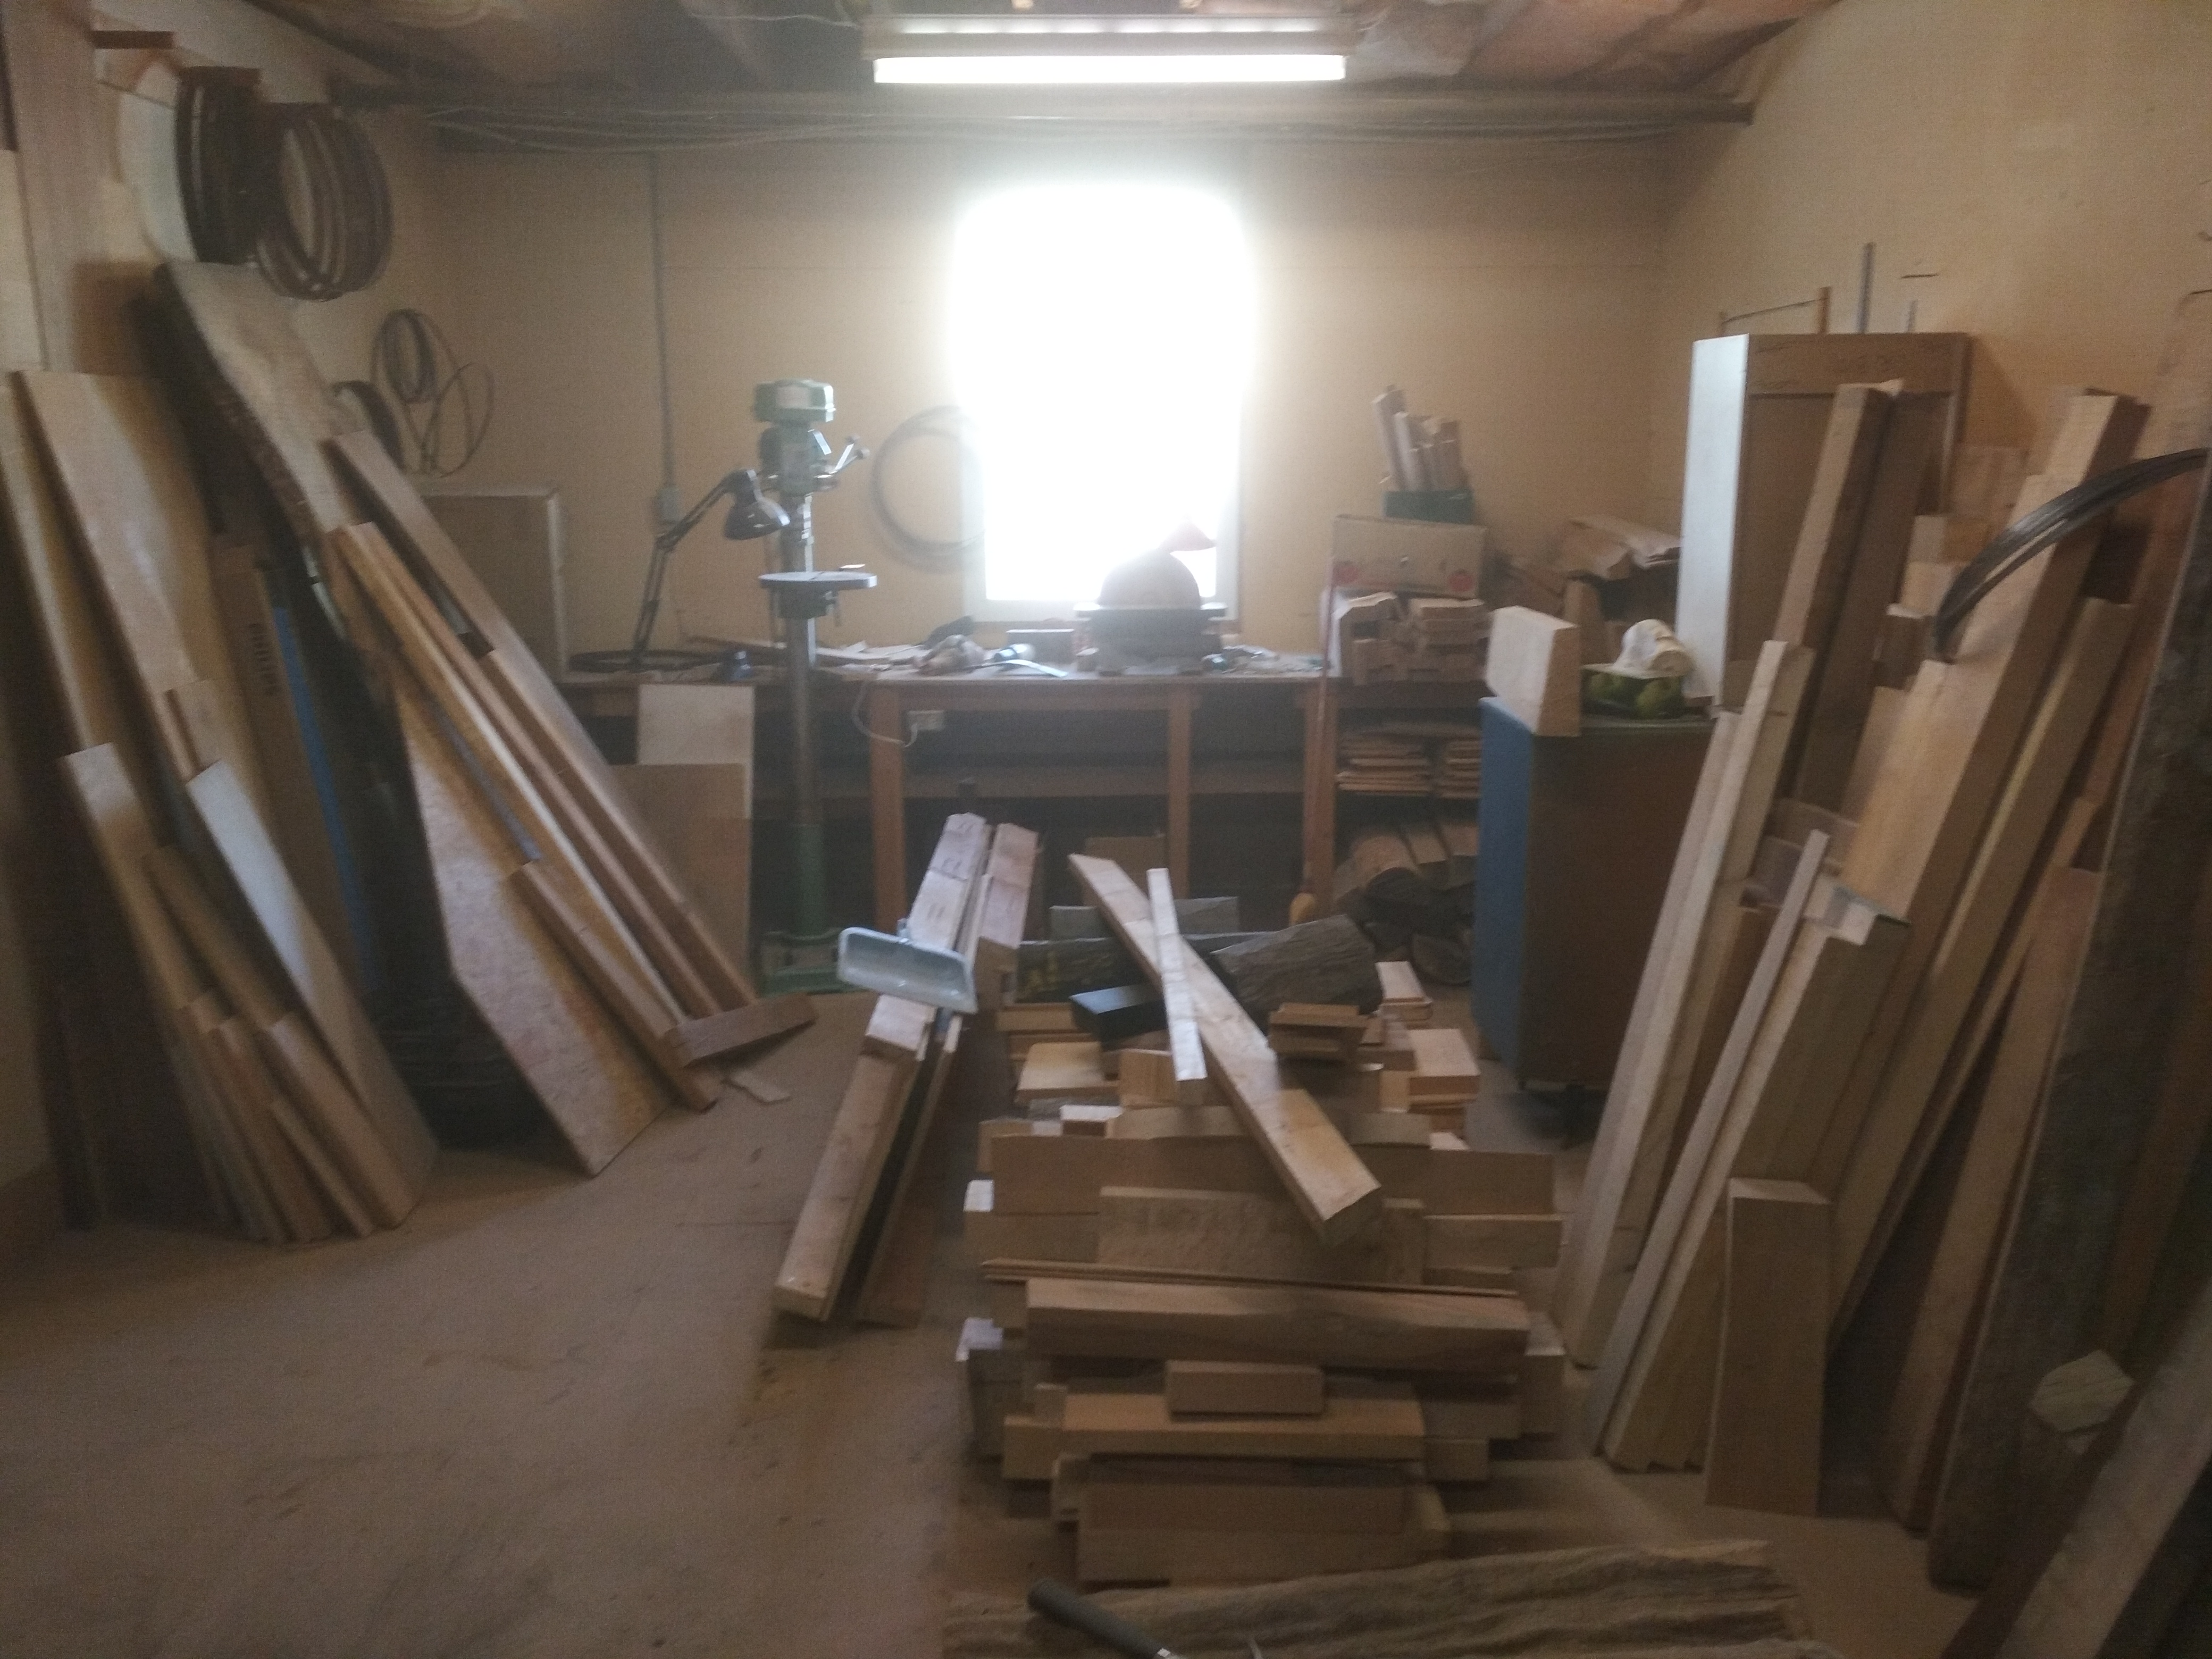
One of the most amazing gifts I've ever received came from Peter, and it was a door. I was finally about to move out of the L-is-for-lute-shaped box after those many years into a slightly larger, fully rectangular space down the hall. This room was actually Ray Nurse's shop, though he was never resident in it while I was in the building; I was to sublet the space. Ray mainly stored his wood stash there, and we all used it as a sawing room. It was somewhat untidy and a bit dusty.
Ray's shop, Ray's band saw, Ray's wood, and another fine Douglas Fir post holding up the right edge of the photo. Taken in the midst of the moving-in disaster.
More of Ray's wood. I was moving to the north side of the building, away from the noise of Peter Fenger's dust collector. That's some nice northern light coming through the window.
As you can see, I was looking at a bit of a dusty mess to clean up before I could move in. Not quite the Augean Stables, but close enough for my liking.
Since Ray, Grant and I still needed to use part of this space for the sawing room, my idea was to divide it with a temporary wall of 2x4 studs hung with thick polyethylene construction sheeting. That way, the dust from the machines would stay on one side, away from my dust-free (ish) hand workshop on the other. I had thought that I might just overlap the edges of the poly to make a temporary door, but Peter asked me one day if I would like a real door to use, since he had one kicking around his workshop, and would be glad to get rid of it. I said sure--and here's what he brought me.
Peter's door.
The view from Peter's door, looking into a small, crowded, cozy and productive shop.
Space was a bit tight, and a lot of the time I felt like I was working inside a cockpit. If I happened to buy a plank of wood to add to my stash, I'd pretty much have to reorganize the entire space to accommodate it. When the cases I'd ordered for my lutes came in, I wedged them between my workbench and an old chest of drawers that served as a storage chest. The bubble wrap the cases came with got wedged in anywhere it would fit.
This suite was a sublet, and eventually I had to give it back to the leaseholder. A few nervous months passed while I looked for a new space... somewhere in Vancouver... somewhere in the lower mainland of BC... somewhere. Then, just in the nick of time, a suite came available in the Barnard Street building, just down the hall. It was much bigger than my current space (and more expensive), and I would finally be the leaseholder, not a sublet. I took a deep breath, and signed on the dotted line.
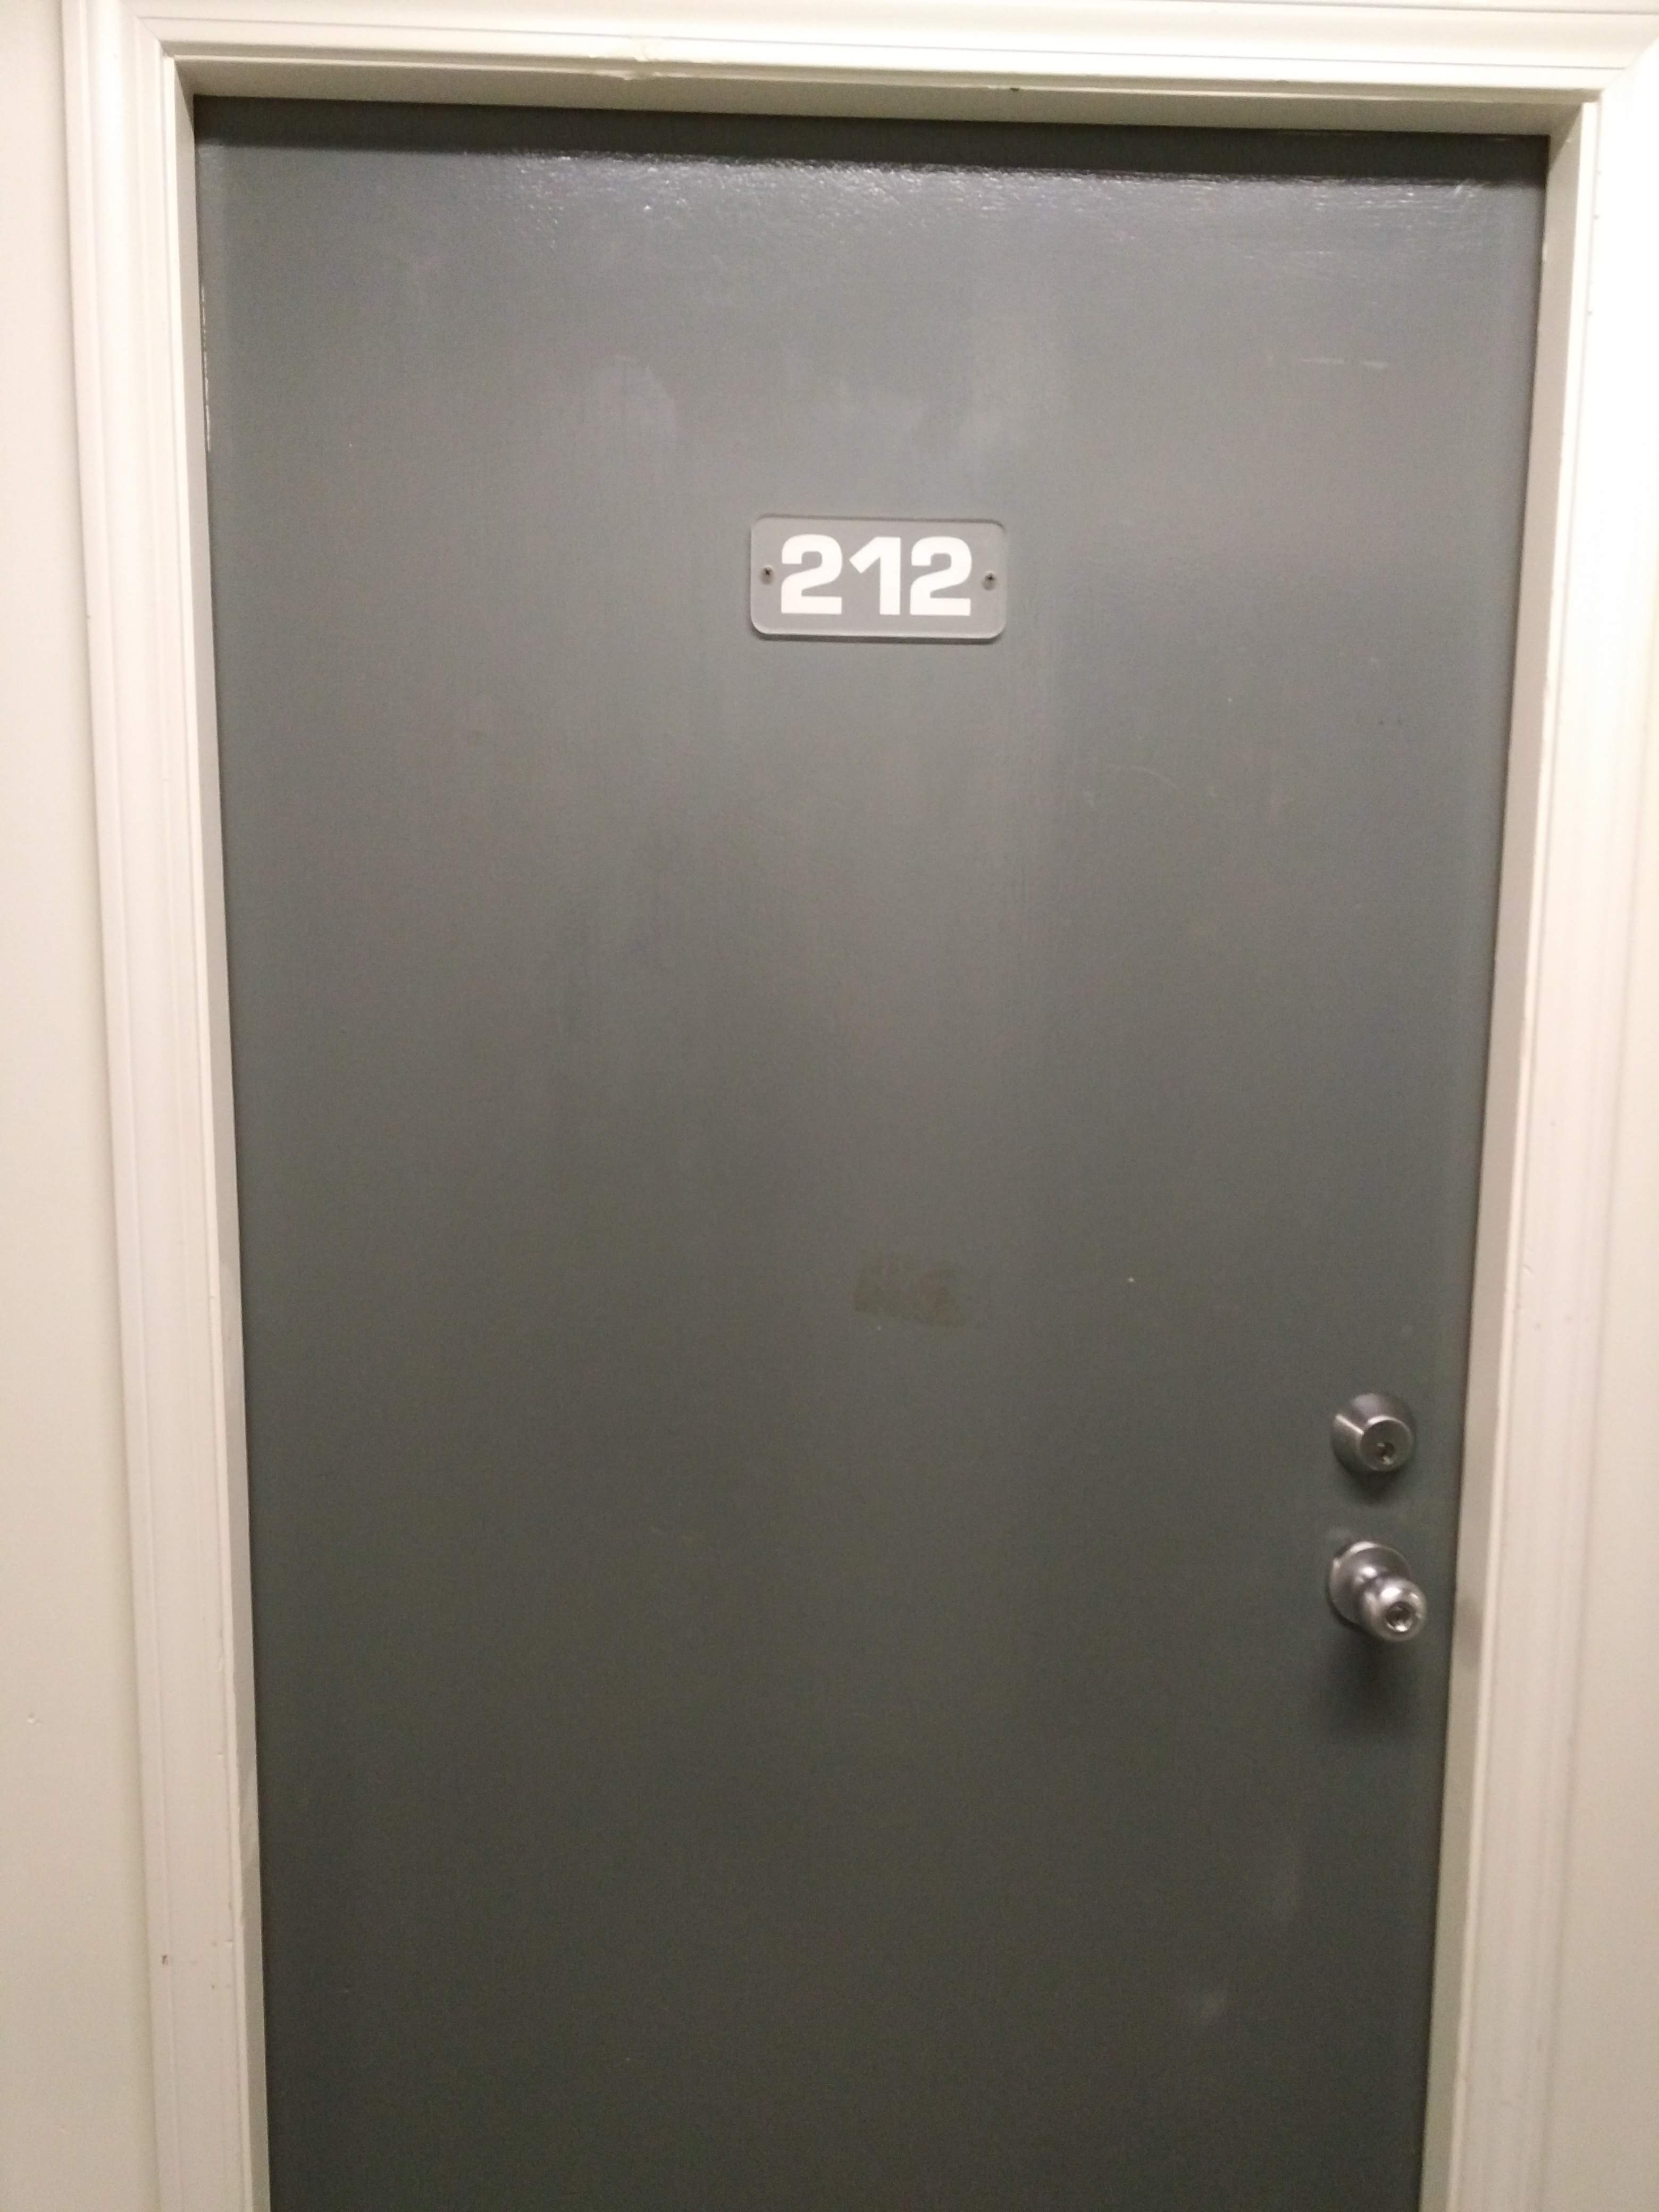
Which brings us...here. Suite 212, 8696 Barnard St., Vancouver, British Columbia, Canada. My workshop, and the World Headquarters of Travis Carey Lutes.
Care for a tour? Here's a little video I made to show you around. It's quick, but gives an idea of how the space looks, and how it's organized.
In further installments on this blog, I'll show you in more detail what the space is like, and how I set it up to work within.
I hope from this post you get a little sense of the building I've laboured in and built a career in as a fine craft artist for the last 13 years of my life. As you might be able to tell, I love the place. In general, I like the people who work there a lot--they are, by and large, very good neighbours. Plus, my colleague Grant Tomlinson is just down the hall, in 206. We rely on each other, giving support, advice, and cameraderie every day.
But it's the building itself that continues to amaze me. Since the building sold, and our eviction--whenever it may come--hangs over our head, Grant and I have made some small efforts to find new work spaces in Vancouver. Let me tell you, they are as scarce as hens' teeth; and scarcer still are buildings made of wood, like ours is. We've had a look at spaces in one of those concrete, uptight, air-tight, air-conditioned buildings, and they do not even compare. Musical instruments cannot be built in such spaces.
Because it's made of wood our building breathes like a musical instrument breathes. In summer we can open the windows and let in the fresh air; in winter, when it's pouring rain in the streets, we can shut the windows, turn up the heat, and dehumidify the shop to that certain magical spot, between 40 and 45% relative humidity, which is the prime space for assembling the various woods that go together to make a lute. Wood loves wood; wood wants to be with wood. For lute makers, and I dare say other fine craft workers who are housed here, the Barnard Street Studios building is an absolute gem.
There is a lot of talk in our part of the world about "saving old growth," trying to halt the destruction of the few, last, old forest giants that live in remote parts of the coastal mountains of British Columbia. A worthy sentiment, to be sure. But our building is also "old growth:" old trees, old lumber, old building, old Vancouver. I think the "Barnard Street Studios" is old growth that should be saved, too.
Hello my friends!--and welcome back to the final episode of the series wherein I show how I go about building a 13 course lute, with a body based on the archlute by Magno Tieffenbrucher, C45 in the Vienna KHM, and a peg box and bass rider arrangement based on the lute by Sebastian Schelle, E.633 C.218 in the Cité de la Musique, Paris. As always, I have much to show you today, and I'm afraid it will be a long post. I'll try to be gentle; and I thank you, in advance, for your kind attention.
Here comes the firehose.
Tying the frets
There are lots of good descriptions all over the internet of how to tie lute frets, but here's my version. I personally think the best description out there, which appears to be quite straightforward and give a good result, is Martin Shepherd's. (The video's here.) I haven't tried it yet, but I will soon. In Martin's version the knot comes around the neck in the opposite direction to mine. My advice: try 'em both, see which one you like best.
The tools and materials of the trade: a selection of fret diameters (from 1.4mm to 0.60mm, graduated by 0.05mm), a pair of pliers, a butane lighter, fingernail clippers, and a wood-burning tool.
Neck's all ready. Fret me!
I don't use the pliers to pull frets tight--I only use them to crimp about an inch of the end of the fret, so that it's easier to tie the knot. (This is especially useful on larger-gauge frets, which can be quite stiff and hard to bend.)
Then I burn the tip of the crimped end.
And tie an overhand knot in that end.
I pass that knotted end under the neck so that the knot emerges on the bass side. Then I slip the free end through the knot.
I brace the fret with the left thumb, and pull the free end back toward me so that the fret tightens.
I bring in the pinch-clippers to cut the end off, leaving a few millimetres...
And scorch the free end with the wood-burning iron. I like using this tool for this part of the job because I prefer to keep open flames away from the instrument, especially if there are strings on it. This one hasn't been strung yet, but when it is, it will have bass courses overhanging the edge of the neck.
The finished knot.
Because it can make a groove and mar the neck as I pull the fret into place, I put a small slip of card under the knot. The problem is more acute in a pear neck than in one veneered with ebony, but I do it anyway, just in case.
I brace the instrument carefully while pulling the fret down into place.
I've made a card marked with the (provisional) fret positions and their diameters. The end of this card rests against the front of the nut.
There's the fret in place. This baroque lute has 10 tied frets, and the 10th ties easily. I don't care much for having to notch the edge of the fingerboard to keep a fret in place, or to hang the fret on a button drilled into the middle rib. It's much easier and better just to pay attention to this detail in the lute's design stage, and ensure that the fret has room to stay where it's tied.
The compleat set. The frets are graduated along the neck's length. The largest, nearest the nut, has a diameter of 1.10mm.
Okay, moving on: let's get some strings on this fellow.
Stringing up
I start with the strings to the main nut. First, I lay out the position of the string grooves.
When I shaped the nut (in the previous episode), I kept the treble edge square, for just this purpose: to match my card against it, and accurately mark the string locations.
In each of the string marks, I make a preparatory cut with an x-acto blade. I've run this blade over a fine file, which slightly serrates the edge and turns it into a kind of small saw blade. Each little kerf makes a secure place to seat a small tapered file, which ensures that string groove will be in exactly the spot I want it to be.
All of the string grooves will be filed in situ on the lute, so I string one bass string in order to hold the nut in place while I work. (I haven't yet filed a groove for this string.)
My tools of the trade for this job: two fine Grobet files (#4 and #6), a selection of graded spacers, a tube of metal polish, and a length of fine cotton yarn.
I begin with the first course, seating my #4 file in the saw kerf, and making a fine, evenly-shaped groove. I don't file too deep: I only want to create a groove in which I can place my first course string, wind it on the peg, and check its height.
I very lightly file the leading edge of the groove--not so much that it will create a buzzing, sitar-like effect; only enough to remove any sharp edges that can abrade the string.
I file the groove lightly with the finer #6 file, and then polish the groove with the cotton yarn charged with a little of the metal polish.
I then wind the string, and slip my spacer piece under it, beside the first fret, to check its height.
This already looks pretty close: for the first course, I want a height of around 0.45 or 0.5 above the fret. Since the fret is 1.1 mm in diameter, that means I want the bottom of the string to be about 1.55 or 1.6 above the fingerboard. As you can see in this photo, there seems to be a tiny bit of space between the bottom of the string and the spacer. I think I'll file with the #6 file a bit more, then polish with the string, then check the string height again.
Using side lighting can sometimes show more easily how much clearance there is between the bottom of the string and the top of the spacer.
I've found that the best way to use this system for setting string heights is to file carefully, then polish, then check string height, and then repeat this sequence as necessary until the correct height is reached. I always have a final height in mind for each course (and that height increases slightly for each course as I move across the string band from the treble to the bass side.) The best way to ensure that I don't go too far is to use a spacer that is 0.05 mm higher than the final height I want. When I slip the spacer under the string and it nudges the string ever so slightly, that's when I know I have achieved the correct string height, and I can move on to the next course.
I usually wind the courses that I'm working on, and just keep them to the side of the grooves, so I can see how thick the string is and use the segment of the tapered file that best matches that diameter. I also broaden the groove (by using a wider part of the file) as the string goes around the curve on the back of the nut. What I'm doing there is actually easing the curve, making it slightly less sharp.
When I'm working well--when I'm getting into the groove, so to speak--I can do a double course of strings in about 15 minutes. That means I will finish making the grooves for the first 11 courses of this lute in a little under 3 hours. Not too bad, for what might at first blush appear a bit of an overwhelming task.
By the way, to wind the string onto the peg in the chanterelle tuner, I thread the string through the hole in the peg, then bring it around the back side of the hole and thread it through again. For the rest of the strings in the main peg box, I thread the string through and then loop it around and under, so that the free end of the string points away from the near peg box cheek--like so:
Stringing the two lowest courses in the bass rider is pretty straightforward--I mark the positions, use the x-acto knife/saw, then file some grooves. I don't have to worry about how deep to make the grooves so that the string is a certain height...
... but I do have to make sure the grooves are deep enough, and the outer ones curled in a little, so that the strings won't slip out of their grooves when they're brought up to tension.
At last--the lute is strung.
Now, all I need to do is start tuning--and keep tuning, and then tune some more, for days on end, until the instrument starts to settle into an equilibrium. The strings need to stretch, and the lute needs to flex slightly to accommodate the tension that's suddenly been introduced. The belly under the bridge may rise slightly, the neck may pull forward, and the action will likely rise by a couple of tenths of a millimetre. I expect all of these things to happen, and as I tune and play I keep an eye on how all these factors work together. Throughout this process, I also get my first real idea of how this lute is going to sound--and that's a thrilling, as well as a somewhat daunting, prospect. As with every lute I make, I've not only put a lot of work into this instrument, but more, I've put every ounce of knowledge, experience, intuition and musicality. I want the lute to sound beautiful--but will it? How can I know? Will it have strength, volume, projection? Will it have subtlety and soul? Will there be an evenness of response across the string band? Will it give everything the player asks of it? Will the treble sing? Will the sound of the basses break your heart?
Only time will show these things, and it won't necessarily show them to me. In my workshop, I'll only get the merest glimpse of what this lute might sound like. Very soon I'll be giving it up to the new owner, who will be the one responsible for bringing it to life and giving it its true voice. My job, at this point, is to make sure that everything works--the strings vibrate without buzzing at the nut, the pegs are well fitted and lubricated, and the feel of the lute is friendly and comfortable. At this point, lute making is a matter of details; it were ever thus, but at this point even more so. So let us put the finishing touches.
Body Frets
Now that the lute's finally well in tune, I can find the octave, calculate the correct placement of the frets, and nudge the tied ones into place and make and accurately glue the wooden body frets.
To find the octave, I use a small piece of body fret shaped from a strip of ebony. I move it slightly up and down the string until I find the exact spot where the fretted note matches the harmonic at the mid-point of the string. (I could do that by ear, but for convenience's sake I use an electronic tuner.)
While holding the fret down, I make two light marks with a sharp, soft lead on each side. Then I lift the fret away and mark the mid-point. That mark is my octave.
I can then measure the distance between that mark and the front edge of the nut, and double the number to give me the playing string length of the lute. This string length will be a little shorter than the physical measurement of the string from the bridge to the nut--usually a few tenths of a millimetre--owing to the physics of a string that's been stretched in order to be pressed down onto a fret. Once I have the playing string length, I can use it to calculate the accurate position of all the frets. I mark these positions on a strip of card, lay it down on the fingerboard beside the first course, and push or pull the tied frets into their spots.
The 11th and 12th frets, however, I'll need to locate and glue down accurately on the belly. Here's how that process goes.
I want the ends of the body frets to basically follow the line of the treble edge of the fingerboard, so I lay down a short strip of masking tape on the belly that projects this line. I then mark the positions of the 11th and 12th frets on the edge of that piece of tape.
At each of these points, I lay down my small rule and measure how long the fret should be. I want the 11th fret to cover the first four courses, so I measure from the mid-point between the fifth and fourth course, to the edge of the masking tape. As shown, the 11th fret should be about 38.5mm long.
The 12th fret will cover the first three courses, and so will be 29.5mm long.
The last tied fret, the 10th, has a diameter of 0.80mm. The next fret in line, the 11th, can be a little taller, since the level of the belly begins to fall away slightly from the body neck joint. I'll make the 11th fret 0.95mm tall, and the 12th fret 1.05.
Here are my fret blanks--strips of ebony and hard boxwood. I usually leave it up to my clients to decide which they would prefer, and for this lute, it will be ebony. I use my pull-through scraper (the same one I used to size up spacers for the back--detailed in episode 1 of this series) to make strips of fret material exactly 1.5mm wide, and of various, accurately measured heights.
I cut the fret material a little over-long, and then shape it pretty carefully with a fine file.
I hold it in a ledge jig to file a smooth quarter round on one end...
...and then the other; then I flip it around to file the other edge.
I cut the fret to the exact length, then dock the ends with a 45° stroke with a file.
There they are: the shaped frets.
I have a pretty slick routine for gluing the frets in place, which I'll show you now. Sadly it involves, first, de-tuning the lute and slacking all the strings to move them out of the way. That's all right though--it allows me to do a couple of other small jobs that are crucial to the smooth functioning of the finished lute. I'll get to them in a minute.
First, as you saw above, I marked the position of each fret on a piece of masking tape. That mark shows where the treble end of the fret lies; now that I've got the frets made I can lay them down, in position, and stick another small piece of tape beside the bass end of the fret. I then mark the fret position on that tape too, and draw a line with a sharp, soft pencil, on the belly between those two marks.
Then I scrape away that line, and along with it, a bit of the finish that I put on the belly in episode 18, to expose a bit of fresh wood for gluing.
I don't scrape away too much--just enough that the body fret will glue securely.
Hot hide glue is my choice for this job. First, a quick, light coating on the bottom...
...and I get it stuck in place quickly, and hold both ends down while the glue sets a little.
Then my steel rule provides clamping pressure for a minute or two.
And that's basically it. When I have both frets glued in place, I wait a few minutes, then brush a drop or two of water over them to soften the bit of glue that's squeezed out. Then I can come along with a sharpened spruce stick and clean up the excess. It leaves a very nice result, I think.
Now while this glue is firming up, there are a couple of other finishing jobs to do.
Fitting the strap button
One of the last jobs I did before gluing in the belly (in episode 13) was to drill a pilot hole for the strap button. Now, I'll enlarge and taper that hole with a reamer (the same small reamer I used to fit pegs in episode 23.)
I make strap buttons out of many different woods--pear, plum, boxwood, snakewood, holly. I usually turn a bunch every few years when I have the lathe out to make sets of pegs. The black strap buttons you see in the photo above are not ebony, but instead are boxwood, a softer material that I dye black and oil.
I shape the shank of the button with a flat file, looking to match the taper of the hole.
When I've filed the correct taper in the button, then fitting is simply a matter of reaming the hole to the proper size.
I generally don't glue the strap button; if it ever needs replacing, it's a pain to get a glued one out. If the button's well fitted, there should be no problem with it slipping out of its place during use.
A few final tasks
Now is the time, while the strings are off, to give both nuts a final shape and polishing.
One priority here is to round over any sharp corners on the nuts that could injure the player. This is mostly a problem on the treble edge of the main nut. Up to this point, that edge of the nut has been left square, but now it should be rounded generously on the top, front and back edges (and even the underside can be gently relieved.)
At the same time, it can be a good idea to re-shape the top of the nut if the string grooves are excessively deep (they should be no deeper than half the diameter of the string, and some players prefer they be much less than that), or if there is excess material on the upper part of the back edge--where the strings should glide easily over a gentle quarter-round profile.
A final touch is to give the top and back of the nut, as well as the string grooves, a final shine with a little metal polish squeezed onto a fine-grit sanding block.
After the big surfaces are polished, I also give the string grooves a final touch with the cotton yarn. Then I clean up all the excess with a soft cloth.
Both nuts are polished, and almost ready to receive strings again. But first...
I'll take the opportunity to lube the pegs one last time with soap. This is an operation that needs to be done frequently in the first few months of the lute's life; if it isn't, the pegs can become sticky and very cranky to use. (I'll include a small piece of dry hand soap in the case for the new owner.) After a while, they become well enough lubricated that they might in fact need to have a little chalk rubbed on the contact surface to make them stick properly--and I have included a piece of chalk in the case for that purpose, as well.
Now I can re-load all the strings in the peg boxes. For the main peg box, instead of starting with the first and stringing in sequence to the 11th, I wind the strings from both outsides in--that is, from the 1st course to the 6th on the treble side, and from the 11th course to the 7th on the bass side. This keeps the strings orderly and prevents them crossing in the peg box.
I think that's it. I think this 13 course lute is now finally truly finished, and ready to leave the workshop.
I have one more task to complete, and it really has nothing to do with work on the lute itself. It's to make some sort of record of the lute, as it sounded on the day that Bob, my client, drove to my workshop and picked up his new lute. I felt that it might be a good thing to include in this blog a sound sample of this thing that's taken up some months of my working life to build, and many more months of my life to write about.
Bob picked up his lute in the spring of 2020. At that time, the city of Vancouver (and the province of British Columbia) had been in a state of lockdown for some weeks, due to the outbreak of Covid-19. I held onto the lute while both of us waited for a break in travel restrictions, so that he could make the 5 hour drive into Vancouver to pick it up. I kept the lute in tune, and resolved to play it as much as I could while I had it; but I'm not a baroque lute player, and I had a new 7 course lute of my own which I had finished alongside the 13 course (I'll tell you about in a future blog post), and that was taking up most of my playing time. So, the 13 course was languishing... a little.
One day, Bob decided he had waited long enough, and that the coast was clear for him and his daughter to make the trip. They got in Bob's truck; they drove; they picked up the lute; they drove home. The operation went very smoothly, Bob had his lute, and potential Covid exposures were kept to an absolute minimum.
Bob had told me that they were leaving early, and hoped to be in Vancouver, at my workshop, by 1pm. I brought the lute with me to the shop that day, and waited. Around 12:30 I sat down with my phone camera to make an audio-visual record of the sound of the lute; I turned on the phone and started recording, just goofing around, doing what I thought was a dry run. I shut the phone off, and was getting ready for the real thing, the real "take one"--when there came a knock at the door. It was Bob and his daughter. I put the lute in its case, and handed it over. I never got a chance to do the real "take one."
And so, in the place of a real recording of the lute, I offer you this--three rather informal minutes or so of me making sounds with this 13 course lute. It's not a pristine recording, and I'm not much of a baroque lute player, but there it is--perhaps it will give you an idea of how this lute turned out.
My series is done. Thank you for reading, commenting, listening. I wish you all a happy and healthy holiday and new year--and I hope to talk to you all again soon.


