Hi friends,
I have a couple of new instruments to tell you about--a 12 course and a 13 course lute. I finished them in late October, but it's taken me a while to get some photos together. In fact, I only have photos of the 12 course for now, so that's where I'll start. (I've bought a new camera and am still learning how to use it, so I hope I can get some decent shots of the 13c and post them on the blog early in the new year).
First, some 'mug shots', showing the overall shape.

A word about the design: the body's based on an archlute by the Sellas workshop from the 1620s. The original has 37 yew ribs; I took the shape and redesigned it for 15 ribs, which is the number in a similar (but slightly bigger) Sellas archlute from the 1620s in the Victoria and Albert Museum.

The V&A Sellas has ribs of ivory, with triple spacers (ebony/ivory/ebony); my version has ribs of honduras rosewood, with holly/rosewood/holly triple spacers.

As you might notice, the shape of the body is a bit squat, compared with, say, a Frei or Maler, or even a late-16th century Tieffenbrucher lute body. (The back is also quite flattened in longitudinal section, as you can see in this side view.) The Sellas workshop used this type of shape in the early 17th century for their small archlutes. The shortened body could accommodate a relatively short string length, and the extended width gave room for a long bridge (of 14 courses), while the flattened back ensured good sound projection.
These were exactly the qualities that drew me and my client, Evan Plommer, to this body shape. Evan had some very specific requirements for the design of the lute: 12 courses, a stopped stringlength around 64 cm, and ten tied frets. The Sellas archlute body fit the bill almost exactly--10 frets tied easily, the wide body could accommodate the 12 courses, and the string length to the main nut worked out to 64.4 cm.
Maybe the most challenging aspect of building this lute was designing, building and attaching the pegboxes. The bent back pegbox carries the first eight courses (it includes a chanterelle tuner), and the stepped extension carries the lowest four. While there are many iconographic examples of this type of pegbox configuration in paintings from the early 17th century, there are very few surviving historical examples of such a lute. In designing and building it I was mainly on my own, relying on historical pictures and a lot of advice from Ray Nurse, who has built a number of lutes like this in his career.
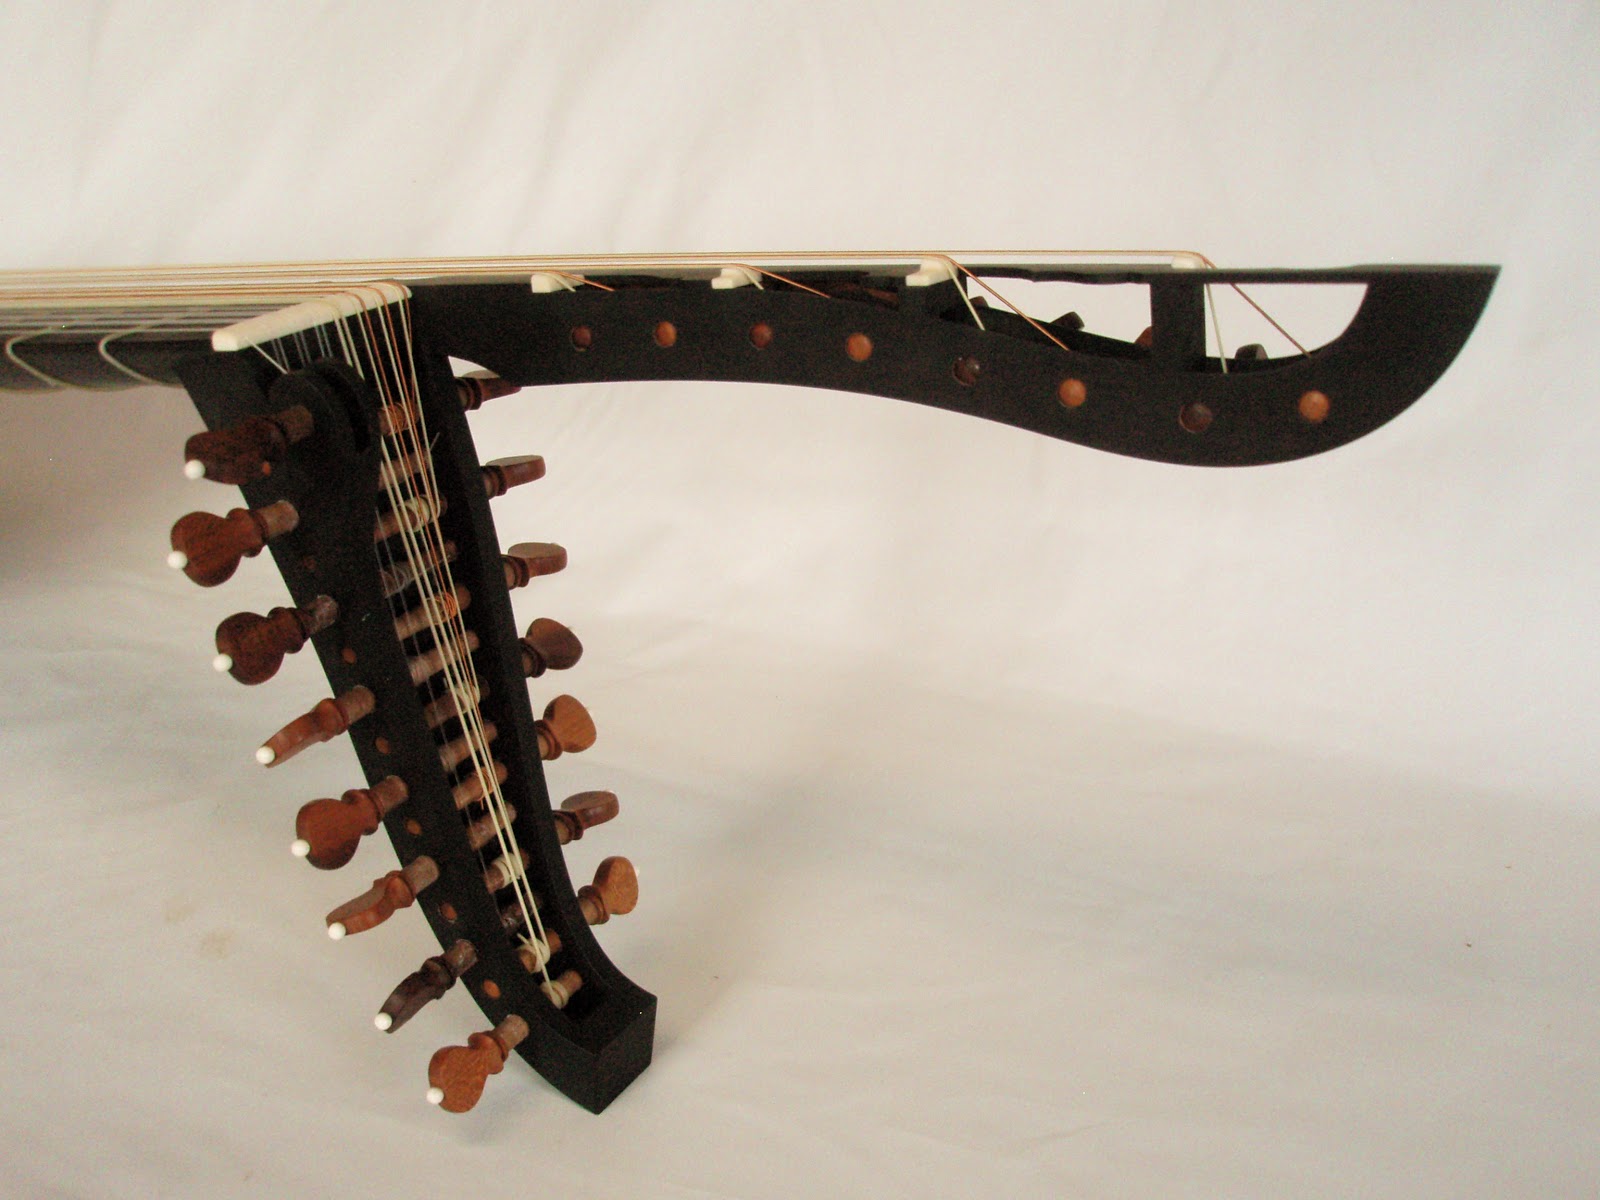

One of the interesting parts of putting these pegboxes together was that they have curved backs (the main pegbox has a curved front too). Evan had asked me to veneer them with ebony, so I had a few adventurous days bending veneers and fabricating shaped cauls for gluing them up.


Evan had also told me that he wanted a French-style bridge, so I came up with this variation on a pattern I've seen in a number of 17th century paintings. I like the 'spur' and the notch carved into the back panel of the bridge.
I'll close with a number of views of the instrument, showing off the triple spacers. It's a very strong look, I think, and echoes a number of other 'threes' (and multiples thereof) in other parts of the lute.


