Showing posts with label 6 course. Show all posts

Wednesday, 21 November 2018

Recent Work, Summer 2018

Hi everyone--I have four new lutes to present to you today.

You may have already seen pics of these that I posted a month or two ago on Facebook. If that's the case, and I've dragged you here under false pretences by calling this post "Recent Work," well, I'm sorry--you're free to go. However, if you're not in too big a hurry, by all means stick around and I'll try to add a few comments, to make the visit worth your while.

I started this group of four in late 2017, hoping to have them finished before the summer of 2018, which I knew was going to be a busy one. I didn't quite get them all done before summer, but instead finished them one at a time, in June, July, and August. I'll present them here in the chronological order of their completion.

I always work in groups, usually two or three. I think that there are some efficiencies to be gained by doing the same or similar jobs across a number of instruments (carving roses, making necks, putting backs together, etc.) Once you've taken the time to set up your tools to do a job once, you might as well do it two or three three times and make it worth your while.

At least that's the theory.... After working this way a number of times I still think it's true, but there is a limit to how many instruments a person can work on without something like boredom setting in. Four lutes might be the limit for me. Progress in the shop can seem slow at the best of times, but working on a large group means progress often seems to come in very tiny increments. You need to be okay with going into the shop each day and being greeted by a bunch of lutes that don't look like they've moved along very much in quite a while. (I keep expecting the Lute Elves to show up overnight or over the weekend and, say, finish carving the bridges I left half-done for them, but alas they never do....)

Luckily, I'm a patient person--I think that's probably very high on the list of qualifications for being a lute maker. And, thankfully, I have clients who are very patient people too.

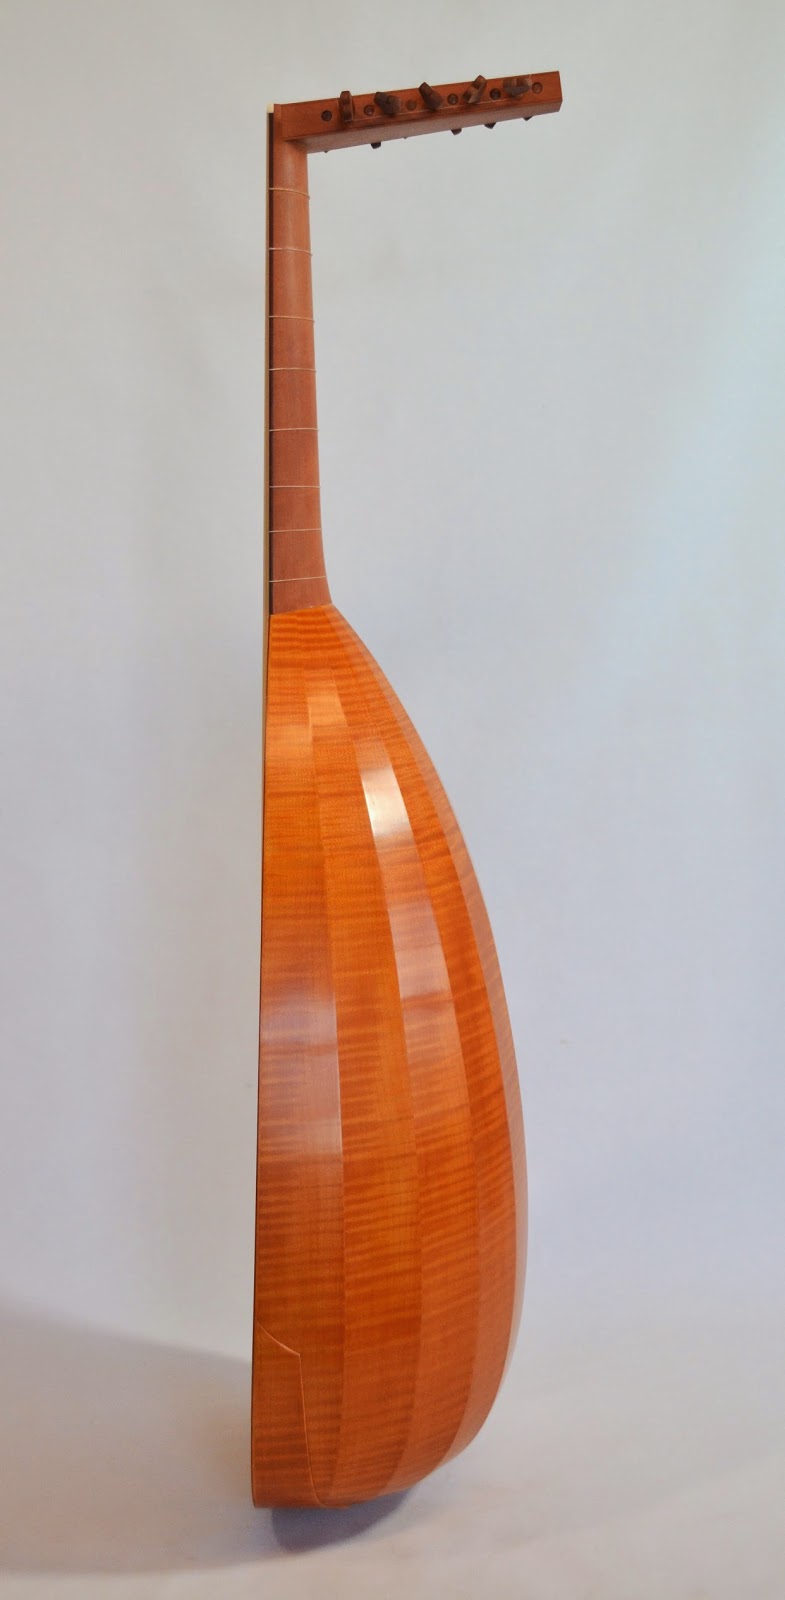
The first lute of the group, finished in late June, was a new model for me: a 6 course with a string length of 54cm, in modern pitch a', for George Moss of Kansas City, MO. It's from a design by Grant Tomlinson, which he based on early-16th century Italian models. I actually built this lute using Grant's mold, which he lent to me; he also sold me the lovely set of German maple ribs for the back, which, according to his notes, he'd sawn in 1982. (I asked him if he'd care to come over to my shop and build the lute for me too, but sadly he declined.)

It made a lovely little lute with a very sweet, rich, balanced sound. In my experience, lutes in a' don't generally have a problem making their treble register heard--indeed, they can be a bit overbearing. Not this one, though. I was a little surprised--and pleased--at the presence and warmth of the basses, and in general the balance of sound throughout the register.  To me, it sounded not so much like an a' lute, but instead like a really good 6 course lute that just happened to be tuned in a' (if you get what I mean.)


Mug shots front and back: the neck, fingerboard and peg box are pear, and the bridge and tuning pegs are plum. The back, as I said, is of German maple, and the belly is one of my finest pieces of alpine spruce. The fingerboard edging is snakewood.


As usual, I supplied a number of possible rose designs to my client, and George decided to go with a pattern from a baroque lute--an 11 course, I believe--by Martinus Kaiser (I don't have the date of that lute to hand just now.) As with so many old lute rose patterns, this one works a variation of the Star of David, with twisting vines and leaves contrasting with the geometric basis.


This lute was finished in time for me to hand-deliver it to George at the Lute Society of America LuteFest in Cleveland at the end of June. He liked it! I was pleased. Then after the week of lute festivities I returned to Canada to do a little repair work, which you can read about here; then met up with my darling wife Julia for a holiday trip that included stops in Montreal, eastern Ontario, Vermont, New Hampshire, and Rhode Island. Lakes, rivers and oceans were swum in, rare liquors tasted, fine cuisines sampled, and old friends, and new friends, were met. By late July, we were back in Vancouver--and I was back in the workshop, rested, and eager to finish up the next lute.

This one was another new model for me: a 'théorbe de pièces,' or 'Lesser French Theorbo,' for Bruce Burchmore of Los Angeles, CA.


This project was a lot of fun, and a real challenge.  There are so many interesting features to this instrument, and much of its design had to be done pretty much from scratch. I had no museum drawing to work from, and really not much expertise to go on to get me started. I didn't know the instrument, and I didn't know the repertoire. I did a lot of learning along the way, from a whole bunch of teachers and advisers, starting with the very patient Bruce Burchmore, and including Grant Tomlinson, Ray Nurse, and my old friend Nelson Amos. I think there's a tale here, and I'll tell it in my next blog post.

Some data: the top string is in d (A=392), and the top two strings are re-entrant (i.e., an octave low.) The string length to the first nut is 72cm, and to the extension 114. There are 14 strings, 8 to the first peg box, and 6 to the extension. The fingerboard, belly edge binding and neck veneer are ebony; and the extension is made of two pieces of English sycamore, dyed black. The belly, as always, is one of my finest sets of European alpine spruce; and the back of the lute is 11 ribs of curly maple.

The rose pattern I used is known as the 'Mouton,' since it is taken from the famous painting of the lutenist Charles Mouton by François de Troy. This version of the pattern was drawn by Ray Nurse.

Perhaps the most striking feature of this type of lute is its extension, which basically consists of a plank of wood with a cutout for a carved panel at the back of the lower peg box, and a second peg box carved from a separate block of wood, attached to the far end of the plank. I've made lutes with extended necks before, but nothing quite like this. I think it's a really cool design, and aesthetically it seems totally of a piece with the refinement of the music that's played on the lute.

I found this lute compulsively photographable. (If you'd like to see further evidence of the compulsion, please go to my flickr page.) Most lutes are like a little world unto themselves, and some of them, like this one, seem incredibly vast. They will not be captured by a single photo, or even a hundred. But I try!

OK--next lute. We're now into mid-August: Julia and I are back from a short trip to the interior of BC,  where we holidayed with my mom and sister, who had driven out from Saskatchewan. The lakes and rivers of the BC interior are beautiful, and we swam in them daily. The air, however, was thick with smoke from wildfires; a new reality, a constant companion in the summers. Back to the coast, where the air is (relatively) clear.

This lute is not a new model--it is a 10 course lute based on the body of the Tieffenbrucher archlute, C45 in the Vienna KHM, which I've scaled down to 95% of the original. (The back is 17 ribs of dark, heartwood pacific yew.) I have built a number of 10 course lutes on this model, along with a few 7 and 8 course as well, and all of them have been very successful.  Reducing slightly the original size of the body allows a string length of 64 cm (while retaining 9 tied frets) which is a convenient length for stringing in g', either in modern or low pitch.

For this lute, my client, Mark Bagley, of Madison, MS, asked me to try to come up with a design that reduced the string length as much as possible, while still tying 9 frets easily. A little squeezing here and there--shortening the neck a little, raising the bridge position just a few millimeters (and correspondingly adjusting the location of soundboard bars and, in consequence, the position of the rose)--gave a string length of 62 cm. A very manageable length for a 10 course lute!

One thing that was different about this lute was the suite of veneers that I made for the neck and peg box. Mark had asked for a special look for this lute, so I suggested a design based on the 1609 Magno Dieffopruchar lute, 144 in the Museo Bardini in Florence. Here's what the original looks like (photos by Stephen Gottlieb, courtesy of Grant Tomlinson):


And here are some shots of my version. The veneers on the Dieffopruchar are made up of strips of ebony and ivory; my version is made of ebony and english boxwood.


Once again, if you'd like to see more photos of this lute, head to my flickr page.

I'm kicking myself a bit because I didn't take any (or not many) photos of my process of making these veneers. It is a fairly involved, and time-consuming, procedure to make them, and I would have liked to write a blog post detailing the steps.... Oh, well, I'll save it for next time: I'll be doing another set of veneers like this within the next couple of years, so I'll try to remember to take lots of pics and talk about it then.

The rose on this lute is based on the 'knot of Leonardo' design, with a chip-carved border.


And now, onto the last lute of the bunch. By this time we're at the end of August (the holidays are done, though we're still taking some last-minute swims in the ocean in Vancouver), and I am finishing this, a 7 course lute based on the 1592 Venere. The string length is 58.5 cm, and the back is of 13 ribs of dark heartwood yew, with sycamore spacers. I had originally begun this lute as a demonstration model for the lute making class at the 2017 LSA Workshop West, in Victoria BC; it wasn't made to order for anyone, but I decided to complete it as part of this batch, and see if someone might be interested. Someone was: a fellow who works in the video game industry here in Vancouver got in touch, and I completed it for him at the end of the month.


The neck and peg box are made of some nicely figured cherry I picked up a few years ago. For an unveneered instrument like this, I might ordinarily use pear for the neck and peg box, but I was very happy with the look, feel and weight of the cherry. (It's nice to have a 'spec' instrument once in a while to try out some different woods). The lute itself sounds great, full and rich, with a nice singing treble and lovely bass sound. I really need to make myself one of these lutes one of these years.

The rose is based on that of the original 1592 Venere lute.

And that is all for recent work. Next post, I will talk about the process of designing and building the 'théorbe de pièces.' I'm onto new projects now: two lutes only this time. Hopefully they'll go reasonably quickly. I'll tell you about them soon!

Sunday, 15 February 2015

A Small Fix

I have another repair to tell you about, which I did in December, in the between putting varnish coats on a couple of new lutes (I'll tell you about them in a little while).  The repair was pretty minor, but I thought I'd talk about it because it illustrates a couple of important principles of lute making--how to make a well-fitted joint, and how to use hide glue to get a really solid bond.  These skills are applicable in many stages in the lute's construction, and every aspiring lute maker should know them.

The repair was to a 6 course lute owned by Nelson Amos, of Ypsilanti, Michigan, and as a matter of fact, it is one of mine, a lute that I built for myself in 2007.  Nelson bought it from me a couple of years ago, when I decided to make myself a new 6 course lute.  The problem: a detached peg box. A sudden wrong move, a small impact, perhaps, had knocked it out of its joint.  It looks pretty terrible, and of course the lute is out of commission until the problem's fixed, but it's really not that big a deal to put things back together.
Photo: Nelson Amos
The first thing to notice is the quality of the break itself, and the results thereof.  When the pegbox came out, it took a fair bit of material along with it on its underside; however, the back side of it is almost completely undamaged.  This suggested to me that although the pegbox was well glued underneath, the back side was not well glued at all.  In fact, on closer inspection I could see very little glue residue at all on the back side of the peg box, or on the corresponding surface of the rebate in the neck: tell-tale signs that I either hadn't fitted the pegbox well, or hadn't glued it well, or, most likely, a little of both.  
All the wood was still there, and the break was pretty clean, and I guess if I was one kind of lute-repair person, I might consider just sticking the peg box back on with some kind of modern gap-filling adhesive.  For better or worse, though, that's not the way I work. The peg box might stick, but probably not for long, and in any case the joint would look really ugly.  I like to do these jobs right, and if I didn't quite do it right the first time around,  I would happily do it right the second time.

The first thing I needed to do was repair the rebate in the neck.  The back side of the joint was fine, but the 'tongue' of the joint was quite severely damaged, with much material having been torn away.  I needed to build that area up again.  I first chiseled and filed the area back to make a flat surface, then glued (with hide glue) a new chunk of pearwood down on top.

There was also a small chip of wood that had been taken out of the back side of the peg box (proving that that surface wasn't actually completely devoid of glue after all).  I chiselled out a small channel and filled it with a slip of pear, then flattened the area with chisel and file.  I also removed the torn-out wood from the bottom of the peg box, and flattened that surface too.

Then I got to work re-shaping the rebate joint.  Most of the material I removed with a chisel, but when I got close, I used some (shop made) bevel-edge plexi-glass sanding blocks.  The bevelled edges allow me to get far into the very corner of the joint; the blocks have 180 and 220 grit paper, stuck on with double-sided tape.  (The very corner of the joint is cleared using a sharp chisel.)
 I needed to shape the sides of this piece as well, to follow the contours of the neck.
Okay, so here's the first point I wanted to talk about: how to get a well-fitted joint.  The pegbox joint can be a tough one to fit: the rebate cut in the end of the neck is an odd shape, and it's difficult to tell if the two surfaces are flat--a straightedge is of little use, especially on the back side of the joint.  So how can you tell if the surfaces are flat? 

Probably the best approach to seeing whether the surfaces are flat in the rebate is to make sure that the contact surfaces of the peg box are flat first.  And by flat, I mean dead flat--a straight edge held against the bottom of the peg box should not rock at all, whether it's held across the bottom, or along its length, or from corner to corner.  Hold the straight edge against the surface, and view with strong back lighting--no light at all should be visible between them.  (The same flatness test applies to the back of the peg box, especially where it contacts the back side of the neck rebate--it too needs to be dead flat.)

Once the peg box surfaces are flat, you can use the peg box itself to test the flatness of the bottom and back sides of the rebate.  Hold the peg box in the joint, and look at the fit--if any gaps are visible, you need to remove the material around the gap to get a close fit.  Once you've done this, though, and the fit looks good, there can still be problems--especially on the outer edges of the joint.  The only way to really test the fit is to put the peg box in place, and apply pressure to the very corner of the peg box.  With your thumb, press the peg box into one corner, say the corner on the bass side of the neck, first.  Push hard, and observe the other (treble side) corner.  Does that corner of the peg box move out of the joint at all?  If it does, then that means the joint in the corner you're pressing the peg box into is not dead flat, and the peg box is rocking a tiny amount in the joint.  The joint needs further work, with files, sanding blocks, or a chisel.

In the same fashion, apply pressure with your thumb to the treble side of the peg box, and look at the bass side.  Does the peg box want to rock outward, even a little?  If so, the joint's not flat, and you've got work to do.

Only when the peg box won't move in the joint, no matter where you press on it, is it really fitted well.

Okay, so that's the first point I wanted to make: fitting the joint really well.  The second point is gluing the joint really well.

I use hide glue for all joints on the lutes I make, which is wonderful stuff, but it requires some careful use, depending on the joint it's used to glue.  For joints that involve gluing end grain, especially, it's necessary to size the joint first--otherwise, the glue will tend to wick away, leaving the joint starved.  I think that's what happened to the peg box when I originally glued it back in 2007.  As you saw above, there wasn't much glue residue on the back of the peg box when it broke out, which suggests to me that the glue had wicked away--and the reason was, I hadn't sized the joint.

Actually, I hadn't known to size the joint.  In all the reading I'd done over the years about lute making, I had never really encountered the concept.  The book I was most familiar with, Robert Lundberg's Historical Lute Construction, doesn't mention it at all; that's not surprising, I suppose, since Lundberg didn't actually use hide glue (for the purposes of that book, at least).

I really first learned about the importance of sizing joints carefully from Grant Tomlinson, my first and best teacher in lute making.  All that I'm sharing with you here comes straight from him, so for whatever benefit you derive from my writing, the thanks should go to him.

Back to sizing: make a batch of hide glue as you would normally do, soaking the glue granules first, then heating in jar in a water-bath; then when the glue is hot and liquid, dilute it to about half its normal strength.  Brush this size on all the surfaces of the joint, on the bottom and back of the peg box, and on the bottom and back of the neck rebate.  Allow the size to dry--about 15-20 minutes--then size all surfaces again.  Size about three or four times in total, and leave to dry thoroughly overnight--then the next day, re-fit the joint again, for the final time (the sizing process will have slightly distorted the surfaces of the wood).


When the joint is perfect, you can glue in the peg box, with the assurance that the glue won't wick away from the joint.  With a peg box fitted this well, and sized this well, there should be no more problems with fragile or glue-starved joints.  This peg box joint will not fail, and that's a guarantee.
So that's the story of my peg box fix, and, for those about to fit their own peg boxes, I hope it will be helpful.  This post strikes me as being a bit text-heavy, and that's too bad, but sometimes things just need explaining and there's no way to get around it.  However, there's one last part of the peg box gluing procedure that I haven't talked about, and that's the actual gluing part--the part where glue is applied, and the peg box is clamped in place.  I won't talk about that here, but I tell you what--for those more visually-oriented learners out there, I will include as a bonus a photo of my gluing rig.  You may find information in it that's helpful in your own work.  Enjoy!


Thursday, 19 June 2014

The Unusuals

Today I'm pleased to report some new work completed, three new lutes making their way in the world.  Together they are "The Unusuals" because each in its own way has some oddities, or peculiarities, that mark it as memorable.

First up is an 8c lute based on the Tieffenbrucher archlute, C45 in the Vienna Kunsthistorisches Museum.  My version here is reduced to about 95% of the original body, which allows for a slightly shorter string length (this lute has a string length of 63cm, with 9 frets tied on the neck).  This lute was made for Dr. Ken Lee of Vancouver.
The back is of Honduras rosewood (with holly spacers), a wood that I haven't used for this model before.  My initial impressions of it are that it creates a very powerful, clear and focused tone. It's perhaps not the most complex tone that you might hope for, but it is quick and strong.  I think it will make a very nice concert instrument; my impression is that it could fill a small hall (relatively) effortlessly.

My client had some specific requests for this lute.  He asked for both the first and second course to be single strung; he also asked for a set of mechanical pegs (Pegheds) to be installed.  I find that I'm being asked to install these pegs more frequently, which I don't really a problem with, though it does hurt my pride in my own traditional wooden peg-making and fitting just a teeny bit.   In my limited experience, the Pegheds seem to work well, though I must say they are not without difficulty to install.

One other unusual request by my client was the rose design: the rose from the 1592 Venere lute in Bologna.  I usually think of this pattern as belonging to that particular model of instrument (since it's the only surviving historical instrument on which it appears), but that's no reason not to use it elsewhere.  I think it works well on this lute.


The next recently completed lute is a 6c version of the Warwick Frei lute.  I've made a number of 11c versions, but this is the first 6c version I've done of this lute.  It has quite a long string length at 71cm, but I must say I felt no difficulty in playing it--the shape of the body seems to fit easily against the player's body, and once one finds a correct way of holding it, it is quite comfortable to play.   I made this lute for Sten Hansen of St. Charles, IL.


The most unusual aspect of this instrument, for me, was the thickness of the soundboard and the dimension, number and location of the soundboard braces.  As outlined in my last blog post, I used barring and soundboard thicknessing that corresponded with the evidence that I saw in the historical lute: an unusually thick belly, a five-bar brace pattern, and a j-bar that spanned the width of the belly.  These may seem like small adjustments on their own, but taken together they are, I think, a fairly radical departure from conventional systems (or at least my own conventional systems).

I think the experiment was a resounding success (but I guess you should ask Sten about that to be sure).  The lute has quite a big sound, with a bright, singing chanterelle and a strong response across the whole range.  The timbre of the instrument is...well...unique.  I haven't heard anything quite like it, and I'm a little baffled at how to describe it.  (This is an ongoing issue for me--how to describe a sound.   Sten and the lute will be in Cleveland next week, at the Lute Society of America Summer Seminar, and I plan on listening for people's responses, and collecting their adjectives.  I will report back in a future blog post.)

 The rose pattern, as I've said before, is one of my favourites, both to look at and to carve.

And I love the way so many different woods arrive at one point, here at the body-neck joint: pear neck and fingerboard, snakewood fingerboard edging, curly maple ribs, spruce soundboard, pear belly edging, boxwood frets.
Last of The Unusuals is the most unusual of all: a five course, fretless medieval lute, built for Gus Denhard of Seattle.  This one is so unusual I will devote an entire future post to its design and construction.  This one stretched me to the limits of my craft skills unlike any other I've made.  At the risk of sounding a bit cocky, after building this one, I think I could build just about anything. 

The broad-ribbed, nearly semicircular back, along with the ribs re-curving into the neck were a fair challenge, but the tile work on the belly and herringbone edge binding--both shop-made--were no less tricky.  I'm quite pleased with the result.

Gus came to my workshop this week to pick up the lute, and in his hands it sounded great.  I think this lute has been a dream of his for a while, and now that he has it, he will be the one to create its repertoire.  That's a great reward for me, to be able to create the vehicle for another person's musical adventure.  A lot of the time, I feel like the luckiest guy on the planet.

And that is all for today.  I'm off to the LSA Seminar in Cleveland tomorrow--I hope to see you there!