Today I'd like to talk about how I designed a recently completed 5 course fretless medieval lute. This instrument is the culmination of a couple of years of research, thinking, discussion and design with the client, Gus Denhard, of Seattle—a fascinating journey which (as always) I hope has yielded a playable and convincing musical instrument that the owner will get a lot of mileage out of.

The main problem in designing and building an instrument like this is that no historical examples of such an early lute have survived. Probably the earliest surviving European plucked string instrument, the gittern by Hans Ott of Nuremburg, dates to about the mid-15th century, and that's about as far back as we can get. For anything earlier than that--say, one or two hundred years earlier, which is approximately the period Gus and I had in mind--we really need to rely on iconographic evidence.
 |
| Hans Ott giettern (photo courtesy of Wikimedia commons) |
I located the journal at the University of British Columbia library, spent a day up to my elbows in pictures, and emerged with one good depiction of the kind of lute that I thought would work. Here it is, a Coronation of the Virgin by Andrea Di Bartolo, from the Ca d'Oro in Venice.


But much else in the picture looked appropriate too. The bridge had a nice shape, and looked a lot like the kind of bridge you might find on a modern 'ud. The scratch plate in front of the bridge was another 'ud-like detail. The soundhole rosettes are simple (in comparison to those that we see in renaissance lutes), but they're elegant, and their simplicity is more than balanced by the busyness of the rest of the design, including the soundboard edging (which looked to me like a kind of 'herringbone' binding), and the tilework inlay in the soundboard.
I found another example of this type of lute (not, incidentally, in H.M. Brown's article, but on flickr). It appears in a fresco among a group of musical instruments (including a gittern) by Lippo Vanni, in the Church of San Lorenzo al Lago. The larger image first:


So I had the model--now to design and build the actual lute.
One principle to keep in mind when working with an iconographic source is that a painting is not a photograph. Parts will be exaggerated, and proportions distorted, to create an effect specific to the painting. In a way, that's frustrating, because you can't just copy the image, but in another it's liberating, since you have to trust your own sense of proportion and your knowledge and experience of what will make a good, playable, working instrument.
That's nowhere more true than with the back side of the lute. All a painting like this gives you is the plan view--it gives no information on the body, how deep it might be, what shape it has, how many ribs it has, or even whether it's built up from separate ribs at all (maybe it's carved from a single block of wood). In designing the lute, these were the first big decisions that had to be made.
I took to heart Crawford Young's advice to build it lightly, and that meant, first, building a ribbed back, rather than carving the body from a solid block. A simple aesthetic seemed right to me, so I went with 9 ribs (about the smallest number that's practical), and kept the longitudinal section basically the same as one half of the plan view (in other words, the body is pretty much semicircular in cross section.)


The first element that I tackled was the herringbone edge binding. In fact, I think that was the very first thing I made of the entire lute, before the body or anything else. It became a minor obsession, because I needed to make sure of two things: one, that I could manufacture the binding (actually two identical bindings, one for each side of the belly), in a width that was right for the lute's proportions; and two, that I could bend it to fit around the edge of the belly, without it falling to pieces under the stress and heat of the bending iron. If I could figure a way to do those things I'd be fine, but if I couldn't, I was pretty sure I'd need to rethink my whole concept of the lute.


The tiles were fun to design, and to make. The photo I had of the painting was not
of a sufficient resolution that I could see very well what their actual design
was, so I was left to come up with something that would create the impression
of the tiles, while fitting in with the proportions of the rest of the
lute. Once again, it can be a bit
of a hassle not to have things spelled out for you, but it can also be quite
liberating.

The same principle applies to the peg box, which is not
detailed in the painting, and is therefore free to be imagined. I decided on slightly curvy peg box, in
homage to the elegantly slim peg boxes on modern 'uds; I also designed a
simple, square-ish peg head to go along with it.

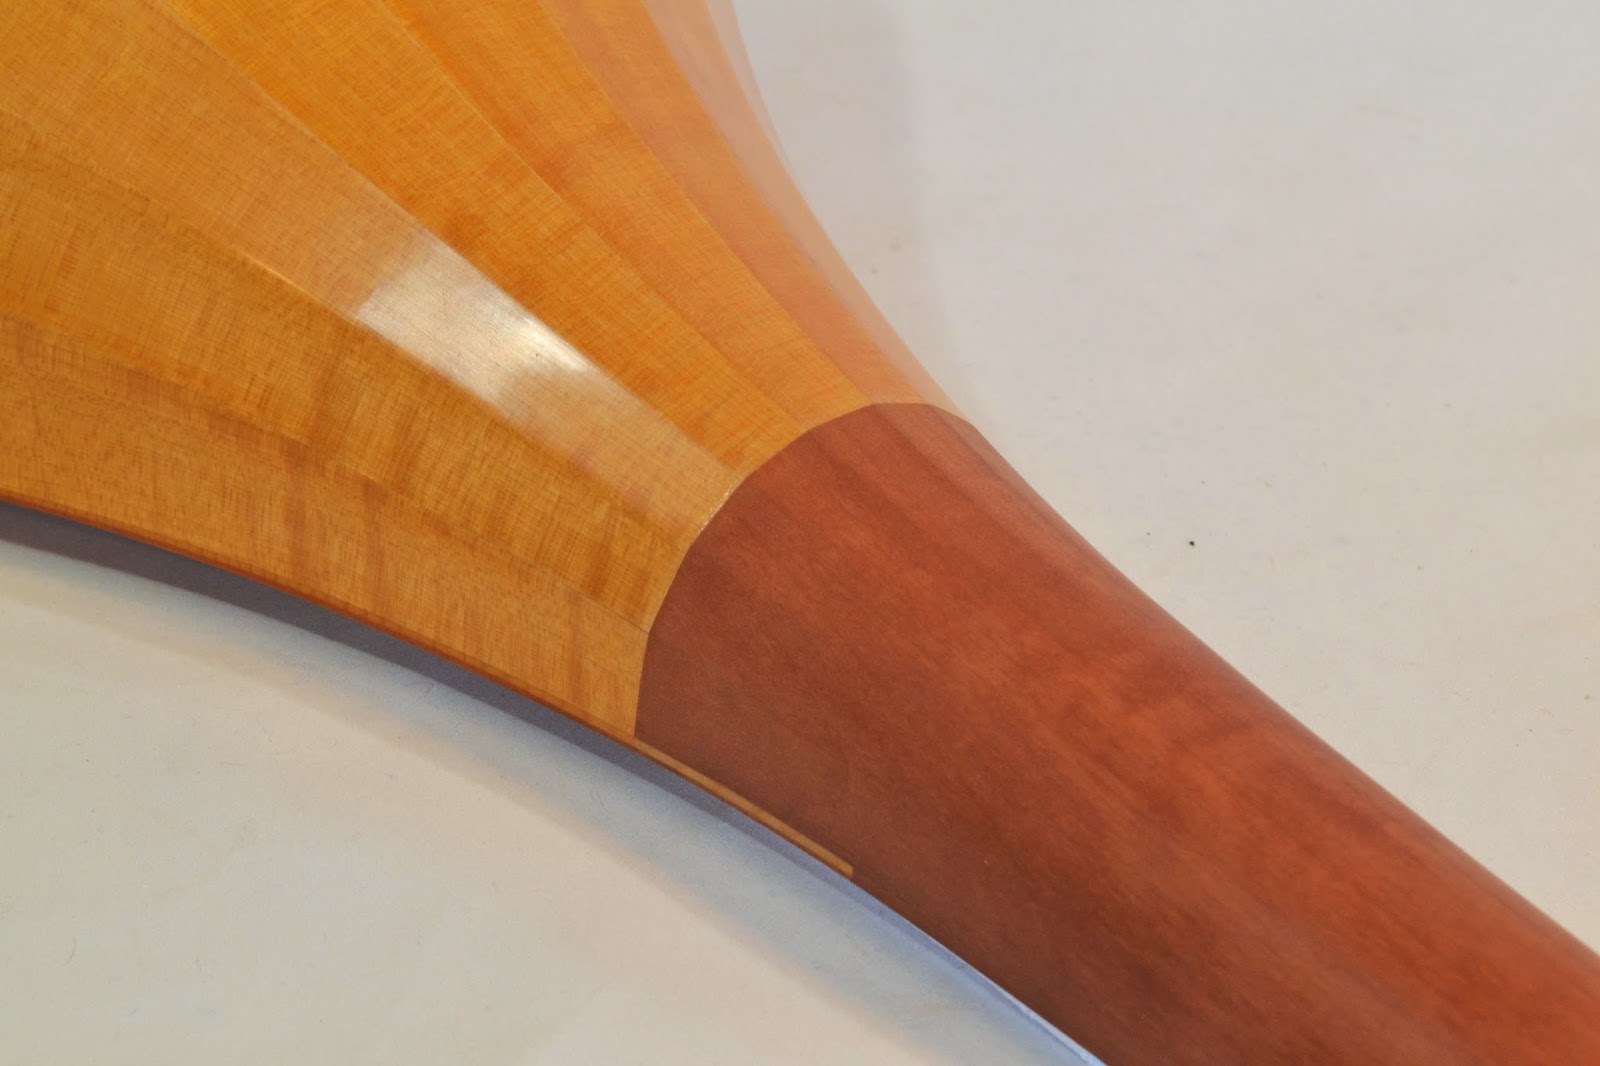
There's one last feature of the design that I'd like to
mention, and that's the smoothly curved joint between the body and the
neck. You see this type of joint
everywhere in the iconography of the period, so we know it was commonly used,
but figuring out why it was used, or why it continued to be used for so long,
is a bit problematic. It gives the
whole lute a very organic shape (rather like a bulb of garlic), and to me, at
least, it's pretty easy to see its evolutionary origins first in instruments
made from gourds, and then, later on, in instruments whose neck and body are
carved from a single piece of wood.
This is the case with the Hans Ott gittern, and, one suspects, most
other gitterns of the period; it's also easy to imagine that up until a certain
point, lutes were made this way too.
However, somewhere along the line, someone decided to try for a different sound, something a
bit more refined, a bit more responsive, and rather than carving the back from
a single piece, built it from separate ribs--and attached the neck after it was
made. A different kind of lute was
born. But why preserve that
old-style neck joint? Isn't it
incredibly difficult to bend the rib in two different directions, and still get
a good, close fit between them?
The answer to that question (as I found when I built the
back) is that, yes, it is difficult, but not incredibly so. In fact, I was a little surprised at
how (relatively) easy it was. The
rib joints looked good, as did, indeed, the whole back, and the whole
instrument. Like much else about
this lute, it represented a technical challenge that I was eager to
accept. (This is the way that I
push myself to keep developing and refining my craft skills and why, even if
I'm never asked to build another one of these lutes, it was well worth my while
to do so this time around.)
And why did this kind of joint keep being used long after it
was convenient to do so? In my
opinion, two reasons. First,
tradition is a very powerful thing: if the joint has always been made this way,
why should it be changed? Second,
the joint itself feels very slick, and, I believe, lends itself to single-line
playing up the neck and onto the upper part of the soundboard. The joint, in other words, fits the
music that was (and will be) played on it.
I hope this account has given you some idea of the kinds of
choices I made to design and build this lute. Most of the choices are, fundamentally, pragmatic ones, and
have ultimately to do with the playability of the instrument: the width of the
stringband dictates the size of the bridge and width of the nut, which both in
turn dictate the dimensions of the fingerboard and neck, which then affect the
size and contours of the body, which then, in turn, dictate the size and
proportions of the decorative features of the soundboard. Everything is of a piece, and all the
features are based upon the body, hands, and technique of the player.
That player's name is Gus Denhard, and he drove up from
Seattle about a month ago to pick up his new lute at my workshop. His initial response was quite
positive, and I'm looking forward to hearing from him in his musical journeys
with this lute. My impression
throughout the design and building process was that the music and repertoire
for this instrument were not already known, but were to be discovered, and for
me that was an exciting feeling.
Without the spark that Gus provided, I may never have built an
instrument like this; his encouragement and enthusiasm allowed me to follow my
instincts, and try new techniques and designs. He's promised to send me some musical postcards from his
journey, and as he does, I hope to share them with you.
