Dear Friends,
How are you all doing? Since I last posted here, the world seems to have changed in a pretty fundamental way. Where I live and work, in Vancouver, Canada, we are not yet on 'lockdown,' but I think we must anticipate it's coming soon. Until then, I continue to work, to go to my little shop in the morning and live my day and make my lutes. What else am I to do? What else are
you to do? Two things keep me focussed in this time of great uncertainty: one is my love for my fellow people, from the one who is closest to me, Julia, the love of my life, and radiating outward to my family, my loved ones, my friends everywhere, all over the world; and the other is making lutes. Sometimes such work can seem trivial even to me, but lute making shapes my life and lets me live in beauty every day. I treasure it, and I know how lucky I am to be able to continue to do it.
I hope you all, my friends, have work and love to sustain you throughout the times of crisis.
Humbly, I celebrate my work today, and invite you to share in it.
Lutes need fingerboards, and 13 course lutes need curved fingerboards. Let us give one to this (very patient) lute.
 |
| The fingerboard points have been installed. The arrows indicate that I have oriented the pieces so that I'll be able to plane them toward the nut. |
 |
| I use the low-angle block plane (with a lot of wax on the sole) to plane them almost flush with the belly tongue, in preparation for making the belly cut-off. |
 |
| I mark a line with a sharp, soft pencil, and then make the cut freehand. The saw cuts pretty readily down into the spruce, so the kerf is well established and jigs the cut as I rock the saw forward and back to cut into the ebony points. |
 |
| I remove the spruce first with a sharp chisel. Note a couple of things: first, along the nut-side of saw kerf I have chamfered the spruce so that when I pry it up I won't damage the opposite edge; and second, I've made parallel knife cuts along the grain so that the excess comes up in smaller pieces, rather than one big chunk. (I also did that when I removed spruce belly material to install the fingerboard points.) |
 |
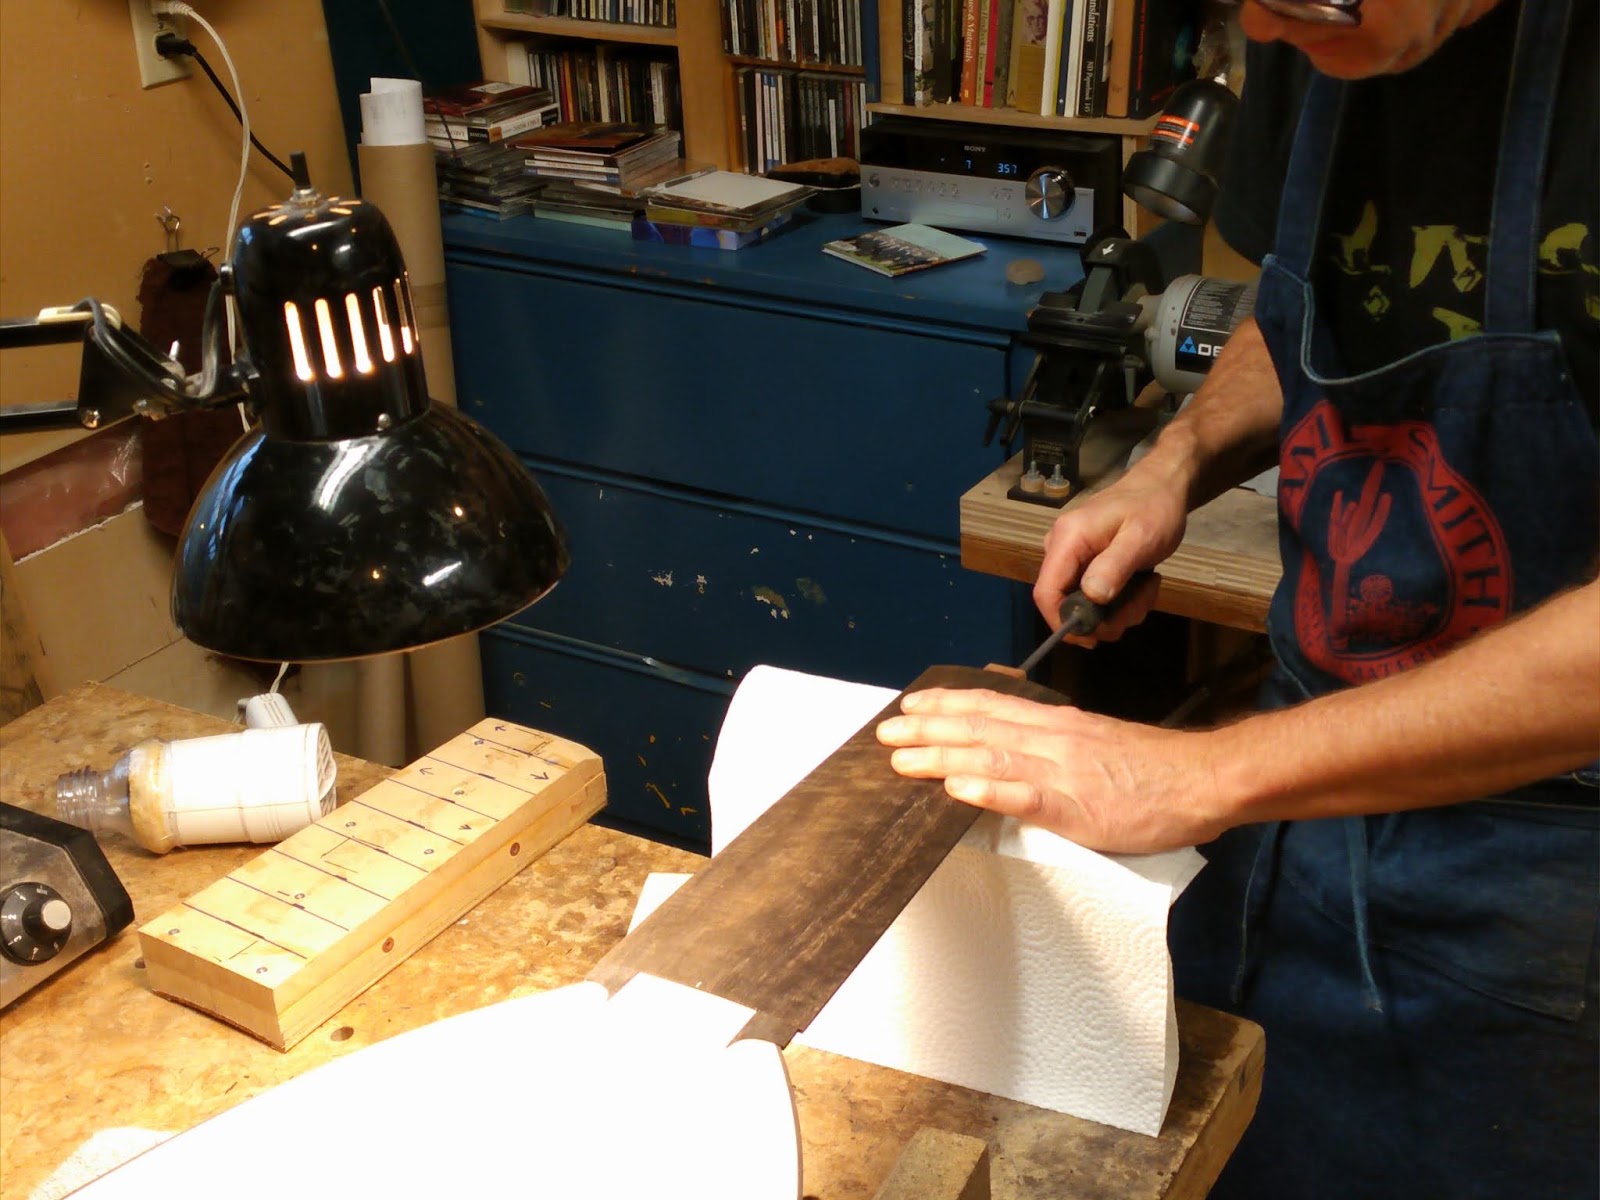
| I remove the excess of the fingerboard points by using a small cut-off chisel and cutting across the grain, from the outer edge in. The ebony I'm using is very tough stuff, with swirling, interlocked grain, and it's difficult to cut. To minimize the danger--to myself, and to the lute--I keep the chisel edge under very close control, making very small movements and taking very small cuts. (The lute, by the way, is also securely clamped in place on my bench.) |
I use files to remove the last of the ebony and paper glued to the neck, and then use files to true up the cut-off edge. That edge needs to be as flat as possible, and as perpendicular as possible to the neck surface. It's not easy to do this when dealing with the curved cut-off (after all, it's difficult to hold a straight edge against it to see how flat the edge is), by I try to get it as close as I can.
 |
| When I've readied the joint, I can try out the fit of my fingerboard gluing caul. I made this shaped caul a number of years ago, and I've used it for a number of 13 course baroque lutes already. The fit looks pretty good; if it were not, I would build up the shape as needed with strips of masking tape. |
 |
| The curve looks like a very close match. As you can see, I've lined the caul with a thickness of cork. I've also made the caul so that it overhangs the edge of the neck by a few millimetres on each side. |
I'll take time out here to tell you a little trick of the trade I use to make cauls with complex shapes, like this one. Do you see the little layer of pink between the cork and wood in the photo above? That pink layer is autobody filler. To make the caul I first carve the wood as close as I can to the shape I want; then I cover the object-area on the instrument (in this case, the upper surface of the neck) with plastic wrap; then I mix up some autobody filler, spread it on the underside of the caul, and either hold it or clamp it in place. The filler dries in a few minutes, and I'm left with a near-perfect impression of the area that I can trim as needed, then cover with a layer of cork and use as a gluing caul.
 |
| The large main caul was made for a lute designed to have a slightly shorter neck than this one. I've made a small addition to add to the lower part of the fingerboard. |
 |
| After re-checking the action (with fishing line and spacer blocks), I have thicknessed the fingerboard to about 2.6mm. In this photo I am shooting the edge of my fingerboard blank, looking to make it as flat and as perpendicular as possible. |
 |
| I can now bend the fingerboard blank. I heat water in a saucepan and brush it on the outside of the piece, then hold the underside over the hot plate. After a few minutes, the combination of outer expansion from the water and inner contraction from the dry heat curls the fingerboard very close to the profile that I'm looking for. |
 |
| Throughout the construction process, there is a hook for hanging the lute in the neck end. Now, I swap out that hook for this hardwood block and deck screw. When I fit and glue the fingerboard, I can tighten the screw, and the block provides pressure to hold the fingerboard in place against the cutoff joint. |
 |
| Like so. This is a dry run, to see how the fit looks at the joint. I trim the fingerboard so that there is about 1mm only of overhang at the nut end. That's enough for me to tighten the block and hold the fingerboard in place. |
 |
| I refine the fit with a sanding block. I may also have to adjust--with files--the fingerboard cutoff on the lute. |
 |
| I've got the joint fitted, and everything is ready to go. When I actually glue the fingerboard on I need to work quickly and efficiently, so there is no time to take timed photos.The next few shots show the stages of gluing, and are from one of the many dry runs I do before gluing up. |
 |
| When my glue is heated and ready to go, I warm the underside of the fingerboard and the top side of the neck with a hair dryer. |
 |
| I then brush glue on the neck, and on the underside of the fingerboard, and place it carefully. I need to make sure the fit is tight here, at the joint. |
 |
| I then screw in the block to hold the fingerboard firmly against the cutoff joint. |
 |
| Then I begin clamping. (I rehearse the sequence many times before gluing.) First I clamp in place the small additional caul... |
 |
| And then the big caul goes on. Note how I have marked with a felt pen the location and the orientation of each clamp. I know where they go, and which way they point, so I can begin by clamping in the middle, and then working outward from there. |
 |
| This nearly exhausts my supply of wooden cam clamps. |
 |
| Here's the immediate aftermath of gluing. I got good squeeze-out on each side, and I also brushed a line of glue down each side of the joint (to take advantage of hide glue's contracting properties, to pull the edges of the joint together.) |
 |
| The lute seems most stable in this position for the time being (though it seems a bit close to the edge of the bench--I think I should move it more to the centre before leaving for the day.) Tomorrow I'll remove the clamps and cauls, clean up the excess glue, and start to shape the new fingerboard. |
I hope everyone is staying safe and secluded. I love you all. Take care, and we'll talk again soon.


Hi Travis, thanks for your kind and inspiring words, and for sharing your expertise with us!!
ReplyDeleteYou're welcome!
ReplyDelete