Hello, and welcome back to my detailed documentation of how I build a 13 course lute.
If you've been following along, you'll know that I'm in the midst of varnishing this lute. However, while the whole pre-varnish and varnish process takes two or three weeks in total, it only takes up a couple of hours of my time every couple of days--which leaves me plenty of time to make the peg box (and some other stuff, which I'll tell you about in a later episode.) Because it's a 13 course lute, this will be a fairly complex thing, and will eventually include a chanterelle tuner and a bass rider. Those two features will be added to the peg box after it has been fitted to the neck. For today, I'll only talk about making the basic box.
I make the peg box out of five pieces of pearwood: two strips for the cheeks, a block at the tip and the bottom, and a back plate. There are also ebony veneers on the front and back, though not on the sides of the cheeks.
I begin with the cheeks, first planing one side very flat with the low angle block plane in my planing box. (This side will be to the inside of the peg box.) I note the direction of runout in the piece--that is, the direction that planes the easiest--and mark it. I want to arrange the two cheeks so that, when the peg box is complete, I will be able to plane the outside of the cheeks easily from the bottom of the peg box to the tip. (As you will eventually see, this is essential for fitting the pegbox accurately in its joint in the neck.)
With the planing directions sorted out, I also know which surface will be to the bottom of the peg box. I use my shooting board and bench plane to shoot that bottom edge flat and perpendicular to the side.
I can then start fitting pieces together on a little building-board. This jig is just a piece of (flat) mdf, with the dimensions of the peg box marked out accurately. I've covered it with a piece of packing tape, to guard against the frame getting stuck to the jig when I glue up. (By the way, at this point the peg box cheeks are both a little over-wide, over-long, and over-tall.)
To make the bottom block (and the tip block, too), I use a little sliding bevel to get the angle I'll need on the sides of the blocks. Then I can mark out my material, cut it out on the band saw, and shape the piece with a disk sander very close to the final dimension.
I do the final shaping of the blocks at the bench with files. Clamping both cheeks to the bottom block, as shown here, helps me to see whether my pieces have flat, squared surfaces--the better to build a strong box.
Just a word on grain orientation, for all the pieces so far. The cheeks are quarter sawn, showing the quarter to the outside of the peg box. The bottom block and top block are also quartered, but they show their end grain to the front and back of the peg box. This is for a couple of reasons. First, the bottom block, when it's fitted into the neck rebate, will match long grain to long grain with the neck, making for a stronger glued joint. Second, having the top and bottom blocks show long grain to the inside of the peg box makes them less liable to absorbing water, which is used to clean up dried glue after assembly. (If instead end grain were shown to the inside, the blocks would easily absorb water, swell, and crack, in very short order.)
This is the basic gluing set-up. I'll do the bottom block first, then the top: brush glue on the contact surfaces, slide into place, clamp down to the building-board, then across from cheek to cheek. I don't have a pic of the full glued-up thing, but perhaps you get the idea.
The result, next day. Note the extra-tall bottom and top blocks, to facilitate clamping. I can now set this aside, and prepare the back plate.
The back plate is a piece of quarter-sawn pear that's a bit oversize in length and width.
The back plate will taper in thickness by about 1mm along its length. Overall final thickness--including veneer--will be about 4mm at the bottom to 3mm at the top. This means that at this point, I want the back plate to be about 3mm thick at the bottom, and 2 at the top.
You can labour away with a low angle block plane at the bench to achieve this taper, or you can use this handy little jig on the thickness sander: just a piece of 400 grit paper backed with layers of masking tape to create a piece that tapers 1mm in thickness over its length. (The thinner end is to the left, thicker to the right.)
The jig is easy to use--just tape it to the feed table, put your plate on top, and run it through the sander. However, you need to be sure to orient the back plate correctly: the thinner end (tip end) goes to the thicker end of the jig; the thicker end (bottom end) goes to the thinner end of the jig.
The only practical way to put this part together is to glue the veneer to the back plate first, before gluing to the peg box frame. Here's my setup, ready to glue: lots of clamps; the thicknessed ebony veneer and pear back plate, double-side taped to their respective sides of the gluing press. I warm both surfaces with the hair dryer, brush glue on both surfaces, then stick them together fast and get even clamping pressure in place.
By the way, for gluing the veneer and back plate together, I use hot hide glue into which I've mixed a little alum. This is to guard, as much as possible, against the back plate curling up as it dries, which is one of the small frustrations of using hide glue in instrument construction. (I discussed this issue, and the use of alum, in a little more detail in an earlier post in this series, Building a 13 Course Lute, Start to Finish, 6: the Rose.)
But no matter what precautions I take, the back plate will curl a little (from the sides), and there's not much I can do to stop it. The best thing I can do to thwart the process is get the back plate glued to the frame as soon as I can.
Step 1: Size the end grain on the bottom and tip blocks. This is to ensure the best possible adhesion between the blocks and the back plate.
The technique I use to size these blocks is one that Grant Tomlinson taught me, and I think he learned it from Stephen Gottlieb when he apprenticed with him in the 1980s: cold size. Rather than brushing on hot size straight from the glue pot--which might be absorbed too quickly and swell and distort the blocks too much--I put a little bit of full strength glue in a small dish, add about the same amount of water from the water bath, stir around with my fingertip until the mixture cools, and then apply it to the surface with my fingertip. I apply this size once, wait a few minutes, then apply it again. I let it dry for an hour, and then I can get back to work on the piece.
'Cold size,' about to be mixed. I was sure I had mentioned this technique another time, earlier in this series or in another post on this blog, but I can't find it now. (If someone else knows where the reference might be, please let me know and I'll link to it.) I use cold size in at least one other place in building a lute, and that is on the top block, after it's been carved, in preparation for having lute ribs glued to it when I put together the back. I should have described it here, in the first post in this series.
But back to the task at hand. When the cold size is dried, I flatten the backside of the peg box frame one last time, on a sanding plate. I also scrape the pearwood side of the back plate, in preparation for gluing.
I'm afraid I don't have any pics of gluing the frame and back plate together--just the end result, shown here. As you can see, the back plate is a bit over-long and -wide compared to the frame. I should also say that I use the building board for a gluing caul to put this together, and use a couple of wooden cam clamps on the bottom block, one on the tip block, and many down each peg box cheek.
With the plate glued on, I can use my low-angle block plane to trim the excess of the back plate and take the peg box a little closer to its final dimensions. (I still leave a millimetre or two extra of width on each cheek; I'll do the final trimming when I fit the peg box into the neck rebate.)
I also use the low-angle block plane to take the peg box to its final depth (which tapers from the bottom to the tip.) I try to get this front surface very flat, in preparation for gluing the front veneers. (The LA block plane works very well for flattening the end grain of the bottom and tip blocks.)
Front veneers. I fit the sides first, and will glue one at a time. I clamp the piece on dry first, without glue, and try to place the veneer so that there's a very small overhang over the peg box cheek. You can see I've got three clamps on a plexiglass caul holding the veneer in place. The clamp on the right side of the picture is just there to hold the peg box securely on the building board.
I've got a bunch of plexiglass cauls for this job, and they're long enough to accommodate one, two, or three cam clamps. I clamp the entire veneer in place, then remove a couple of clamps from one end.
I can lift the flexible veneer, and get glue between it and the cheek, then position the cauls, and clamp. Then I can remove the clamps and cauls from the other end of the veneer, lift that, get glue on the underside, and clamp it down.
This sort of clamping technique--getting the piece accurately clamped in place dry, then removing some of the clamps, applying glue, clamping, moving on to the next section--is something I do pretty often in this work (for instance, it works great when gluing the capping strip to the body, which may be viewed here, in the first instalment of this series.)
I also need to glue veneer over the tip and bottom blocks; so first I'll give them a smear or two of cold size, then fit the veneer piece with--you guessed it--my low angle block plane, and a shooting board.
You can see in the photo above that there is some hardened glue squeeze out inside the peg box, both from when I glued on the back plate and when I glued on the front veneers. I will remove this by brushing cold water on it, letting it soak, and then scraping the softened glue out with a sharpened stick. I have to be careful to use water sparingly for this job; if I'm too generous with it, the back will swell, and probably warp, and likely crack. Best to work patiently, in this case.
At this point, the basic peg box is almost complete--there's one more job I need to do before I can be ready to cut the rebate in the neck and fit up, in preparation for fitting the treble and bass riders.
That job is: drilling the peg holes. I have a couple of photos of this operation, and I believe there to be a wealth of information about this process in them. Let me point out a few highlights.
Here we are at the drill press, pretty much ready to start drilling holes. I have a right angle holding jig to which I've clamped the peg box; I've also oriented the box along its centreline, so that the peg holes will be drilled perpendicular to it. On the back side of the jig, there's a big lead brick that somebody in the last 50 years or so left in the space in the building where I have my workshop. I use this brick to weight the jig down, so I may drill very accurate holes.
I would draw your attention to one other feature of the photo above, and that is all the bits and blocks of wood I have placed on the inside of the peg box. These are scrap pieces of jelutong (leftovers from lute mold making.) I've fitted two long strips up against the insides of both peg box cheeks, and then braced them against the cheeks with blocks. The strips and blocks provide backing for the drill bit; if there were no backing, the bit would break out and splinter the inside of the cheek.
A reverse shot, showing one other feature of this job: the marking out of the peg holes. I've drawn a line down the centre of the cheek, and marked the exact position of each peg hole along it. I've pricked each mark with an awl, and I'll drill pilot holes at each mark. I've also drawn a circle around every second peg hole, showing where I'll use a larger drill bit for the larger end of the peg. Uncircled marks will get a slightly smaller hole, for the smaller end of the peg.
The completed box, ready to be fitted to the neck.
That's about it for this instalment, my friends. It's pretty straightforward, technical lute making; not too much art, I'd say, but a lot of craft. I'm saving the art for the next instalment when, at last, I will show you how I fit the peg box to the neck, and fit, glue, and carve the chanterelle tuner and bass rider. I may even describe gluing the peg box on. It promises to be a long, and possibly fascinating post. I hope you'll come back and join me for it!
Hi my friends--I hope you're well. It has been a while since I posted, so let's get to it. Today I want to talk about my varnish: what it is, how I make it, and how I apply it to a lute.
A selection of varnish samples on various kinds of woods (honduras rosewood, curly maple, yew, and ash.) I make a varnish sample to go along with every lute that I build.
First, a note of caution. The process of varnish making that I'll be talking about today can be quite hazardous if proper precautions aren't taken. I don't think anyone should attempt to make this varnish without being properly trained. Please don't use this blog post as a 'how-to' for varnish making; it's a description (and not a very complete one), not a set of instructions.
The stuff that I make and use is a terpene resin varnish that's commonly called Fulton Varnish, after the person who formulated it, William Fulton, an aerospace engineer, violinmaker and varnish researcher and experimenter. Fulton published the results of his work in a series of articles in The Strad in the early 1970s; I was introduced to his techniques by Grant Tomlinson in the early 2000s. Grant had been working with Fulton's recipe for years, so by the time I came along he had worked out pretty much all the kinks (and there are a number of kinks that needed working out.)
You may have heard of modern violin makers' search for the 'Secrets of Stradivarius,' the lost methods of the old masters that, if only we could recover them, would allow us to build violins with the magical soul of the old instruments. High on the list of 'secrets' is the oil varnish used by the old Cremonese masters. Of course, varnish alone won't make a great violin (or a great lute), but if it's a good varnish, it will do a few things: be beautiful, in finish, lustre and colour; be stable over a long period of time; and be reasonably simple to make and apply. Fulton's varnish fulfills all of these requirements.
The old makers' varnish is not exactly a 'secret,' in the sense that it's somehow being purposely hoarded or withheld. It's simply a recipe, or more accurately a technique, that's been lost over the centuries, supplanted by the products of the industrial age. Mass-produced finishes took the place of the old and locally-made, even shop-made, varnishes. By the time instrument makers realized that these newer products might not be--ahem--all they were cracked up to be, the old techniques of making oil varnish were mainly lost. Human cultural memory is short.
Many old recipes for making oil varnish survive, but Fulton took seriously the idea that the ingredients named in them might not be quite the same stuff as their modern equivalents. For instance, one of the main ingredients in some of these old recipes is 'turpentine.' When I say that word, you may think of the clear, distilled liquid thinner for paint and varnish. But Fulton realized that the turpentine of 300 or 400 years ago would have been very different: more contaminates and oxygen in the mix, gummier, thicker and browner, more like the sap of the coniferous trees from which it had been derived.
So Fulton decided to take the modern distilled spirit of gum turpentine, and turn it back into the turpentine of 3 or 400 years ago, by oxygenating it (bubbling air through it with an aquarium bubbler) and exposing it to ultraviolet light (in the form of sunlight) over a number of weeks or months. The result of this back-engineering is polymerized terpene resin. Here's what it looks like in a gallon jar: dark brown in colour, and about as viscous as blackstrap molasses.
Some of the turpentine evaporates during the polymerization process. The piece of masking tape shows the original volume of turps in this batch, so you can see that I'm left with less than half the original volume.
This particular batch of polymerized turpentine was made not by me but by Grant Tomlinson, and had sat high up on a shelf in his workshop for many years. Over the time I've known and worked with Grant he's shown me many techniques of the lute maker's craft, but few as valuable as varnish making. I first assisted him making a batch of varnish in 2005; then in 2010, Grant assisted me in my own first attempt. Last September, when the picture above was taken, I attempted to make Fulton varnish flying solo for the first time.
Now I said above that Fulton's varnish is reasonably simple to make, but that doesn't quite mean that it's easy to make. For one thing, the cooking process creates some pretty noxious fumes, so it must be done outdoors. This, in turn, creates some logistical problems, such as where to cook and when. When I made varnish with Grant in 2005 and 2010, we made it in the parking lot of the building next to our shops. This worked fine until a couple of summers ago when Grant was showing our colleague Wilma Van Berkel how to make varnish. That Sunday, I recall, was a beautiful day, with a slight breeze, which cleared away the fumes quite nicely; but unfortunately they were blown pretty directly toward an apartment building nearby, and partway through the cooking process an alarmed resident came over to see what in the world was going on, and whether she should call the fire department. I figured that this time, I should try to find somewhere more remote to do my cooking.
As for when to cook, since it is done outdoors, a clear day (or at least one without rain) is a necessity. In Vancouver, the end of September pretty much marks the end of decent summer weather; temperatures turn colder after that, and soon the rain--the torrential, unending months of it--begins. The window of time for me to do this cooking was running out fast. If I didn't do it soon, I would have to wait until spring.
I called my friend Bob, who has an acreage in Langley, about an hour out of town, and asked if he would host me. I warned him about the fumes, and he said it would be no problem, he wouldn't mind a bit.
So one Saturday morning in September I woke up, checked the weather forecast, and decided it was time to go. I drove to my workshop, loaded up my equipment, and headed out to Bob's. Here are some highlights of my varnish making day.
The full scene at Bob's beautiful acreage. I'm set up quite far away from a couple of houses on his property. You can see a yellow extension cord running to my work site from the outdoor kitchen a few feet away.
Here is the basic set-up. A milk crate provides a handy box for carrying equipment, and provides me with my seat. On the plywood, there are a hotplate; a cast-iron pot for cooking the resin; a pot lid for checking varnish hardness and colour; a pair of neoprene gloves; a heat diffuser for the hotplate; a lab thermometer (that reads to 400° C); and the jar of polymerized gum turps. Closer to the camera are wet towels, in case of emergency; and a tub of water, the presence of which I'll explain in a second.
On this day, my varnish making is divided into two parts. First, I must heat the polymerized gum turps to a certain temperature in the cast iron pot to make a brittle resin. I begin by pouring the gum turps into the pot, and heating slowly, stirring with the thermometer and keeping an eye on temperature. Around 125°C, a reaction takes place in which some volatile substances in the turps cook off, in the process creating a considerable amount of heat. This exothermic reaction can cause a rapid (and potentially dangerous) rise in temperature, as well as the creation of some heavy noxious gases. The tub of water in the photo above is available in case the reaction gets out of hand: I can lift the pot from the hotplate and dip it into the water to lower the temperature quickly.
In the event, there was very little exothermic reaction created by this particular batch of gum turps. I think one of the reasons why is that the batch was made long ago by Grant Tomlinson (he figured it might have been made twenty years ago), and it had simply mellowed, the volatile substances having dissipated over the years. Another possible reason why there was not much of a reaction is that the batch was not made using a certain chemical--manganese napthenate, to be specific--which Fulton recommended using as a catalyst in the original polymerization process.
Once past that rather tense phase of cooking, I could pretty confidently take the temperature of the gum turps slowly higher, ultimately somewhere above 300° C, the temperature needed for making a beautiful amber-brown shade of resin. (Lower terminal temperatures are used to create lighter-coloured resins and varnishes.)
Here I am, your humble narrator, enjoying the cooking process on a lovely late summer day.
This photo is courtesy of Bob, my host, who took a break from driving his tractor and cutting the grass while I made varnish.
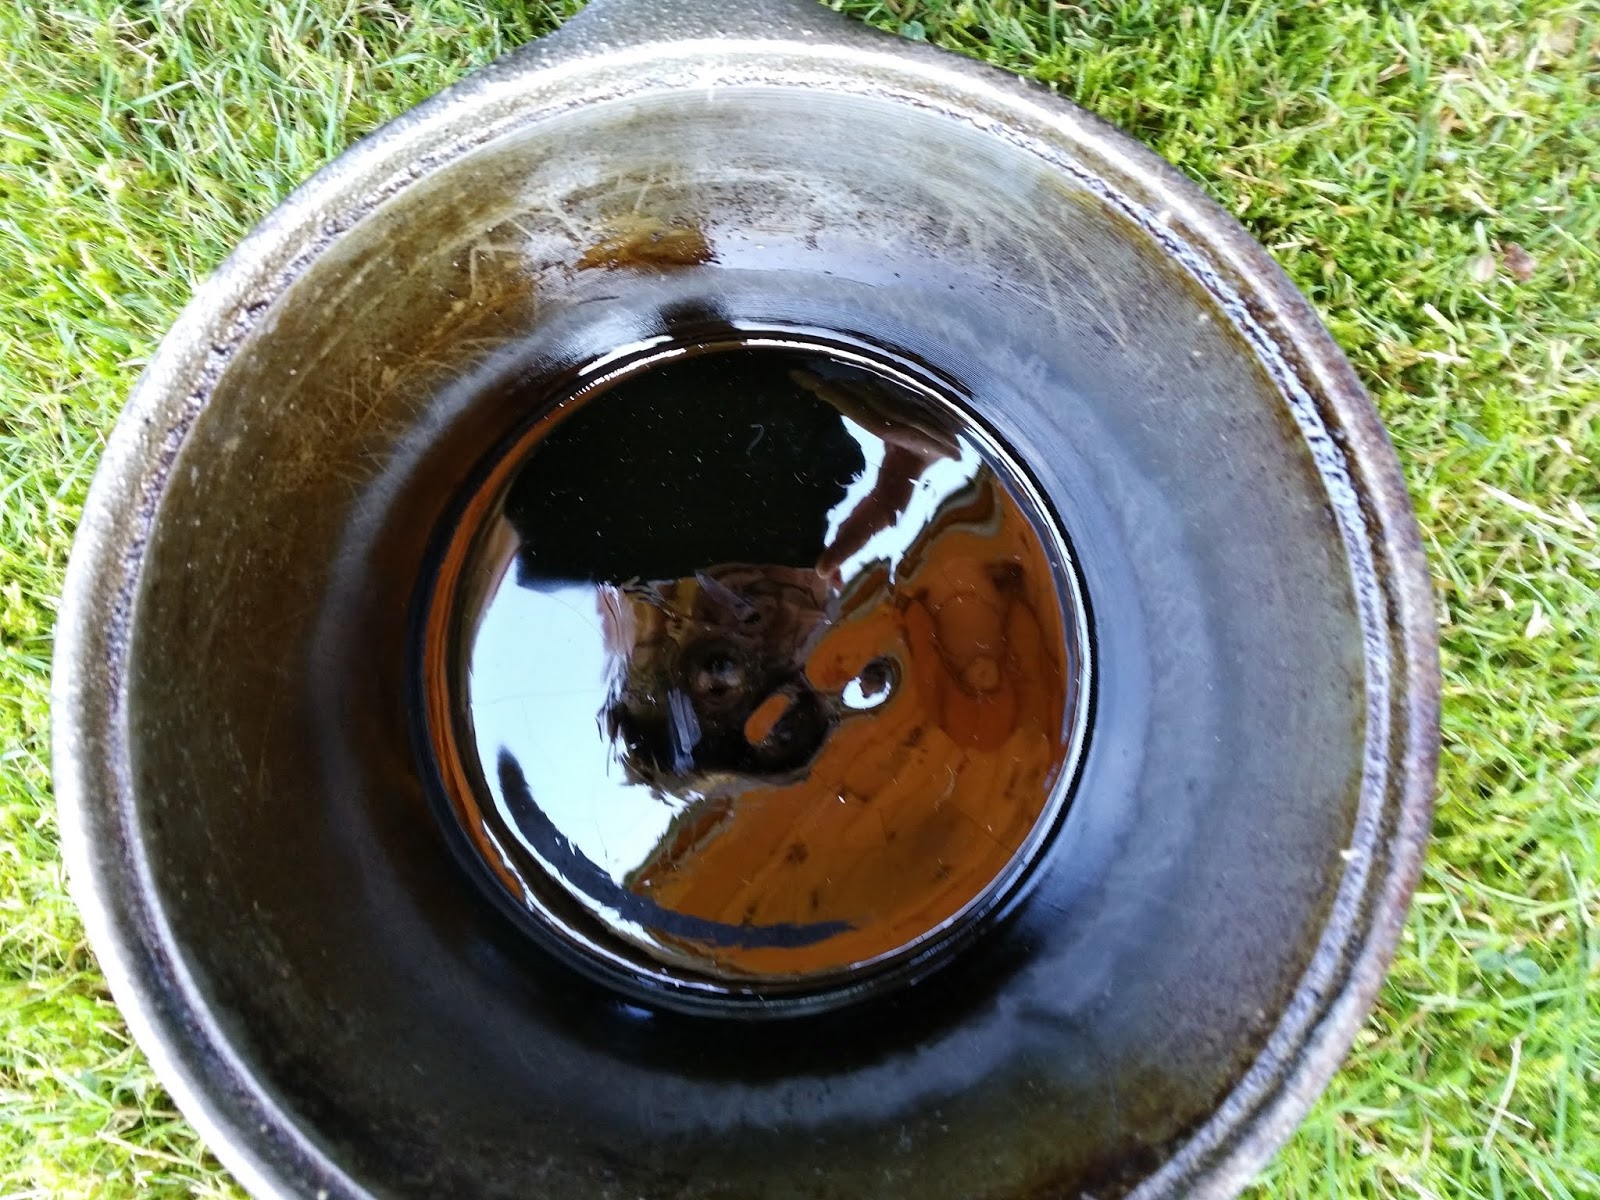
Here is the result of the cooking the resin, after removing from heat and allowing to cool. Although it looks like a liquid, it is a solid--I've converted the gum turps to a brittle resin.
Now I just need to remove it from the pot, which I do by breaking it up with a hammer and screwdriver. I will use some of this brittle resin for the second stage of my cooking day, where I actually cook varnish. The rest of this brittle resin I will put into a jar and keep until I need to make varnish next--which hopefully won't be for a few years. (The brittle resin will keep indefinitely.)
The varnish-making part of the day can now begin. I crush a certain amount of the brittle resin in a mortar, and mix it in another pot with stand oil. Then I heat this mixture steadily, over the course of about an hour, to around 300°C.
I don't have any photos of this part of the process, because I was busy doing it and paying pretty careful attention, and Bob had left the area. But here's what happened. I sat beside the hot plate, stirring constantly with the thermometer, taking temperature readings every minute and jotting them down in my notebook. Even small variations in the rate of heating, as well as the amount of time the varnish is held at the terminal temperature, can make differences in the quality of the varnish. I keep careful records of the cooking process, in the hope of tracking down the origins of these subtle differences.
Fulton's recipe calls for holding the varnish at the terminal temperature 'until a firm pill stage is reached.' I'm not exactly sure what he means by that, but here's what Grant taught me to do: take the thermometer from the pot and let a drip of varnish fall onto the cold pot lid. Let the drip cool for a few seconds, then tap it with your fingertip and lift away. The varnish will stick, and you'll pull away strands of beautiful amber varnish that billow and drift in the breeze. The longer you hold at the terminal temperature, the finer and longer these gossamer strands will become.
The Sorcerer's Pot-Lid. Who can tell the varnishes it has known!
And then, when you judge that the varnish can become no finer, you take it off the heat and let it cool. You can't keep heating indefinitely; your varnish will gel in the pot. That's about it. When the varnish has cooled to below 150°C, you can add some distilled spirit of gum turps as a thinner, and then filter into jars. Here is the final product.
It's lovely stuff. Can't wait to make a lute, and slap on a coat or two.
Which leads us to the next part of today's post: applying the varnish.
For this part of the process I decided to make a series of short videos on my phone. This marks a first for The Lute's Progress: I've never done a video demo before. I don't want to get your hopes up or anything--they aren't the highest of fidelities, I'm not used to talking to a camera, and my framing of the shots may leave a little to be desired. (For instance, in none of the videos can you see my face clearly. That may be either a glitch or a bonus feature; I'll leave it to you to decide.)
But I couldn't think of a better way to illustrate what I was doing in flattening off the previous varnish coat, and then brushing on the next one. It's not a process that lends itself to taking a bunch of photos, as I usually do, then writing descriptions. So, with all their faults, I humbly present these videos and hope that you can get a reasonably clear idea of what I'm up to when I apply a coat of oil varnish.
And that will be that for this time. Next time, I'll tell you about making the peg box. Cheers!
Video #1: Removing dust particles
Video #2: Flattening off the varnish
Video #3: Brushing varnish on the first few ribs
Video #4: Brushing varnish on the last ribs and capping strip


