Sunday, 15 February 2015

A Small Fix

I have another repair to tell you about, which I did in December, in the between putting varnish coats on a couple of new lutes (I'll tell you about them in a little while).  The repair was pretty minor, but I thought I'd talk about it because it illustrates a couple of important principles of lute making--how to make a well-fitted joint, and how to use hide glue to get a really solid bond.  These skills are applicable in many stages in the lute's construction, and every aspiring lute maker should know them.

The repair was to a 6 course lute owned by Nelson Amos, of Ypsilanti, Michigan, and as a matter of fact, it is one of mine, a lute that I built for myself in 2007.  Nelson bought it from me a couple of years ago, when I decided to make myself a new 6 course lute.  The problem: a detached peg box. A sudden wrong move, a small impact, perhaps, had knocked it out of its joint.  It looks pretty terrible, and of course the lute is out of commission until the problem's fixed, but it's really not that big a deal to put things back together.
Photo: Nelson Amos
The first thing to notice is the quality of the break itself, and the results thereof.  When the pegbox came out, it took a fair bit of material along with it on its underside; however, the back side of it is almost completely undamaged.  This suggested to me that although the pegbox was well glued underneath, the back side was not well glued at all.  In fact, on closer inspection I could see very little glue residue at all on the back side of the peg box, or on the corresponding surface of the rebate in the neck: tell-tale signs that I either hadn't fitted the pegbox well, or hadn't glued it well, or, most likely, a little of both.  
All the wood was still there, and the break was pretty clean, and I guess if I was one kind of lute-repair person, I might consider just sticking the peg box back on with some kind of modern gap-filling adhesive.  For better or worse, though, that's not the way I work. The peg box might stick, but probably not for long, and in any case the joint would look really ugly.  I like to do these jobs right, and if I didn't quite do it right the first time around,  I would happily do it right the second time.

The first thing I needed to do was repair the rebate in the neck.  The back side of the joint was fine, but the 'tongue' of the joint was quite severely damaged, with much material having been torn away.  I needed to build that area up again.  I first chiseled and filed the area back to make a flat surface, then glued (with hide glue) a new chunk of pearwood down on top.

There was also a small chip of wood that had been taken out of the back side of the peg box (proving that that surface wasn't actually completely devoid of glue after all).  I chiselled out a small channel and filled it with a slip of pear, then flattened the area with chisel and file.  I also removed the torn-out wood from the bottom of the peg box, and flattened that surface too.

Then I got to work re-shaping the rebate joint.  Most of the material I removed with a chisel, but when I got close, I used some (shop made) bevel-edge plexi-glass sanding blocks.  The bevelled edges allow me to get far into the very corner of the joint; the blocks have 180 and 220 grit paper, stuck on with double-sided tape.  (The very corner of the joint is cleared using a sharp chisel.)
 I needed to shape the sides of this piece as well, to follow the contours of the neck.
Okay, so here's the first point I wanted to talk about: how to get a well-fitted joint.  The pegbox joint can be a tough one to fit: the rebate cut in the end of the neck is an odd shape, and it's difficult to tell if the two surfaces are flat--a straightedge is of little use, especially on the back side of the joint.  So how can you tell if the surfaces are flat? 

Probably the best approach to seeing whether the surfaces are flat in the rebate is to make sure that the contact surfaces of the peg box are flat first.  And by flat, I mean dead flat--a straight edge held against the bottom of the peg box should not rock at all, whether it's held across the bottom, or along its length, or from corner to corner.  Hold the straight edge against the surface, and view with strong back lighting--no light at all should be visible between them.  (The same flatness test applies to the back of the peg box, especially where it contacts the back side of the neck rebate--it too needs to be dead flat.)

Once the peg box surfaces are flat, you can use the peg box itself to test the flatness of the bottom and back sides of the rebate.  Hold the peg box in the joint, and look at the fit--if any gaps are visible, you need to remove the material around the gap to get a close fit.  Once you've done this, though, and the fit looks good, there can still be problems--especially on the outer edges of the joint.  The only way to really test the fit is to put the peg box in place, and apply pressure to the very corner of the peg box.  With your thumb, press the peg box into one corner, say the corner on the bass side of the neck, first.  Push hard, and observe the other (treble side) corner.  Does that corner of the peg box move out of the joint at all?  If it does, then that means the joint in the corner you're pressing the peg box into is not dead flat, and the peg box is rocking a tiny amount in the joint.  The joint needs further work, with files, sanding blocks, or a chisel.

In the same fashion, apply pressure with your thumb to the treble side of the peg box, and look at the bass side.  Does the peg box want to rock outward, even a little?  If so, the joint's not flat, and you've got work to do.

Only when the peg box won't move in the joint, no matter where you press on it, is it really fitted well.

Okay, so that's the first point I wanted to make: fitting the joint really well.  The second point is gluing the joint really well.

I use hide glue for all joints on the lutes I make, which is wonderful stuff, but it requires some careful use, depending on the joint it's used to glue.  For joints that involve gluing end grain, especially, it's necessary to size the joint first--otherwise, the glue will tend to wick away, leaving the joint starved.  I think that's what happened to the peg box when I originally glued it back in 2007.  As you saw above, there wasn't much glue residue on the back of the peg box when it broke out, which suggests to me that the glue had wicked away--and the reason was, I hadn't sized the joint.

Actually, I hadn't known to size the joint.  In all the reading I'd done over the years about lute making, I had never really encountered the concept.  The book I was most familiar with, Robert Lundberg's Historical Lute Construction, doesn't mention it at all; that's not surprising, I suppose, since Lundberg didn't actually use hide glue (for the purposes of that book, at least).

I really first learned about the importance of sizing joints carefully from Grant Tomlinson, my first and best teacher in lute making.  All that I'm sharing with you here comes straight from him, so for whatever benefit you derive from my writing, the thanks should go to him.

Back to sizing: make a batch of hide glue as you would normally do, soaking the glue granules first, then heating in jar in a water-bath; then when the glue is hot and liquid, dilute it to about half its normal strength.  Brush this size on all the surfaces of the joint, on the bottom and back of the peg box, and on the bottom and back of the neck rebate.  Allow the size to dry--about 15-20 minutes--then size all surfaces again.  Size about three or four times in total, and leave to dry thoroughly overnight--then the next day, re-fit the joint again, for the final time (the sizing process will have slightly distorted the surfaces of the wood).


When the joint is perfect, you can glue in the peg box, with the assurance that the glue won't wick away from the joint.  With a peg box fitted this well, and sized this well, there should be no more problems with fragile or glue-starved joints.  This peg box joint will not fail, and that's a guarantee.
So that's the story of my peg box fix, and, for those about to fit their own peg boxes, I hope it will be helpful.  This post strikes me as being a bit text-heavy, and that's too bad, but sometimes things just need explaining and there's no way to get around it.  However, there's one last part of the peg box gluing procedure that I haven't talked about, and that's the actual gluing part--the part where glue is applied, and the peg box is clamped in place.  I won't talk about that here, but I tell you what--for those more visually-oriented learners out there, I will include as a bonus a photo of my gluing rig.  You may find information in it that's helpful in your own work.  Enjoy!


Sunday, 7 December 2014

The Lute Doctor Is In


Today I'd like to tell you about a fairly substantial--and quite successful--lute repair I did last summer, for Michael Miranda, of Alhambra, California.  The patient was a lovely 13 course baroque lute made in 1979 by Nico van der Waals; the case history and diagnosis were a little complicated.
Photo: Michael Miranda

Photo: Michael Miranda

Michael bought the lute in 2001, and though it was still in pretty good shape, it had obviously been well-used over its lifetime.  Then recently, he explained to me, it began to lose sustain and response in the treble range, and seemed as though it was becoming 'played out.'  He took it to a local luthier, who put a new belly on it, which worked fine for a time; but after a while the bridge pulled off, destroying the new belly in the process.  Michael then took it to another local luthier who put the old (original) belly back in, which also worked fine for a while, until the belly started to lift up and separate from the edge rib along the bass side.  Fearing catastrophe, Michael slackened all the strings, and the lute was rendered basically unplayable. 

Needless to say, by this point he was feeling a bit frustrated.  He first contacted Grant Tomlinson to see if he might repair the lute (if indeed it could be repaired, after all these misadventures), but Grant was busy and unable to take on the work, and so he passed it to me.  Grant was convinced that the lute could be fixed, and the best way to do it was to use the old belly--a very stiff, fine grained top, with a beautifully carved rose and an elegant bridge--but install a new set of bars.   Much else would need to be done to refurbish and stabilize the belly, as I would find out when I removed it from the body and had a closer look.
Photo: Michael Miranda
The first thing that came clear was that the reason why the the joint between the belly and body failed, was that the edge of the belly was just too chewed up to make good contact with the edge rib.  The belly had been removed many times during the life of the lute, and each time it was, the luthier's palette knife would chew up the edge just a little bit more.  By the time it got to me, there was barely a surface there left to glue.
So, besides replacing the bars, the edge of the belly would have to be rebuilt as well.  There were also numerous cracks--one below the bridge, and one extending from each of the fingerboard points--which would need to be stabilized and filled.
Photo: Michael Miranda
First things first: remove the old bars.  I cut most of the material away with a sharp knife, planed the remainder very close to the surface of the belly with a low-angle block plane, then removed the last remnants with a very sharp scraper.  Whatever had been used to stick the bars down originally, I was pretty sure it wasn't hide glue--some sort of yellow resin, perhaps carpenter's glue.  Whatever it was, it seemed to have deteriorated the material of the belly beneath the bars, turning the wood chalky.  I had to be very careful in removing this stuff, because although the belly was already quite thin (less than1.5mm in most areas), I would need to expose new wood for the new bars to be glued to, to ensure a solid joint.  I had to strike a fine balance here.

With the old bars gone, I could start the rebuilding process.  All along the edge of the belly I planed and scraped a bevel about an inch wide, and you can see in this photo how deep I've gone--nearly to the underside of the ebony half-binding.  You can also see--where the belly is chipped away, exposing the ebony--how badly damaged the belly was in this spot.


With the perimeter of the belly chamfered, I could now glue onto it new strong, close-grained belly material.  I used off-cuts from bellies of lutes I've recently built, and did the gluing in pieces: one on each side, one across the bottom, and one on the "tongue" of the belly.

And I used just about every 2-inch clamp I had in the shop.

Here's the result, with clamps and cauls removed.  Before I could carry on, I had to carefully plane the new wood down to the correct thickness (level with the old wood beside it), and close to the outline of the belly (that is, close to the ebony edge binding.)

Next up: repair the cracks in the soundboard.  In addition to one below the bridge, there were two long cracks extending from the tips of each of the fingerboard points, down almost as far as the large bar above the rose (so, about 3 to 4 inches long).  These cracks had been there for a long time, and were quite wide--the belly had apparently shrunk considerably over the years.  Because of this, the repair would have to be done in two stages: first stabilize the cracks on the underside of the belly, then fill the cracks themselves from the top side.

I glued small diamond patches of spruce soundboard material over the cracks, at intervals (and avoided placing them where any new bars would eventually go.)  As you can see, these cracks were long, and I tried to follow them right to their ends, and deal with their entire lengths, so that they would not open up again later on.

On the top side, I used a sharp knife to actually widen the cracks a little, to make them a more-or-less uniform width along their entire length, and make them into a more deliberately v-shaped channel.  That way, I could shape a long, v-shaped patch of soundboard material that would fit closely and fill the entire channel without gaps on either side.  I glued the patches into place with hide glue, which is perfect for this kind of repair: since it shrinks as it dries, it has a tendency to actually pull the patch material down into the crack, for an even tighter fit. 
I scraped the patches flush, and as you can see, removed a bit of the soundboard's patina in the process.  The patches themselves are also quite a bit lighter in colour than the old belly material.  I later coloured these areas a little with some very thin varnish, and though they won't fade away completely (at least not for a few years), they won't be that noticeable, especially with a rank of 13 courses of strings above them.  In any case, they will certainly be preferable to the cracks that they replaced.

The final stage of rebuilding the belly was to create and glue on a new set of bars.  The instrument was based on a 13 course lute by J.C. Hoffmann (which, if I hadn't recognized it, was helpfully written on the top block by the maker!), so I consulted some historical belly drawings of lutes by Hoffmann, selected some of my heaviest, stiffest bar material, and shaped a new set of bars and glued them on.

I want to show you a shot of the bars as they're being glued on, in the go-bar deck.  You'll notice that the belly is sitting up on a platform; I wouldn't normally use this for gluing on bars, but I did in this case because this belly already has a bridge glued to it, and the platform has a cutout that the bridge fits down into.

Here's a shot of the completed belly, showing the new bars contoured along the tops and trimmed to length, the diamond patches on the cracks, and the new belly material scarf-joined to the outer edges of the belly.  This soundboard is now very solid, has a beautiful, ringing tap-tone, and is ready to be glued back into the body of the lute.
Which I did.  The fit was good: the outline of the belly matched very well with the body, and most importantly, the gluing surface of the belly matched very snugly against the outside rib.  There would be no more problems with the belly lifting away from the body.

One last bit of work was in order: a new set of fingerboard points.  With those cracks having been repaired, the belly was now slightly wider in that area than it had been before, and the old points no longer fit.  With new points in place, the repair was now complete.
See?  You hardly even notice the filled soundboard cracks, once the lute's strung up.
And there we are--the completed repair.  I thought it turned out rather well.  It seemed to have a good, solid, sweet tone; I hoped it would be an improvement over the sound it had before, though I had no way of knowing, since it had been unplayable when I received it.  I shipped the lute back to Michael in August, and eagerly awaited his assessment.  I got an email a few days later.  Here's what it said:

Hi Travis,

It’s a miracle - You’ve brought my lute back to life!! I’ve restrung it, and have slowly brought it up to pitch. The sound is even better than when I first purchased it over 10 years ago. Many, many thanks for your expertise and attention to detail. I look forward to seeing you next summer and will be in touch soon regarding the Vancouver lute fest. All your beers are on me!


take care,


Michael


I just love it when I hear things like this from people I've made or repaired lutes for--it truly makes my day (and I don't just mean the "all your beers are on me" part, though that's nice too.)  I really get a kick out of making lutes work, and not just my own lutes, but lutes by other makers.  I've worked as the Lute Doctor at the LSA's Vancouver Lute Workshop for the last few years, and I've had occasion to fix a few.  Some repairs are large and some are small, but whether I'm simply adjusting the action to make the lute a bit more comfortable to play, or undertaking larger-scale fixes like this one, the process of doing repairs, and seeing the immediate results they can have for players, is very rewarding.

Some lute makers hate doing repairs, and cringe at the very mention.  Not me; I like doing them (in moderation), and I don't mind who hears it.  If there are repairs to be done, I'll schedule them in between batches of my own lutes that I'm working on, just to give myself a little bit of variety at the bench.  You can learn a lot by doing repairs, and one important thing you can learn is to be fearless.  If a lute has been built, it can be unbuilt; whatever is broken can be fixed.  These are principles that doing lute repairs has taught me, and they're principles that I apply in my own lute making practice, every day in my workshop.


Sunday, 16 November 2014

How I Learned to Like My Bending Iron (or, The Return of the Betterizer)

Hi friends,

I was bending ebony soundboard edge-bindings for a new batch of lutes this week, and realized again how much I like my little bending iron.  It wasn't always this way--when I first got it, probably about a dozen years ago, I didn't care for it very much at all.  Over the years, though, I've modified it in a few ways to really make it work for me. 
The bending iron is one of the standard ones you can get from a guitar making supplier, like Luthier's Mercantile or Stewart Macdonald (I forget which one I bought it from).  It came a bit raw out of the box, a bit unformed.  The first problem I noticed was that the sides of the iron (which, incidentally, is not made of iron, but of aluminum) were really pretty wobbly, not straight at all, which didn't help the results of my attempts at bending.  I gave it a good workover with some files and sanding blocks, and got it to the point where the faces were reasonably true.  Making good bends, especially with wider material (like for 9- or 11-rib lute backs) became a whole lot easier.

I also screwed a plywood base to the thing, so I could clamp it more conveniently and securely to the work bench. 
The main thing that I disliked about the bending iron was the way it sets up to bend small strips of wood, such as edge bindings or rib spacers.  It comes with (or maybe you have to buy these separately) a pair of aluminum hoops that fit around the bending iron, one on top of the other, which you tighten in place by means of a nut and bolt.  This is what they look like when they're not on the bending iron, which they haven't been on mine for a few years.  (I didn't care to put them on just for the sake of the photo op, so here they lay, lifeless.)

There are a couple of problems with this setup, the main one being setting the width between the hoops.  To work best, the hoops need to be very evenly spaced apart, and the distance needs to be just ever-so-slightly wider than the material you're working with.  If it's not (and this is the way it usually went for me), then on one side of the iron the material will be pinched, while on the other there will be too much wiggle room.  I had real trouble adjusting these hoops accurately--you can hold them in place, but as soon as you start tightening the nut, they'll move.  A small, but constant, source of frustration.   

A second problem arose when I first began building lutes in batches, because occasionally the rib spacers for one back would be a different thickness from the spacers I was using on the other.  This meant as I went back and forth, fitting ribs alternately on the molds, I would need to adjust the space between the hoops back and forth too, to accommodate the different sizes.  Frustration multiplied.  It was clearly time to call in--the Betterizer!

I have found that when I'm stumped about how to modify a piece of equipment, it sometimes helps just to take things apart and have a look at the insides.  That's what I did with the bending iron, and found that it's basically hollow--just a teardrop-shaped aluminum tube with a small heating element that plugs into it.  All that space gave me an idea.
I flattened the top surface of the iron and drilled a couple of holes into it, then threaded the holes and screwed a couple of 1/4" bolts up from the inside.  Then I drilled slightly larger holes, the same width apart, into a couple of pieces of 1/8" brass stock I had on hand.  I shaped these pieces carefully on the bench grinder so they were the same teardrop-shape profile as the top of the bending iron.

Then I drilled holes into some other pieces of brass stock, of various thicknesses (to be exact, the thicknesses were 0.2mm, 0.4mm, and 0.8mm).  I also shaped these pieces on the bench grinder, but I made them a little smaller than the 1/8" pieces--about 3mm smaller, all the way around.  (I stacked these pieces and clamped them together for shaping on the grinder, so they would all turn out with the same profile when I was finished.)

Here's what I made, a veritable Roman hoard of brass shims (or perhaps a beautiful school of brassfish swimming by.)   You can see the two larger 1/8" pieces at the bottom of the photo:
 Stack up some of the smaller shims on top of the bending iron, and here's what you get:

 Put a larger 1/8" piece down on top.
Add yet more smaller shims on top of that--
And another 1/8" piece.  Screw the pieces down tightly with some wingnuts--
And there you have it, a bending iron with grooves built in for bending ebony edge bindings (shown here), sycamore rib spacers, or just about anything else your heart desires.  Need to adjust the depth of the slot?  Just remove the wing nuts, add or remove or stack a different combination of shims so that the slot is just that tiny bit wider than your material.  Are you building multiple lute backs that use different widths of spacers?  No problem--this set up gives you two slots that you can set to whatever depth you want.  No muss, no fuss, no guesswork, no switching back and forth, just... calm.  Peace.  Oneness with the universe.   Betterization accomplished.

I usually have a few spacers left over, so I just stack them on top before screwing down the wing nuts.

I really like this setup.  I feel that I've taken a tool which, when it came from the supplier, was really not that well made or well-designed for the job, and turned it into a piece of equipment that's essential to my professional workshop.  For any builders out there who have experienced the frustrations I have, I recommend this fix.  And I wish you well in your own adventures, shaping your tools to your needs.  Do let me hear about them, if you like... and Happy Betterizing!  


Sunday, 13 July 2014

Designing a Medieval Lute

Note: I've recently written a new blog post that reviews some of the aspects of iconography and lute design that I've discussed here. Check it out: The Backside of an Angel


Today I'd like to talk about how I designed a recently completed 5 course fretless medieval lute. This instrument is the culmination of a couple of years of research, thinking, discussion and design with the client, Gus Denhard, of Seattle—a fascinating journey which (as always) I hope has yielded a playable and convincing musical instrument that the owner will get a lot of mileage out of.

Initial discussions between Gus and I focused on the basics: the size (and pitch) of the instrument, number of courses (5, instead of the usual 4), tuning (in fourths), and so on.  Gus didn’t have a specific design in mind, but he did have a firm idea of how he wanted to use the lute, which was to explore, with his musical collaborators, the connections between European and eastern/Arabic music of the Middle Ages.  The lute's a natural for this, since its direct ancestor, the 'ud, was brought to Europe by the Moors about a thousand years ago.   The modern 'ud, and what we now call the renaissance lute, are both descended from this early 'ud, and are therefore very close cousins.  My hope was that by judiciously combining certain features of both these instruments, I could perhaps find a way back to that common ancestor.

The main problem in designing and building an instrument like this is that no historical examples of such an early lute have survived.  Probably the earliest surviving European plucked string instrument, the gittern by Hans Ott of Nuremburg, dates to about the mid-15th century, and that's about as far back as we can get.  For anything earlier than that--say, one or two hundred years earlier, which is approximately the period Gus and I had in mind--we really need to rely on iconographic evidence.
Hans Ott giettern (photo courtesy of Wikimedia commons)
But which iconographic evidence?  Depictions of lutes abound from the middle ages--in altarpieces, manuscript illuminations, frescoes, wood carvings and so on, in a seemingly unending stream.  One piece of advice that proved invaluable came from Crawford Young, the early lute scholar and performer.  Actually, it was two pieces of advice: build the instrument lightly, he said (more on this later); and for a model, look at Sienese pictures from the 14th century.  He also narrowed the search further, by suggesting I consult Howard Mayer Brown's "Catalogus, A Corpus of Trecento Pictures with Musical Subject Matter," a series of articles published in the journal Imago Musicae in the mid-1980s.  What a resource!  I heartily recommend it to anyone interested in the subject: a near-exhaustive collection of pictures, indexed by artist and type of instrument depicted, all keyed to a list of thumbnail versions of the pictures.

I located the journal at the University of British Columbia library, spent a day up to my elbows in pictures, and emerged with one good depiction of the kind of lute that I thought would work.  Here it is, a Coronation of the Virgin by Andrea Di Bartolo, from the Ca d'Oro in Venice.


And here's a close up of the lute.  Why did I choose this particular picture as my model?  Well, there are a number of details that led me to believe it might offer a viable design.  First, it seemed to be of a size (in relation to the angel holding it) that could work for a lute with a string length of around 60cm, with the top course tuned in g', which was Gus's request.  It also had a ratio of neck length to body length that would allow for the equivalent of around 5 or 6 frets on the fingerboard, and 8 to the upper soundhole rosette (another of Gus's requests).  So the proportions seemed right, and indeed, when I put together a drawing using a compass and straightedge, the body outline conformed quite nicely to some simple geometry, using whole-number ratios to draw circles and arcs.  That in itself is a convincing detail.

But much else in the picture looked appropriate too.  The bridge had a nice shape, and looked a lot like the kind of bridge you might find on a modern 'ud.  The scratch plate in front of the bridge was another 'ud-like detail.  The soundhole rosettes are simple (in comparison to those that we see in renaissance lutes), but they're elegant, and their simplicity is more than balanced by the busyness of the rest of the design, including the soundboard edging (which looked to me like a kind of 'herringbone' binding), and the tilework inlay in the soundboard.

I found another example of this type of lute (not, incidentally, in H.M. Brown's article, but on flickr).  It appears in a fresco among a group of musical instruments (including a gittern) by Lippo Vanni, in the Church of San Lorenzo al Lago.  The larger image first:

And then the detail.  The picture resolution is not great, but you get the idea: two soundhole rosettes (both of simple design), bridge with scratch plate out front, tilework inlays, binding all around the top, and curving neck joint (rather than a blunt joint, as one finds on a renaissance lute).  All very similar to the image I used for my design, and confirming for me a lot of the features, both functional and decorative, that I decided to include.

So I had the model--now to design and build the actual lute.

One principle to keep in mind when working with an iconographic source is that a painting is not a photograph.  Parts will be exaggerated, and proportions distorted, to create an effect specific to the painting.  In a way, that's frustrating, because you can't just copy the image, but in another it's liberating, since you have to trust your own sense of proportion and your knowledge and experience of what will make a good, playable, working instrument.

That's nowhere more true than with the back side of the lute.  All a painting like this gives you is the plan view--it gives no information on the body, how deep it might be, what shape it has, how many ribs it has, or even whether it's built up from separate ribs at all (maybe it's carved from a single block of wood).  In designing the lute, these were the first big decisions that had to be made.

I took to heart Crawford Young's advice to build it lightly, and that meant, first, building a ribbed back, rather than carving the body from a solid block.  A simple aesthetic seemed right to me, so I went with 9 ribs (about the smallest number that's practical), and kept the longitudinal section basically the same as one half of the plan view (in other words, the body is pretty much semicircular in cross section.)

With the body designed, I turned my attention to the soundboard, and its many features--bridge, scratch plate, rose designs, tiles and binding.  All of these things needed their proportions re-imagined to match each other, and to match the scale of the whole instrument.

The first element that I tackled was the herringbone edge binding.  In fact, I think that was the very first thing I made of the entire lute, before the body or anything else.  It became a minor obsession, because I needed to make sure of two things: one, that I could manufacture the binding (actually two identical  bindings, one for each side of the belly), in a width that was right for the lute's proportions; and two, that I could bend it to fit around the edge of the belly, without it falling to pieces under the stress and heat of the bending iron.  If I could figure a way to do those things I'd be fine, but if I couldn't, I was pretty sure I'd need to rethink my whole concept of the lute.

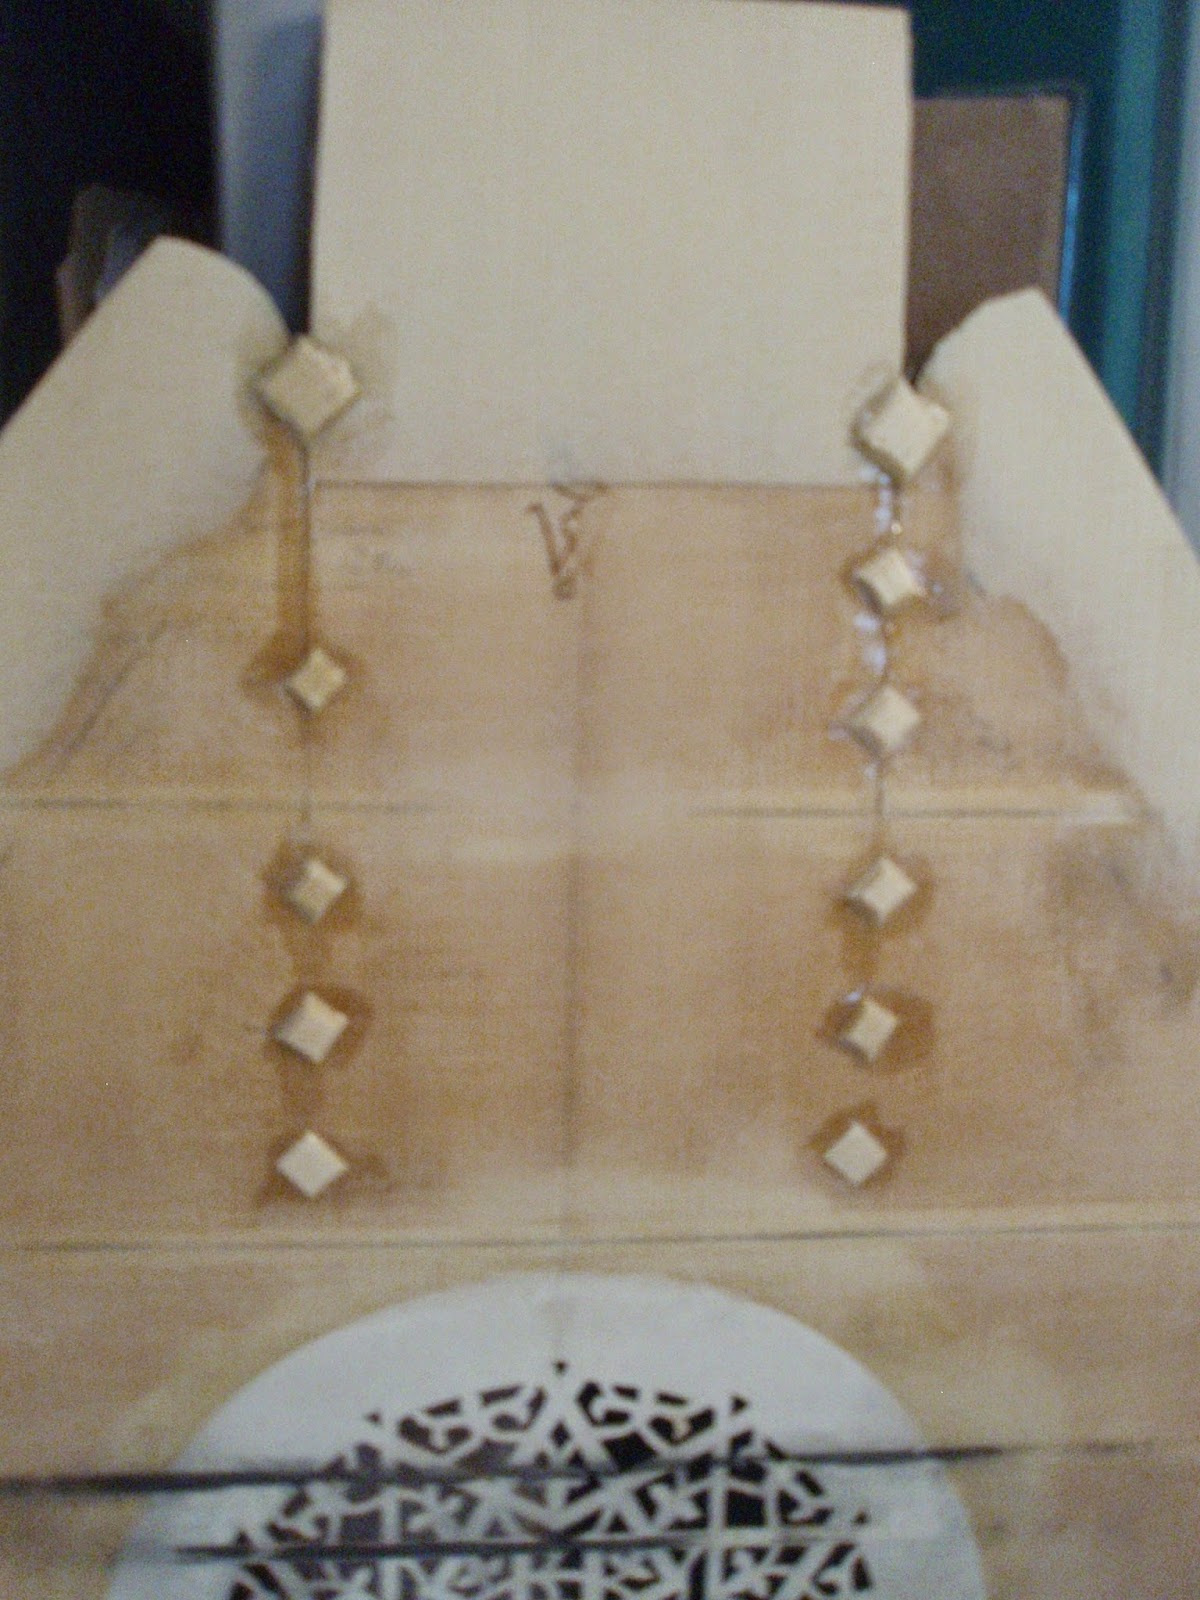
The binding turned out well, and so I felt free to build.  Most of the other features I figured out as I went along, and as they emerged in the building process.  The bridge design, for instance, was a product of three influences: the overall shape came from the painting, the width derived from the string spacings that Gus had provided, and the height and other dimensions were adapted from my observations of modern 'ud bridges.  The roses needed a bit of redesigning to better balance the ratio of negative to positive space; they also needed to be repositioned, slightly, to accommodate the body shape I'd created, and the internal barring system I'd worked out (you can read about the barring system here.)  Once I had the sizes and positions of the bridge and roses, I could then size, position and glue the scratch plate.  And once that was in place, I could create and position the four tiles that really give the lute its characteristic look.

The tiles were fun to design, and to make.  The photo I had of the painting was not of a sufficient resolution that I could see very well what their actual design was, so I was left to come up with something that would create the impression of the tiles, while fitting in with the proportions of the rest of the lute.  Once again, it can be a bit of a hassle not to have things spelled out for you, but it can also be quite liberating.
 The same principle applies to the peg box, which is not detailed in the painting, and is therefore free to be imagined.  I decided on slightly curvy peg box, in homage to the elegantly slim peg boxes on modern 'uds; I also designed a simple, square-ish peg head to go along with it.

There's one last feature of the design that I'd like to mention, and that's the smoothly curved joint between the body and the neck.  You see this type of joint everywhere in the iconography of the period, so we know it was commonly used, but figuring out why it was used, or why it continued to be used for so long, is a bit problematic.  It gives the whole lute a very organic shape (rather like a bulb of garlic), and to me, at least, it's pretty easy to see its evolutionary origins first in instruments made from gourds, and then, later on, in instruments whose neck and body are carved from a single piece of wood.  This is the case with the Hans Ott gittern, and, one suspects, most other gitterns of the period; it's also easy to imagine that up until a certain point, lutes were made this way too.

However, somewhere along the line,  someone decided to try for a different sound, something a bit more refined, a bit more responsive, and rather than carving the back from a single piece, built it from separate ribs--and attached the neck after it was made.  A different kind of lute was born.  But why preserve that old-style neck joint?  Isn't it incredibly difficult to bend the rib in two different directions, and still get a good, close fit between them?
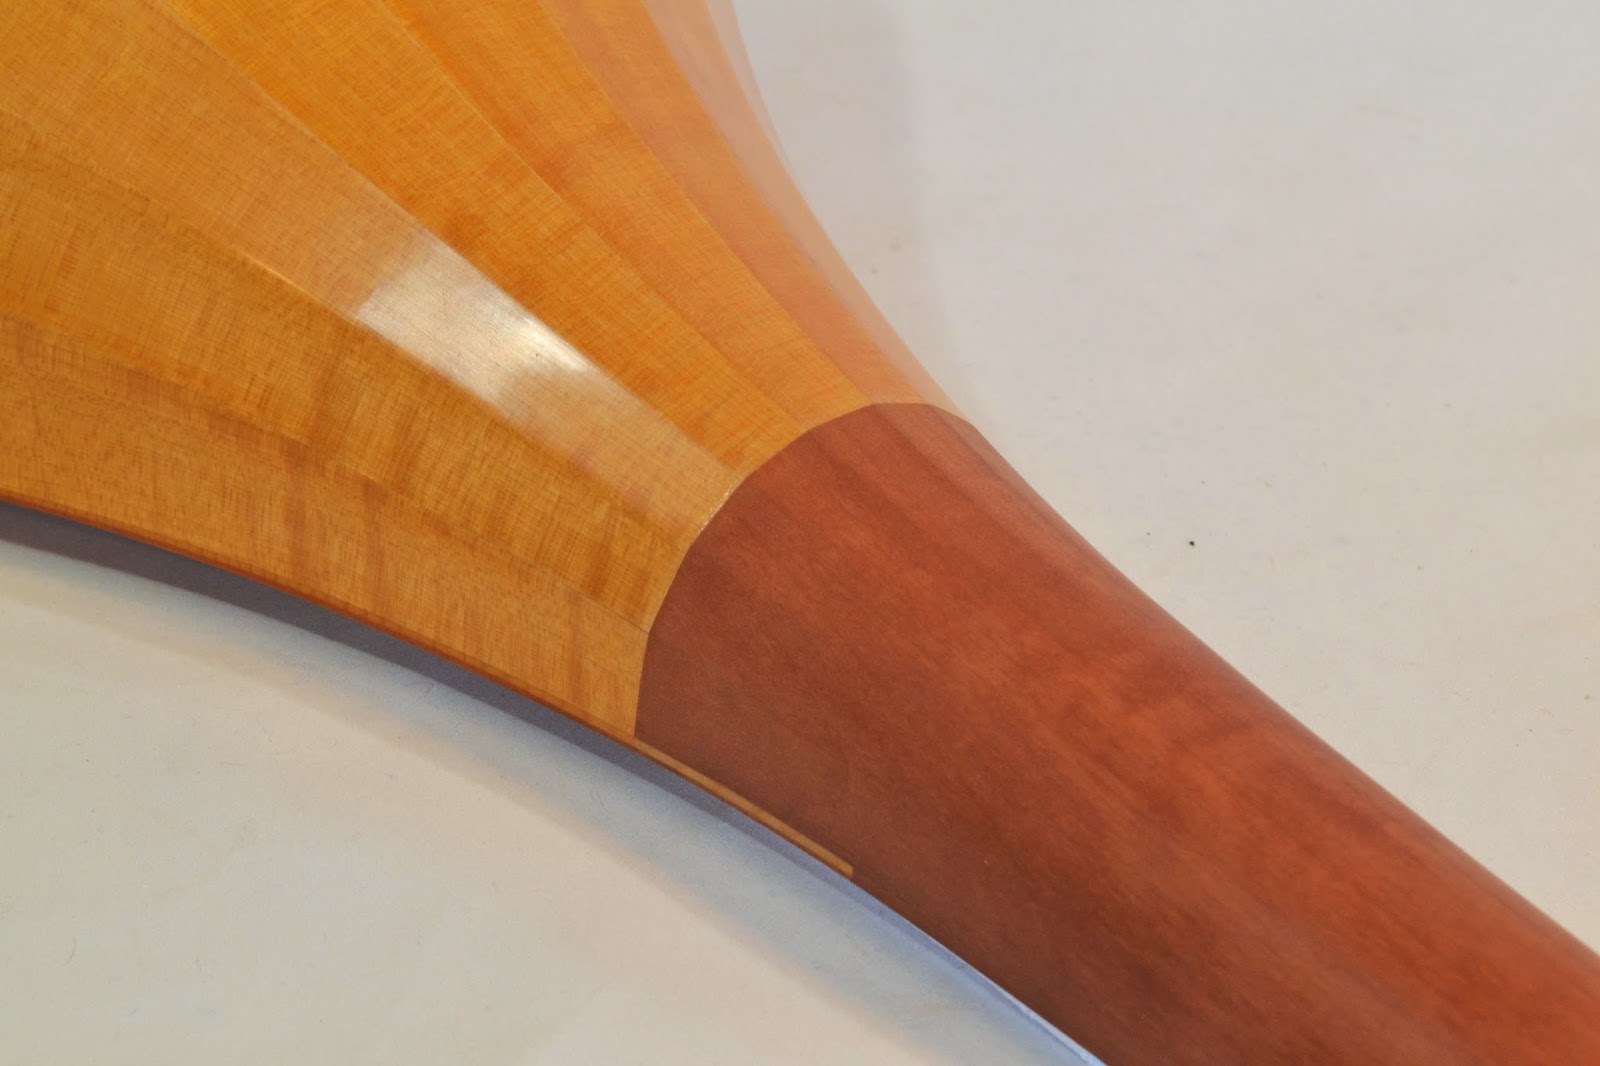
The answer to that question (as I found when I built the back) is that, yes, it is difficult, but not incredibly so.  In fact, I was a little surprised at how (relatively) easy it was.  The rib joints looked good, as did, indeed, the whole back, and the whole instrument.  Like much else about this lute, it represented a technical challenge that I was eager to accept.  (This is the way that I push myself to keep developing and refining my craft skills and why, even if I'm never asked to build another one of these lutes, it was well worth my while to do so this time around.)

And why did this kind of joint keep being used long after it was convenient to do so?  In my opinion, two reasons.  First, tradition is a very powerful thing: if the joint has always been made this way, why should it be changed?  Second, the joint itself feels very slick, and, I believe, lends itself to single-line playing up the neck and onto the upper part of the soundboard.  The joint, in other words, fits the music that was (and will be) played on it.

I hope this account has given you some idea of the kinds of choices I made to design and build this lute.  Most of the choices are, fundamentally, pragmatic ones, and have ultimately to do with the playability of the instrument: the width of the stringband dictates the size of the bridge and width of the nut, which both in turn dictate the dimensions of the fingerboard and neck, which then affect the size and contours of the body, which then, in turn, dictate the size and proportions of the decorative features of the soundboard.  Everything is of a piece, and all the features are based upon the body, hands, and technique of the player.

That player's name is Gus Denhard, and he drove up from Seattle about a month ago to pick up his new lute at my workshop.  His initial response was quite positive, and I'm looking forward to hearing from him in his musical journeys with this lute.  My impression throughout the design and building process was that the music and repertoire for this instrument were not already known, but were to be discovered, and for me that was an exciting feeling.  Without the spark that Gus provided, I may never have built an instrument like this; his encouragement and enthusiasm allowed me to follow my instincts, and try new techniques and designs.  He's promised to send me some musical postcards from his journey, and as he does, I hope to share them with you.