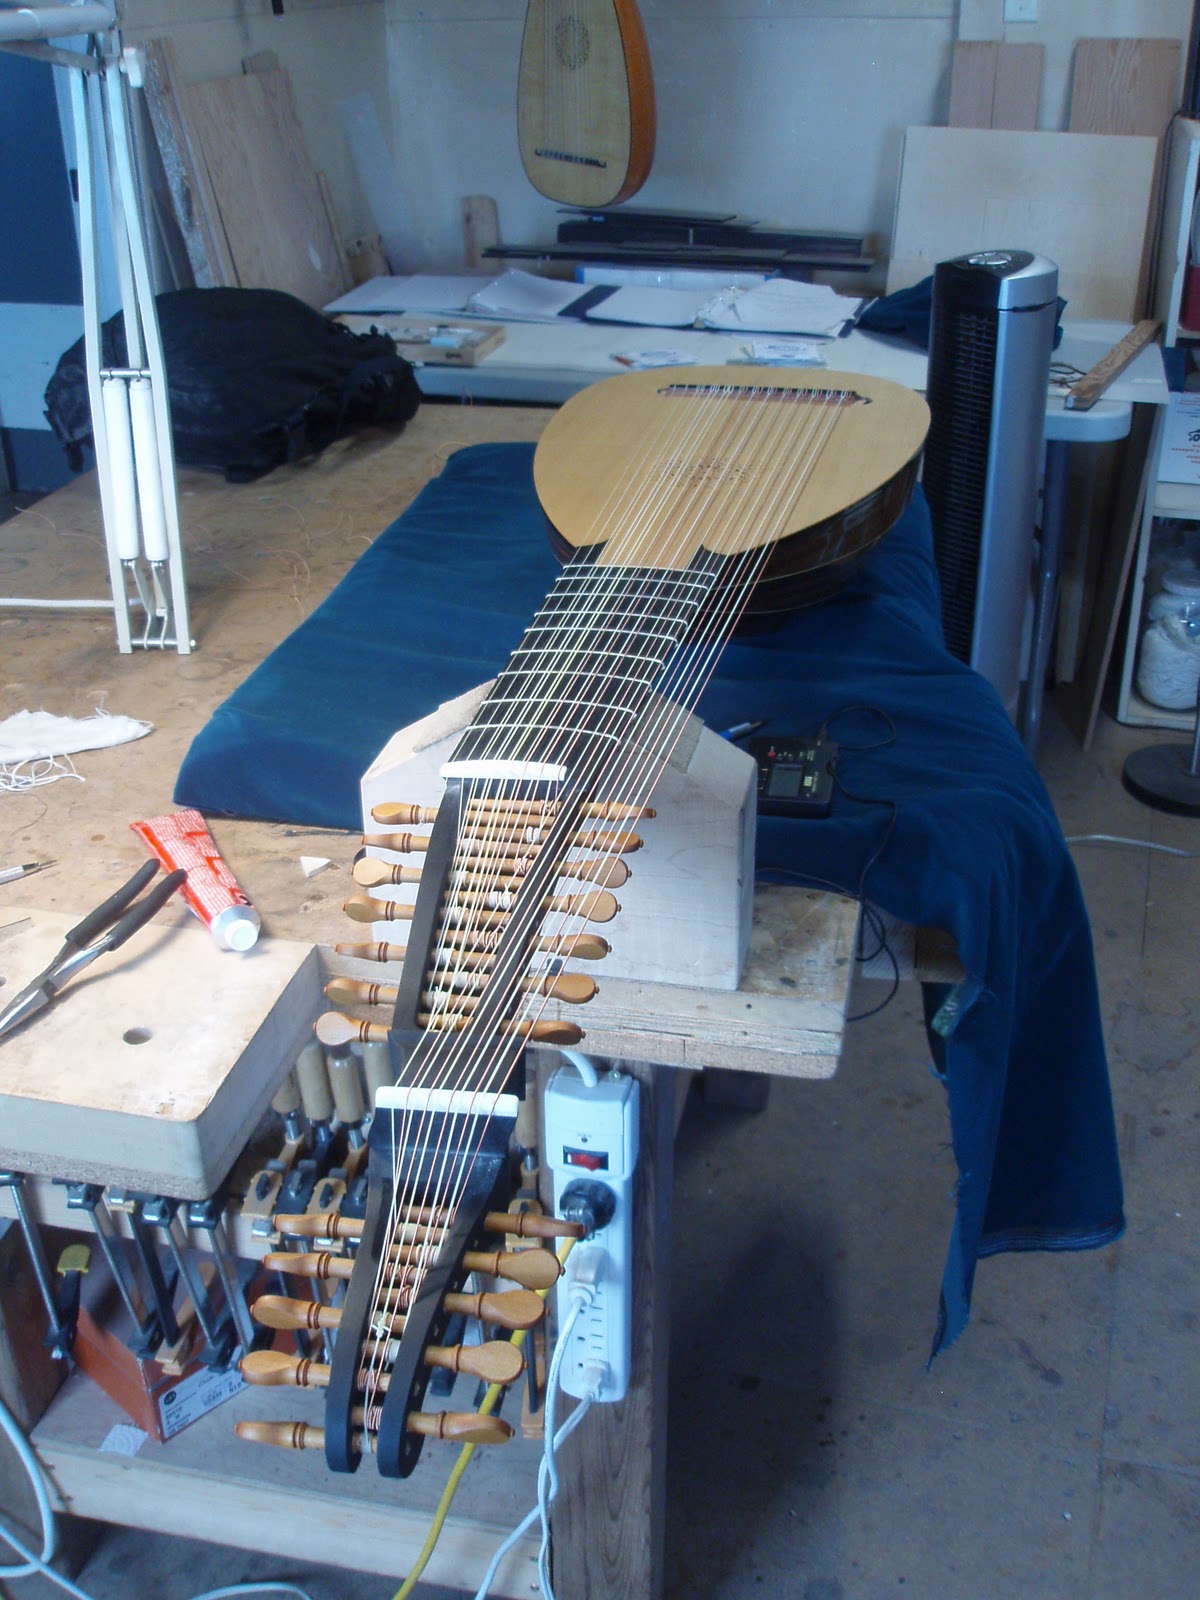
Sunday, 17 June 2012

The Betterizer

I get a kick out of work, but I also get a kick out of talking about work.  I've been lucky in my life to have toiled alongside people who like to play with the language to talk about their labour--it's always fascinated me, and always made the workday more fun (and pass more quickly).

The habit of mixing work and words started early for my brothers and me, growing up on the farm in northern Saskatchewan.  The three of us read To Kill a Mockingbird in high school English class, and whatever else that novel taught us, it gave us an expression to describe a certain kind of work: bustin' up a chiffarobe.  It's what Mayella Ewell asks Tom Robinson to come into her yard to do, and as we know, it's an act that has some very serious consequences for all concerned.  For us kids, it was just an outlandish expression: what on earth is a chiffarobe?  And why on earth would somebody want to bust one up? 

Anyway, the phrase stuck, as these youthful obsessions sometimes do, and it came to connote a type of work that usually involves hard (and possibly pointless) labour, that's emotionally conflicted or emotionally dangerous, and maybe even physically dangerous too.  To this day I can phone up my brother Roger and ask him what he's been up to, and if he answers "bustin' up a chiffarobe" I know exactly what he means.

Another example.  A few years back I was helping out some friends at their screen printing business.  During some down time, I spotted a rack that held several large rubber squeegees.  To me, they looked in danger of falling off their narrow shelves, so I took it upon myself to tack a strip of wood on the front for a lip, to better hold them securely.  Somebody asked, hey, what's Travis up to?  and somebody answered, he's over here betterizing a shelf!

Betterizing--I liked that.  It fit exactly what I was doing.  I wasn't improving something; I was making something better.

It's a strong impulse with me, the betterizing impulse, and has been since childhood.  It's stood me in very good stead as a lute maker.  I think it's an impulse that every lute maker must have, to a greater or lesser degree.  The Lee Valley Catalogue will sell you many things, but it can't sell you everything, and so you have to be prepared to betterize an existing tool to make it fit your specific needs.

Such fixes don't need to be elaborate.  This week, for instance, I was gluing bars on the underside of  a couple of lute bellies, and then planing them to their finished heights.  As part of my routine of finishing the profiles of the main bars, I chamfer their edges (a feature that's seen universally on old lute bellies).  To do this, I've been using a Veritas miniature shoulder plane from Lee Valley tools.  While it's a wonderful little tool, it's really not the right one for this job--the sole's a bit too narrow, and if you go off track with it, the exposed corner of the blade can dig in and hack your work.
This using-the-not-quite-right-tool-for-the-job is the kind of thing that could go on for years, like a leaky faucet.  But instead of running (credit card in hand) to the StewMac catalogue, I thought, the plane's fine, but what it really needs is a fence on the side, to guide it along the edge of the bar.  I looked around the shop, and found a little slip of spruce, a soundboard off-cut, that did the trick. 
Now, how do I hold it in place?  My fingers?  Tape?  Some kind of clip...?   Over there, on the desk... will it fit?  Yes!  Perfect.
But does it work?
Yes indeed it does, like a hot damn, in fact--better than some brass fingerplane I now don't need to shell out 50 bucks for.  The whole unit's solid and stable, and the fence is easily switched to the other side of the plane, for working on the opposite side of the bar.  A tool betterized, a job made easier, money saved.  My heart sang a tiny song of victory.

Now, onto bigger fish.

I actually made this piece in 2009, when I was working with Grant Tomlinson.  Grant was going to be away for a few days, so I was on my own in the shop.  Rather than create some sort of sorcerer's apprentice type of situation by working on lutes while he was gone, I took the time to build something that I'd wanted for a long time: a router base for my Dremel rotary tool. 

Mainly I wanted this tool for cutting the small channel for the edge binding around the soundboard.   Now, numerous companies (such as StewMac) will sell you a Dremel router base, and it might work for this purpose... but most of the ones I've seen are either too heavy, or can't be adjusted properly, or don't have stops that register correctly against the soundboard and outside ribs.  In short, they may work fine for a guitar, but not for a lute.  If I wanted something that did exactly what I wanted, I'd have to build it myself.

This looks like a job for--the Betterizer!

 Here's what I came up with--
I didn't begin with any master plan--all I had was an adjusting screw mechanism that I'd cut out of an old block plane, and I built around that.  I knew I wanted to use this screw to adjust the cutter up and down, so what I had to do first was find a way to mount these pieces in the polycarbon material I was using for the job.  I just made some tight-fitting cutouts for them, and that worked fine.
Once I figured that out, I was off to the races.  I built a carriage that I could screw the Dremel tool into (the neck of that tool is threaded), and a base with a hole cut in it, through which the cutting bit is lowered.  I also drilled a hole for a bolt through the back of both carriages--the hole in the back of the base is actually a slot, as you can see.  When I've adjusted the cutter to the correct height, I can tighten the wingnut on this bolt, and that locks the cutter securely in place.


This is a view of the bottom, and it shows the guide attachment I made for cutting the binding channel in the soundboard.  The little tongue of material that my thumb is pointing towards?--that's what sits on top of the soundboard.  The little round, serrated thing to the right of my thumb?  That's the cutter head.  It's peeking up just above the width stop--I can loosen the two screws you see here to adjust the width of the channel (the screw on the right actually has a slot, so I can move the plate forward or back, exposing less or more of the cutter). 

Here's a couple of shots of the thing in action--


And a shot of the slot that it cuts.  Pretty nice result!

(By the way, if anybody's interested in having a closer look, I've added a few more photos of this tool on a flickr page, here.)


Okay, one last thing.  If you insist.

One of the most useful pieces of equipment in the lute shop is a pull-through scraper.  It's used to create batches of uniformly-sized strips of wood, such as soundboard bindings, or rib spacers.   Maybe these scrapers are available commercially, though I've never seen one.   I got the idea for mine from an article I read in American Lutherie a few years back--a Spanish-trained guitar maker was talking about how he made the tiny strips of wood for mosaic-pattern soundhole rosettes.  What a job: hundreds of strips of wood of different colours, glued together side by side into sheets, then the sheets glued togther into loaves, then slices taken from the ends of the loaves and glued side by side into a circular channel cut into the soundboard around the soundhole--far too much work.  Give me lute making so I can slack off a little!


This is the unit I made, and it resembles quite closely the guitarmaker's setup.  (More pics can be found here.)  There's a plane blade on its side between a couple of hardwood blocks; the front edge of the blade sits close to another flattened hardwood block.  (The blade can be slid forward and back, and secured in place by tightening wing nuts on the bolts.)  To use the tool, put your strip of wood between the blade and the block, snug up the tip of the blade against the strip of wood, tighten the bolts, and pull the strip through.  If you've set it up right, the blade will take off a thin shaving.  Flip the piece end-for-end, and run it through again; then do the same for all the other strips in your batch.  Then snug up the blade once more, and then run all the pieces through again.  Do this process a few dozen times, with a few dozen pieces of wood, and presto! you have a nice batch of uniformly-sized, flat- and parallel-sided strips.

One recent job I did demanded something a little more accurate.  Often these strips come out of the process with flat, parallel sides, but they're kind of trapezoidal in cross-section.  This is not a big deal if all you want is a normal set of rib spacers, but I was working with something a little more complicated--a triple spacer, made of rosewood sandwiched between strips of holly.   If I wanted the three strips to be equal thicknesses, I needed to make sure that the sides were square to the bottom and top.

I wanted the final thickness of the spacer to be 2.4mm, so each strip needed to be 0.8mm wide.  I first thicknessed (with a thickness sander) a slab of rosewood to 0.8mm, then glued slabs of holly to either side, making a holly-rosewood-holly sandwich.
(I left the holly pieces a little extra-thick, about 1.0mm each.)  I then cut the sandwich into strips about 2.5mm wide, and began the pull-through thicknessing for each piece.

To keep the strips square-edged, here's what I did--just behind the blade, I wedged in place a small, flat block of maple.  As I pulled each strip through the scraper, I used a slip of hardwood to press the strip downward onto that block.  I figured if I did this every time I pulled the strip through--and if the surface of that block was at a right angle to the blade--I'd end up with square-sided strips.
 And that's exactly what happened!  Betterizer strikes again!
 Of course, I also had to be quite careful, while running the strips through, to scrape an equal amount off each side, so that one outside strip didn't get wider than the other.

Thankfully, there aren't too many lute models that use this kind of spacer--making them was fun, but a bit demanding.  These spacers I used for a new 12 course lute, based on a 15-rib Sellas archlute back.  The original, in the Victoria and Albert Museum, has ivory ribs, with ebony-ivory-ebony spacers; my version has rosewood ribs, with holly-rosewood-holly spacers.  Check it out.


And that is all--except for one thing.  This weekend is Father's Day, and it's also my Dad's birthday.  Wallace William Carey died in 2001.  He would be 77 this year.  While he was not a lute maker--he was a farmer and mechanic--he was a Betterizer of the first order, and watching him work, and watching the way he worked, was a big part of my education as a craftsman.  He was determined and dedicated, and happy at his workbench.  I miss him, and still learn from him every day.


Monday, 4 June 2012

The Name of the Rose

Hi again.  I have a small correction to make.

My last post contained a reference to an early 16th century painting in Urbino.  Michael Stover, who took the photo of the painting (and whose 6 course lute I modeled after the lute in the painting) got in touch after I published the post to clarify some information about it.  Here's what he wrote:

Hi Travis,

I was very interested to see your blog discussion of the two 6-

course lutes. Kenneth Bé just told me about it. Very nice. There's
one small correction -- the angel holding the lute is at the bottom
of a large painting on canvas of the coronation of the virgin in the
Cathedral art museum, rather than a fresco. (We don't want anyone
going hunting for a fresco that isn't there.) I haven't been able to
find out any information about who the artist was. Kenneth has seen a
photo of the whole painting in situ, and tells me that it's a typical
"incoronazione" of the 1540's.

Isn't the Gerle lute supposed to be later than that? If so, the

Urbino lute would be the earliest appearance of that design, and it
ought to be called the Urbino rose!


Michael brings up an interesting point about the name of the rose (to coin a phrase), which I'll get to in a second.  First, though, a bit more about the painting.  (Michael tracked down the images and information that follow.)

The painting is by Pierantonio Palmerini, entitled "Madonna con Bambino e Santi" and dates from 1532 to 1535.  The painting is preserved in the Museo Diocesano Albani.  Taken from the museum's website, here is the full painting in all its glory--
Michael also tracked down a very nice detail shot of the lute and player.  I reproduce it here courtesy of the photographer, Terry Clinton (visit Terry's flickr page here.) 
Here's a close-up of the belly of the lute, showing very clearly a segment of the lute rose design that I have, up until now, been rather blithely calling the "Gerle" pattern.
 Just to refresh your memory, here's my version of the full pattern.
Michael's question about what we should call this lute rose pattern is an interesting one.  The Gerle lute, from which this pattern was originally traced, dates from the 1580s (so says the Vienna Kunsthistorisches Museum, where it's housed); the Urbino painting, which shows the same pattern, dates from 40 to 50 years earlier.  So as Michael asks, why not call it the Urbino rose?

Well, for one thing, the Urbino painting isn't necessarily the earliest representation we have of this rose pattern.  There's another Madonna and child with saints from the 1520s showing a lute with this rose (the image is from David van Edwards' website)--
Giovanni Antonio Pordenone (1483/4 -1539)
Madonna and Child Enthroned with Saints. c. 1525
Parish church, Susegana (Treviso). (Reference courtesy of Gernot Hilger)
And, as Ray Nurse reminded me last week, Bellini's San Giobbe Altarpiece, dating from around 1500, has a lute with a rose that's a close variation of this design.
If you can't see that too well, here's my recent version of Ray's Bellini pattern.

So it seems pretty clear that this rose pattern was indeed around for a long time before Georg Gerle took a stab at it in Innsbruck in the 1580s, but just how long, we can't really say.  The geometric pattern which underlies it, the 6-pointed "Star of David," is of course a very old motif in middle eastern art, and serves as a constant reminder of the lute's 'genetic code,' the eastern origins of the instrument.

I suppose the reason why we call the pattern the "Gerle" is that Georg Gerle's version is simply the best exemplar we have of it.  It's clearly, cleanly and quickly carved, and, to my mind, fairly vibrates with the creative energy of the craftsman.  Like so many of the best old rose carvings, there's an almost monumental kind of simplicity to it.  Have a look.
Grant Tomlinson photo
The pattern was very popular throughout the renaissance and baroque periods; Robert Lundberg estimates that around 30% of the extant old lutes use this pattern in one form or another.  Here are three examples from my own repertoire.

This is a rose I carved for a large 10 course lute--the pattern's taken from a Venere lute of 1619 (it's basically the Gerle pattern with a double chip-carved border). 
This rose was carved for an 8 course lute.  The original design is from a Sellas archlute of the 1630s.  As you can see, the geometric elements (the 6-pointed star) are identical to those of the Gerle pattern, while the organic (curved) elements have been replaced by a vine and leaf pattern.
Finally, here's a triple-rose variation that I just completed last week, for a new 12 course lute.  The pattern is taken from an archlute by Giorgio Sellas, from the 1620s, and uses cut-down segments of the Gerle pattern in a really ingenious way. 

Wednesday, 23 May 2012

New-ish work

Hi friends--time for an update.  Much has happened in the shop since last I wrote--new lutes flew out the door to their new homes, a lute mold got made, and two more lutes are now well under way.  I have much to tell you about, and a long weekend in which to get started, so here goes.

First, two new 6 course lutes were finished in March.  One is a 9 rib model, for John Jamison, in Washington state; the other is an 11 rib model for Michael Stover, in Washington, D.C.  Both are versions of an early-to-mid 16th century lute, suitable for playing anything from early Italian repertoire (Dalza, Francesco, Capirola) to the music of Dowland--in other words, practically the whole of the 16th century.

 A few shots of the 9 rib...


The back is made of some highly figured  birdseye maple.
A detail shot of the treble bridge point (the bridge is of plum.)
And a couple of shots showing the neck and peg box.  The pegs are plum, the neck and fingerboard are pear wood, and the darker fingerboard edging is snakewood.


The rose is taken from a late-15th century painting by Giovanni Bellini.  Ray Nurse drew the pattern (Thanks again, Ray.)


And now some shots of the 11 rib:


The back is of curly maple.

The rose is a design after Gerle.


The lutes look very much alike, but there are some subtle differences. The 11 rib's body is a little shallower,  in response to the client's wish for a quick, bright-sounding lute with good projection (though I should also say that the 9 rib has excellent projection, a crisp attack and nice full tone).  The positions of the rose and bridge are a little lower on the 11 rib's belly too--a couple of design tweaks which, along with some slight modifications of the internal barring scheme, were also aimed at creating the sound that we were looking for.

Both of these lutes have a fingerboard that extends onto the soundboard, a feature that's often seen in paintings from the early 16th century and before.  There is a small controversy about whether what we see in those old paintings is actually the fingerboard, or simply some dark varnish or paint extending down from the fingerboard to protect the upper part of the soundboard.  A bit of an esoteric subject, perhaps, but hey, I'm a lute maker--I eat esoteric for breakfast.

(For those interested, the English lute maker David Van Edwards discusses the issue fully here.)

During the planning stage for his lute, Michael Stover sent me a photograph that he had taken on a trip to Italy some years before.  This photograph, of an early-16th century fresco in the Duomo in Urbino, shows a lute with what looks like a Gerle-type rose, and almost certainly a fingerboard that extends into the upper area of the soundboard.  It's a great looking design overall.  I've used it for both of these new lutes, and will use it as the basis for the design of my 6 course lutes from now on.

Photo: Michael Stover


Tuesday, 15 November 2011

Schelle/Widhalm

Today, as promised, a brief description of making the Widhalm 'swan-neck' extension--the elegant, elongated double pegbox on the 13 course lute that I completed earlier in the summer.


But why a Widhalm extension? you ask.  Who is this Widhalm you keep talking about, Travis?

Well, the full name is Martin Leopold Widhalm, Leopold to his friends, and he was a lute and violin maker in Germany in the middle 1700s.  Originally from Vienna, he came to Nuremberg to work in the shop of the master luthier Sebastian Schelle shortly after Schelle's death, in 1744.  At this time the workshop was being run by Schelle's eldest daughter Barbara.  Apparently sparks flew (a dangerous thing when there's sawdust around!), because she and Leopold were married within the year.  They worked together to the end of their lives--Leopold died in 1776, Barbara in 1781--making lutes and violins of the highest quality, and they raised three sons who carried on the family trade.

I mention this not just because it's an interesting and happy story of true love in the lute shop (though I am all in favour of that)--it also shows a direct connection between the model of lute I've made and the model of pegbox extension I want to use with it.  Whenever I consider the design of an instrument, I try to make sure that my choices are historically informed--that there's some sort of evidence, whether pictorial, or documentary, or physical (a surviving instrument) that supports what I'm doing.  I'm not dogmatic about such things, but I do want to guard against creating any glaring historical anachronisms.  In the case of the Widhalm extension, it's a good historical fit, but it's also a really good model.  If it's executed well, it looks great, and most importantly, it works.

Anyway, on to the process.  And to give credit where credit is due: the method I've used here was shown to me by my mentor, master lute maker Grant Tomlinson.  One cannot go far astray with such a generous teacher to show the way!

Begin with an appropriately sized chunk of beautiful, creamy English Sycamore, and two patterns, showing the plan and side views of the extension.  Draw the patterns on the planed surfaces of the blank, and proceed to the bandsaw--
I've cut from the side first, but as you'll notice, I haven't cut the waste pieces away completely--I've left little 'bridges' of material at strategic places so that the entire blank remains intact for the time being.  This is so I can now lay down the blank flat on its back, and cut out the plan-view shape.

And this is what it looks like after cutting the plan view.  I can now take the piece to the workbench and cut away the waste pieces with a hand saw.
And here's what I'm left with: the basic shape that I can now refine with rasps, files, and scrapers.

No sooner said than done!  This sycamore is lovely stuff to work.

Next, I locate and drill all the peg holes in the pegbox extension.  There are 24 pegs, so 24 holes in each side of the pegbox...48 holes in all... and they'd better be in the right place!  Once I've engineered all that, I can use patterns to lay out the areas that I need to carve out.  I avail myself of the modern technology of the drill press and forstner bit to remove the bulk of the material, and then I'll finish off these cutaways with hand carving tools.


I need to fit a tall nut on the extension, so I carefully cut a slot and fit a tapered piece of hard maple.


Everything looks good so far--I'll start fitting the extension to the neck of the lute.

The main things to keep in mind while fitting this is that the extension needs to be aligned in two axes, up and down and side to side--but the joint itself needs to be perfectly fitted.


When I'm absolutely sure that everything is in proper alignment, I can set up my gluing rig, take a deep breath, and glue it in place.  As always, hide glue is the perfect adhesive for the job.

To give myself a little extra room for adjustment during the fitting-up process, I've left the root end of the extension a little over-size.  Once the extension's glued on, I can carve away this excess, and make a smooth transition between the neck and the extension.

When it's all in shape, I dye the extension black, using a dyestuff called logwood.  It comes in powder form, and it's taken from a South American tree.  It's a very reliable, colourfast dye, and it's been in use for a long time (I've read that the Puritans used it to dye their clothing black.)


You'll notice that I'm dyeing not only the Widhalm extension, but also the pegboxes and pegs of a couple of other lutes (the 8c and 11c that I built alongside this 13c).  Dyeing is a bit of a messy and involved process, and I try to arrange my work so I can do a number of different jobs all at the same time.

The colour of the dyed extension is a little cold at this point, and so far not a good match with the warmer tones of the ebony veneered neck.  The colour changes, though, as soon as I apply an oil finish to the extension.  The oil warms up the colour considerably, and now there's a nice match of colour and surface texture between the veneered neck and the extension.


Now we're ready to fit the pegs, fit the two bone nuts, and string up the finished instrument.

There we are!  Now all I've got to do is learn how to play the Baroque lute.  (So far, at least, I'm a Renaissance man only....)  If there are any Baroque players out there, maybe you could leave a comment telling me if I'm at least holding the lute properly!


And that's the end of the process.  What I've described here is by no means a blow-by-blow of the entire procedure of making and fitting this extension--I've just given some highlights.  The end product turned out really well, and I'm quite happy with the process and the result. 

Until we meet again....